
Introduction
Have you ever been in a situation where you need to image or reimage your device? Of course, you have and so have I. Recently David Segura launched some awesome PowerShell code called OSDCloud. You might know him better for the Offline patching of images OSDBuilder, which has been on the market for quite some time.
OSDCloud is brand new and working without the need to build your own infrastructure.
How much does it cost; you may ask? Nothing, David spends his weekends for us to use it. It is free. You pay for your internet and that’s all.
This tool will deploy the OS until a state where you can onboard the device using Autopilot and finally be fully managed by Intune.
In this post I will demonstrate the steps you need to proceed with this awesome tool.
Requirements
- Internet
- ADK
- USB (Only for physical devices)
- Windows 10 1703+ to create the USB disk
- Intune license
Table of Content
- Install ADK
- Create OSDCloud Workspace
- Create ISO
- Boot into WinPE
- Cloud Image your device
- Autopilot
- Managing it with Intune
ADK
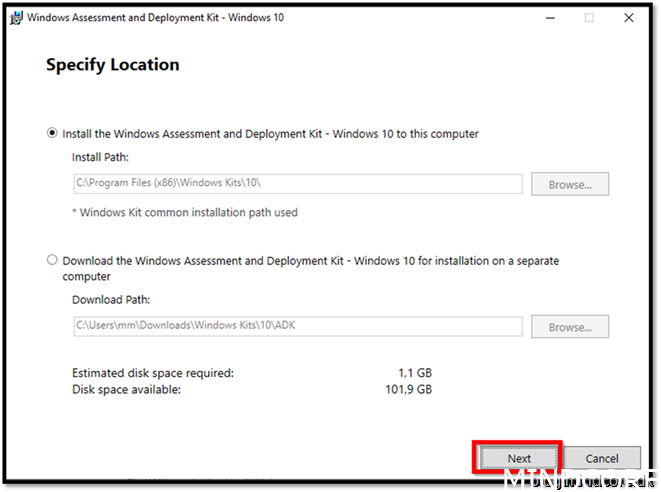
You can do this on your host machine but if you don’t like to spend 5 GB on installing ADK, then find a server or another device to do the following steps. Just be aware that the function to create USB drive will not work on a server OS.
Download ADK
Install the downloaded file
Adkwinpesetup.exe
Click Next
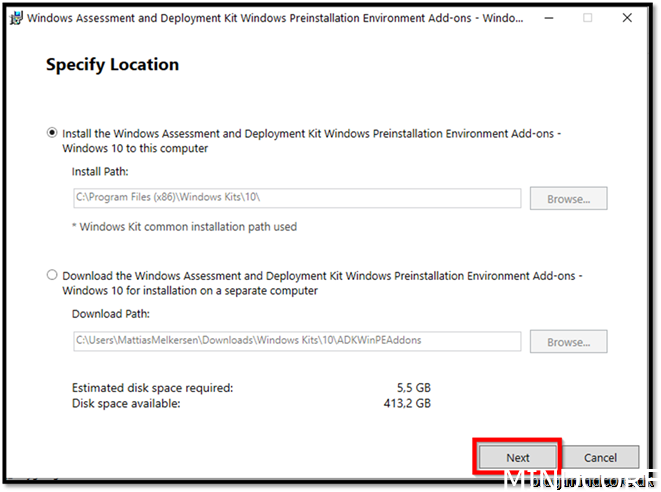
Click Next
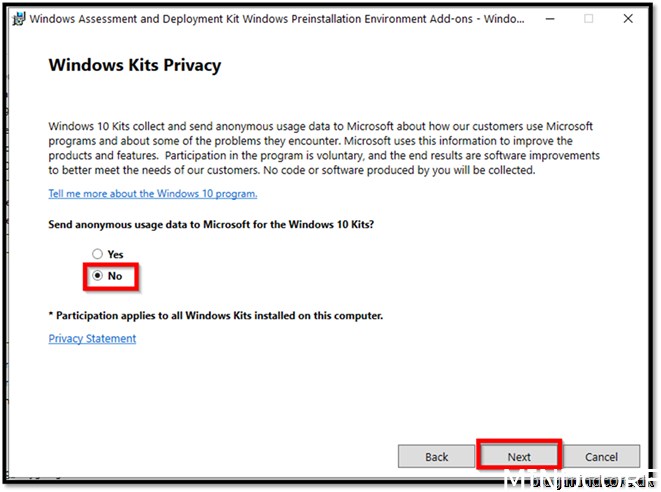
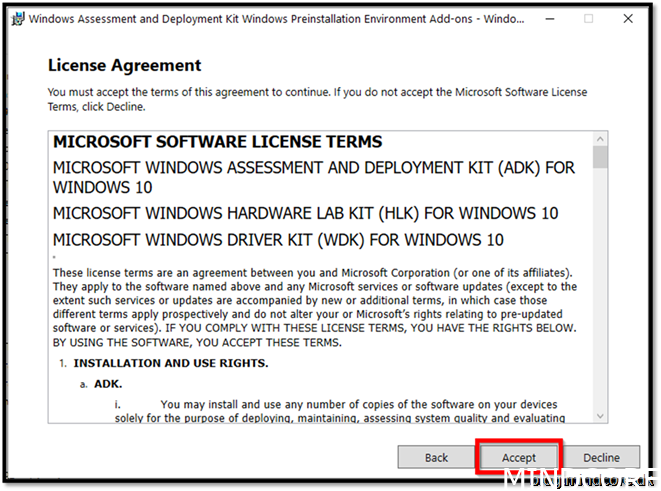
Click Accept
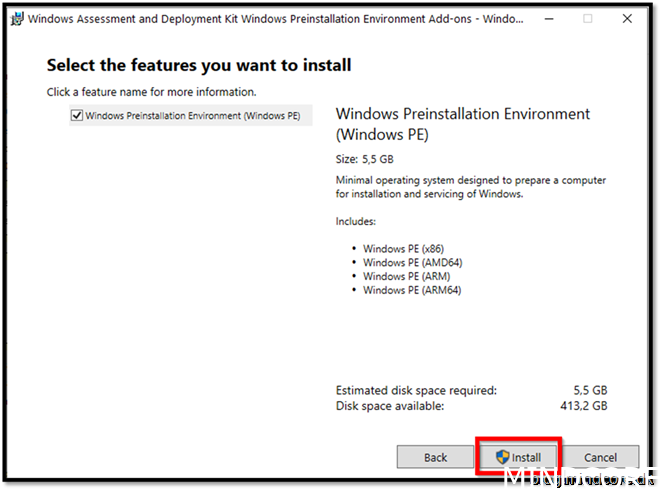
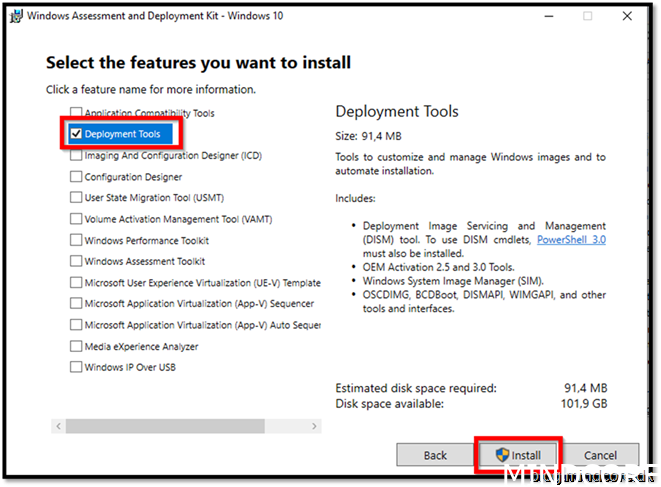
Click Install
Click Close
Download this one too
Double click adksetup.exe
Click Next, next, Accept
Click Install
Click Close
Create OSDCloud Workspace and ISO
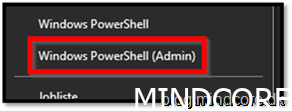
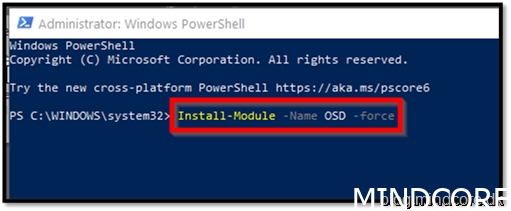
Open PowerShell as admin
Install-Module -Name OSD -force
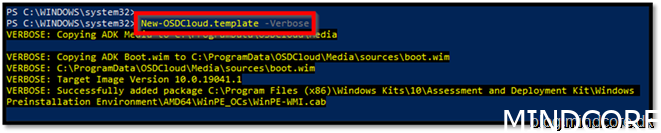
To build a more refined copy of ADK’s WinPE we will run this command.
New-OSDCloud.template -Verbose
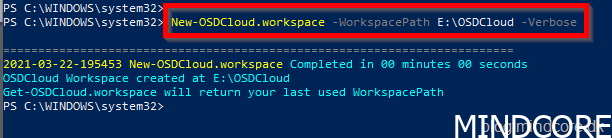
Create a workspace for the binaries
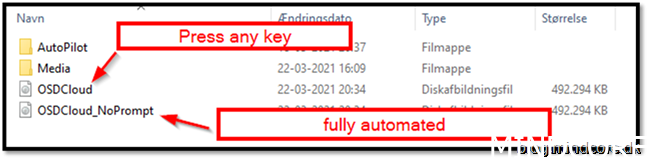
New-OSDCloud.workspace -WorkspacePath E:OSDCloud
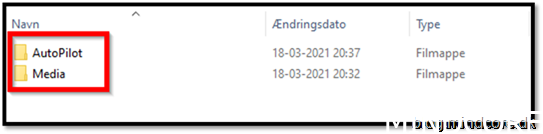
If we go to the workspace, we find the folders Autopilot and media. Let’s focus on how to get our Autopilot profile and locate it to the folder.
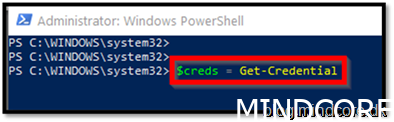
Let’s go and get those Autopilot profiles
$creds = Get-Credential
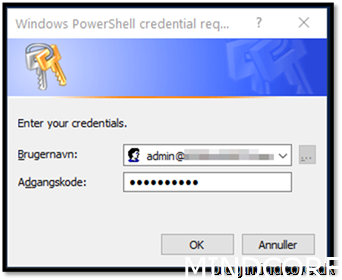
Insert your credentials (Intune admin)
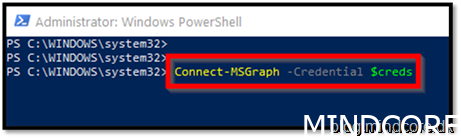
(If you don’t have MSGraph installed yet you need to run Install-module Microsoft.Graph first)
Connect-MSGraph -Credential $creds
Get-AutopilotProfile | select displayname

Get-AutopilotProfile | Where-Object DisplayName -eq “Mindlab Production” | ConvertTo-AutopilotConfigurationJSON | Out-File -FilePath E:OSDCloudAutoPilotProfilesAutoPilotConfigurationFile.json -Encoding ASCII

Successfully downloaded the Autopilot JSON.

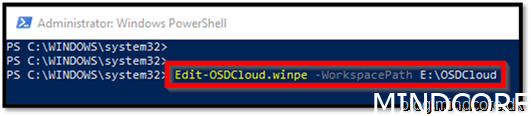
To get the Autopilot configuration file into the WinPe we need to edit that.
Edit-OSDCloud.winpe -WorkspacePath E:OSDCloud
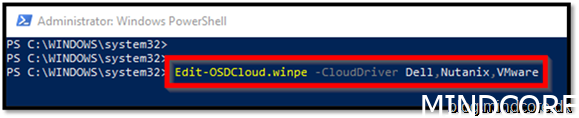
If you need drivers in your PE image for supporting certain Network interfaces that can be done too. There are 2 commands at the moment.
The first one adds all WinPE drivers that exist for Dell, Nutanix and VMware.
Edit-OSDCloud.winpe -CloudDriver Dell,Nutanix,VMware
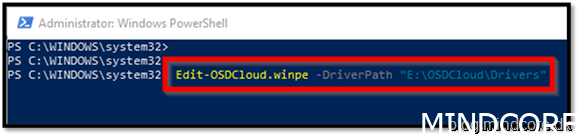
The second option is to choose your own drivers from a path
Edit-OSDCloud.winpe -DriverPath “E:OSDCloudDrivers”
Lastly we complete the ISO by building with all the elements we prepared.
New-OSDCloud.iso
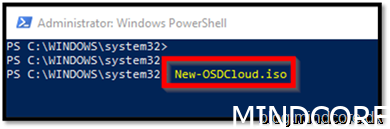
And the result will look somewhat like this:
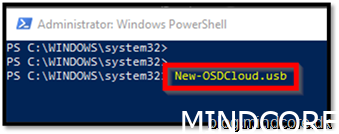
If you need to put it on a USB stick, make sure that it will be ok to erase what’s on it.
Simply run this command
New-OSDCloud.usb
Boot into PE and Cloud image your device
Start Hyper-v and create a new empty Virtual Machine.

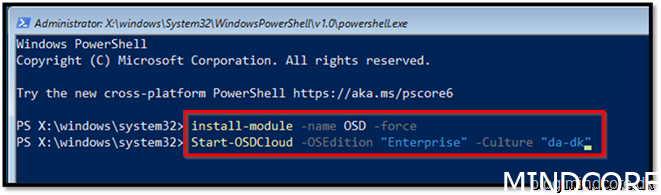
Inside the virtual machine, PowerShell starts up.
Install-module -name OSD -force
Start-OSDCloud -OSEdition “Enterprise” -Culture “da-dk”
Press 1
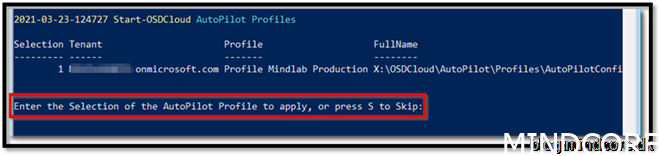
Press A to confirm you will format the disk

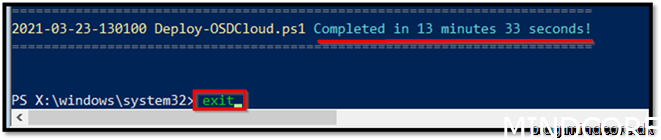
After a while depending on your internet line, the device is ready to be rebooted. Mine took 13 minutes and 33 seconds.
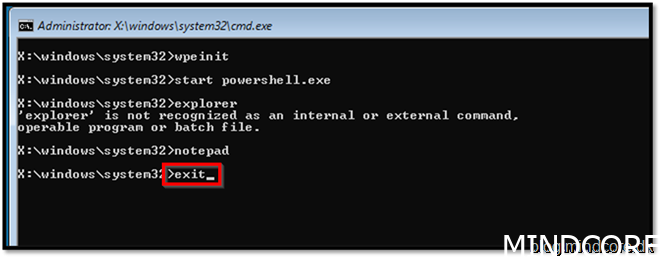
Write exit
And on the CMD as well
Write exit
Autopilot
The device will reboot and start running some configurations. After a couple of minutes, you will see the known OOBE
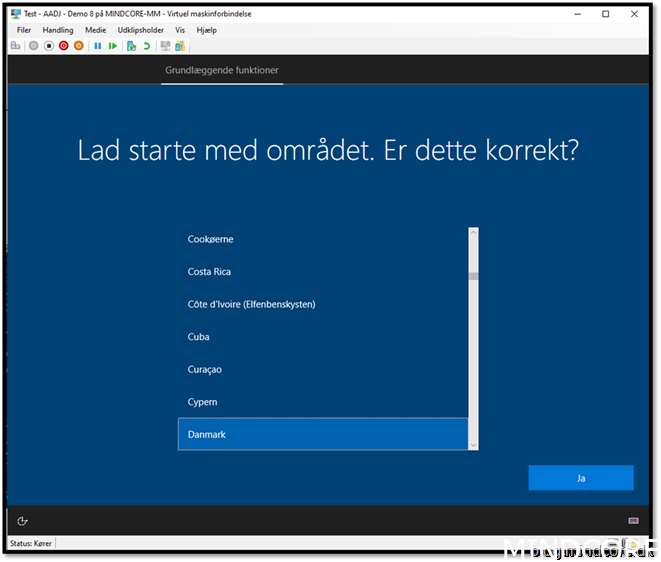
It will reboot automatically once more and after that you will be presented with your company name.
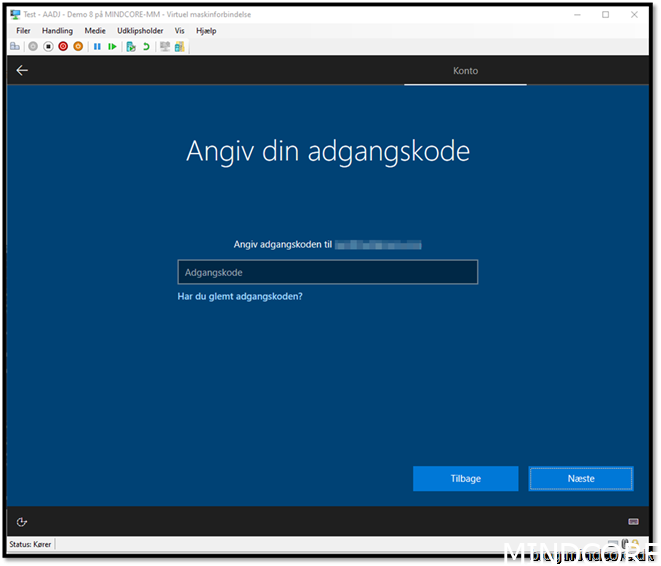
Type your username
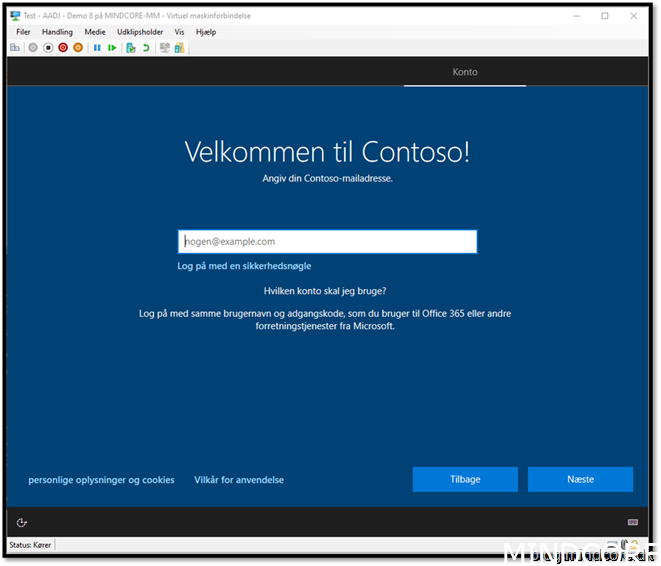
Type your password
Managing the device using Intune
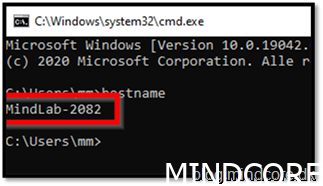
First, we need to know the new name of the device.
Open a CMD
Type hostname
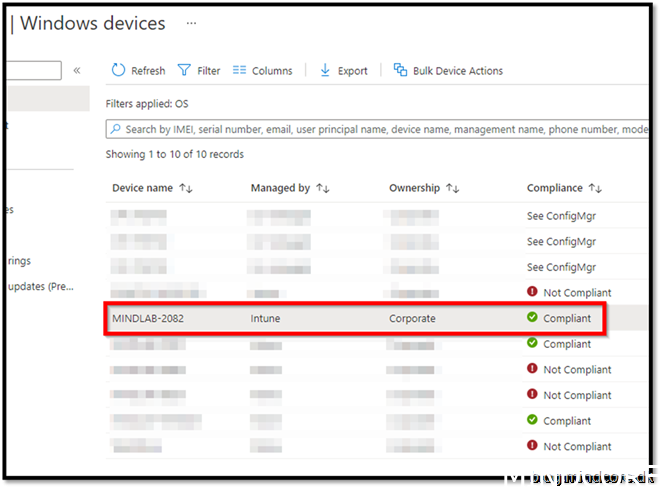
Go to https://endpoint.microsoft.com/
Devices -> Windows
We see our device joined Intune just fine. Now it is time to make sure our device will be converted to the Autopilot service, so next time we need to refresh Windows, this will be done without the need to reinstall the device.
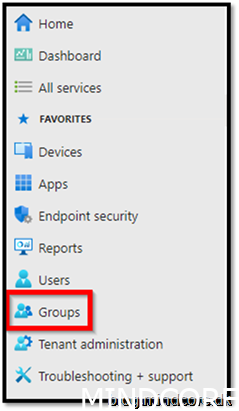
Go to Groups
Press New Group
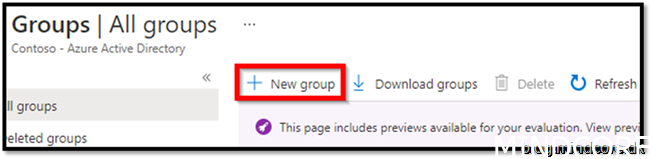
Give it a group name
Group description
Set membership to Dynamic device
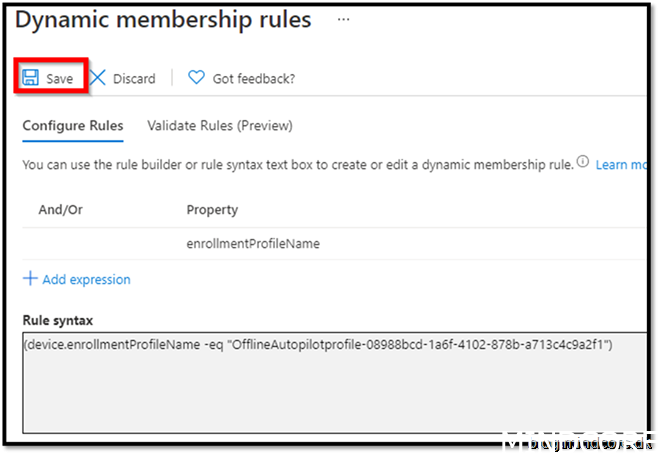
Click Add dynamic variable.
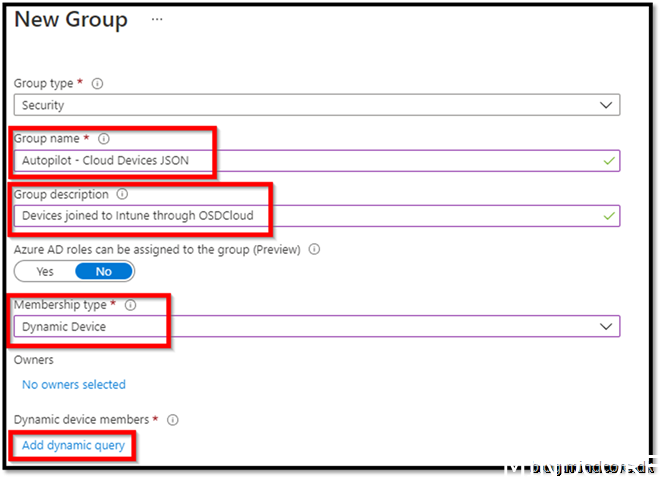
Click Edit
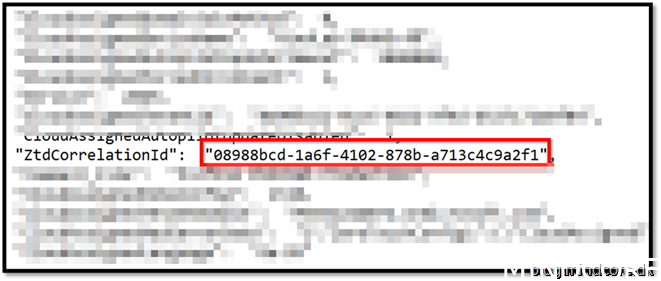
Insert (device.enrollmentProfileName -eq “OfflineAutopilotprofile-08988bcd-1a6f-4102-878b-a713c4c9a2f1”)
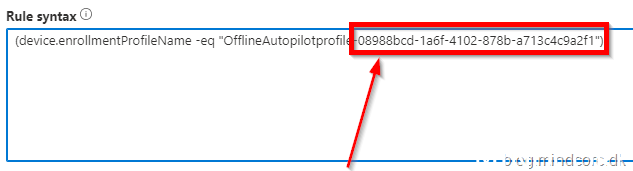
You can find it in the autopilot JSON file located in E:OSDCloudAutoPilotProfiles
Grab the ID and overwrite mine.
Save the group
And press Create
Wait some time and verify your device got into the group.
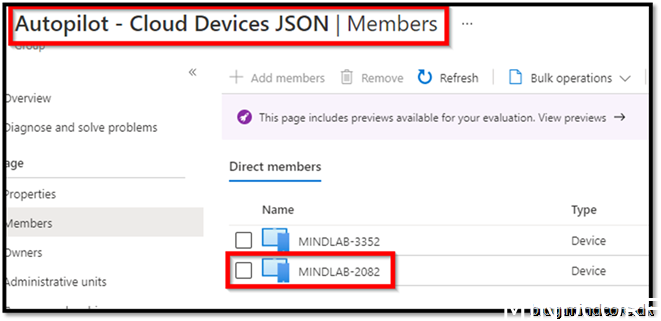
We verified our device came into the group. Very nice.
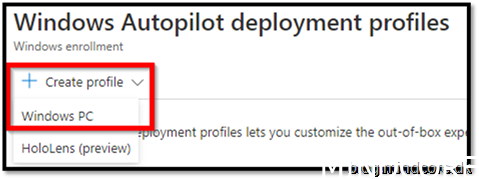
Go to Devices -> Enroll devices -> Deployment Profiles
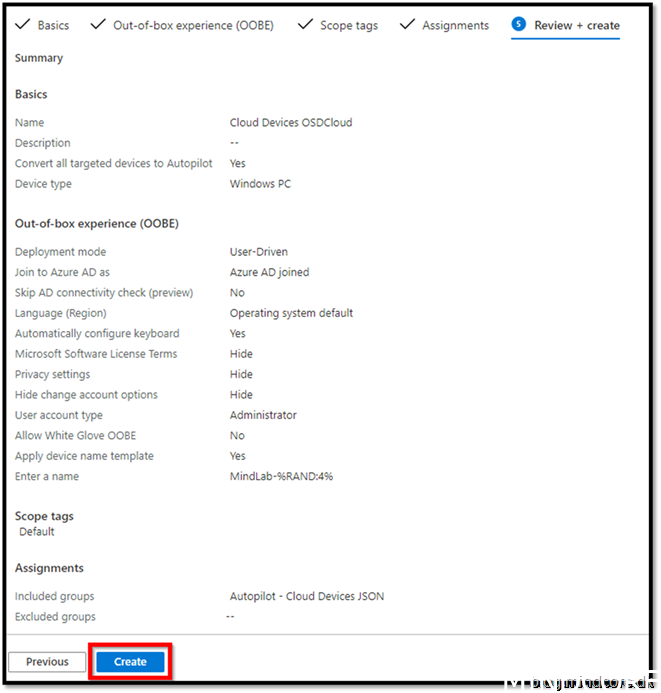
Create profile -> Windows PC
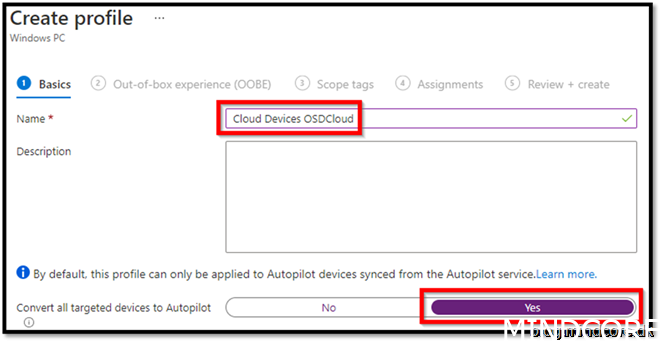
Give it a name
Convert all targeted devices to autopilot set to yes
Press Next
My device should be a user driven Autopilot experience. Set settings as beneath.
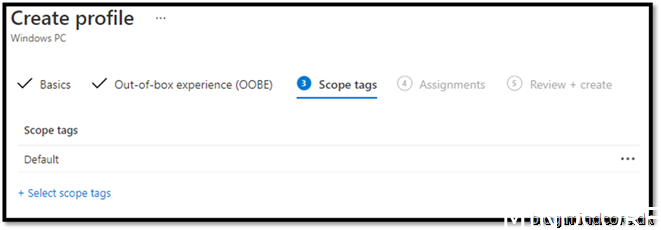
Click next
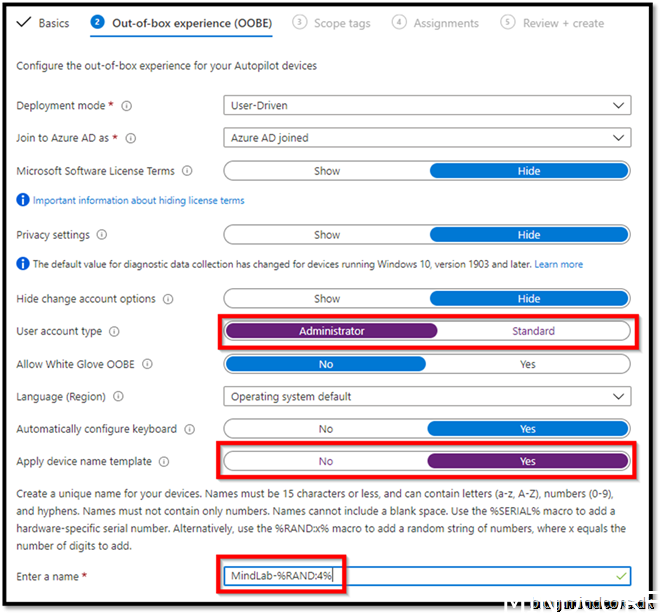
Click next
Add groups
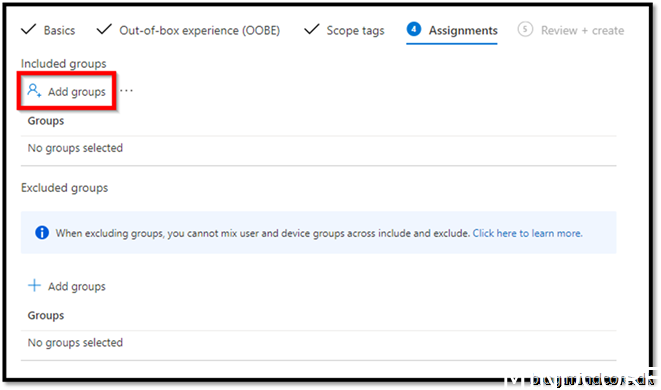
Select Autopilot – Cloud Devices JSON
Click Select and Next

Press create
Wait some time for the profile to target the device.
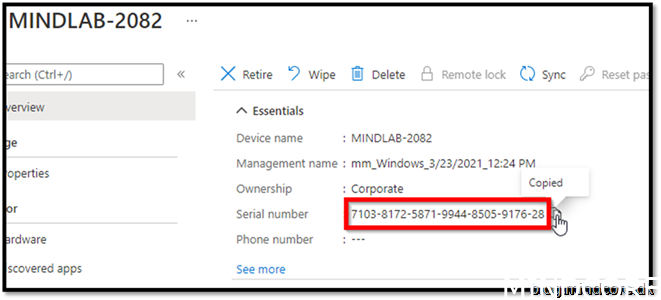
Go to devices -> Windows
Click on the device
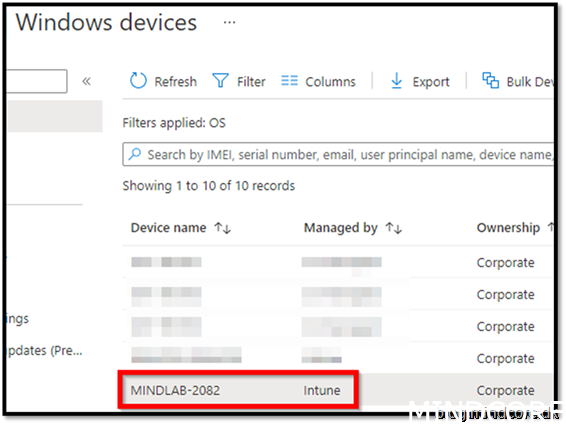
Grab the Serial number
Go to Devices -> Enroll Devices -> Devices
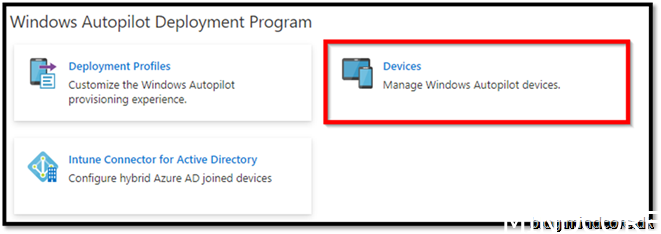
Insert the serial number

We did it and got our device from scratch to fully managed by Intune and converted to Autopilot without ever touching the import script or hardware hash.
Summary
For companies that needs to start their cloud journey or just need a quick way of getting Windows reinstalled, OSDCloud is an excellent choice. No expensive bills and very fast to setup to use.
Happy Cloud OSD!
What is coming?
Lenovo and HP driver support direct downloads from vendor, so no need to provide driver packages and other stuff that takes up time.
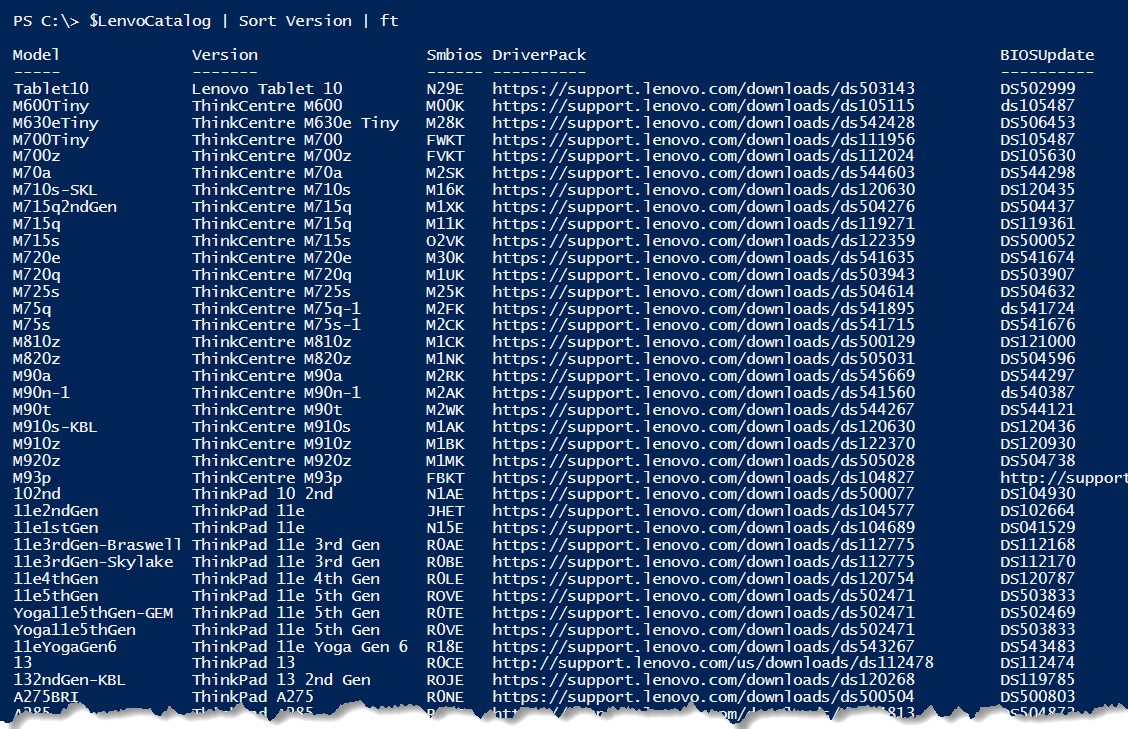
Picture borrowed from David Segura’s twitter.
(If you are interested in more Autopilot stuff, go check out my earlier blog post on the topic.)