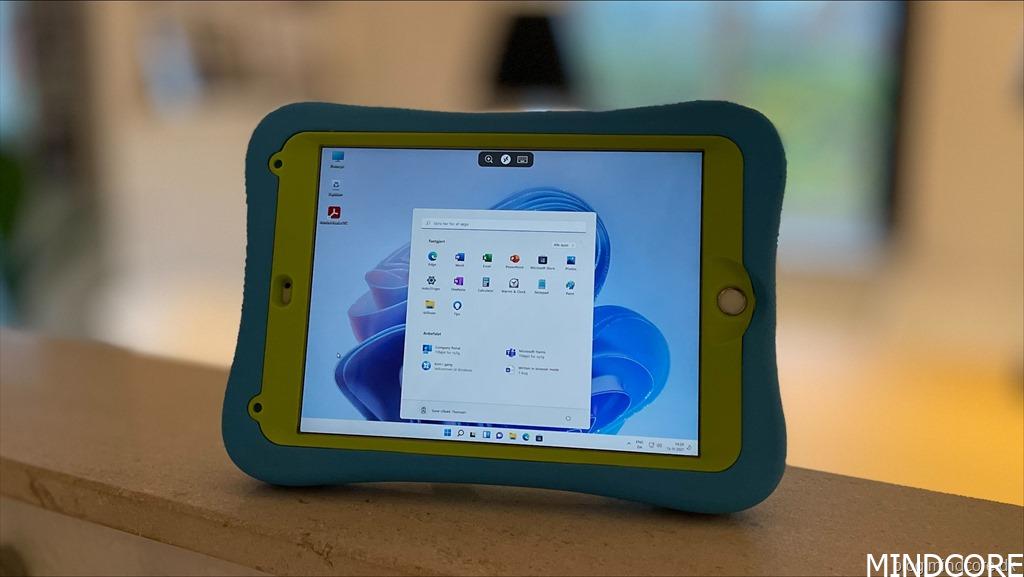
Windows 365 Enterprise Cloud PC with a custom Windows 11 image on my son’s iPad.
Introduction
A few months back I wrote a blog post about how to configure Windows 365 Enterprise in Microsoft Endpoint Manager, which was provisioned with a standard gallery Windows 10 image and after Windows 11 became generally available, my Cloud PC was successfully reprovisioned with a standard gallery Windows 11 image. – It just works!
But what if you would like to provision your Cloud PC(s) with a custom image (also known as a Golden Image)? Well Microsoft understand the need for this and since it is supported in Windows 365 I believe it’s time for yet another Windows 365 post and this time I will walk you through the process of how to provision your Cloud PC(s) with a custom Windows 11 image.
The original blog post about – How to configure Windows 365 Enterprise in Microsoft Endpoint Manager
The blog post about – How to reprovision existing Cloud PC (Windows 365) to Windows 11
Creating a custom image for Windows 365 Enterprise
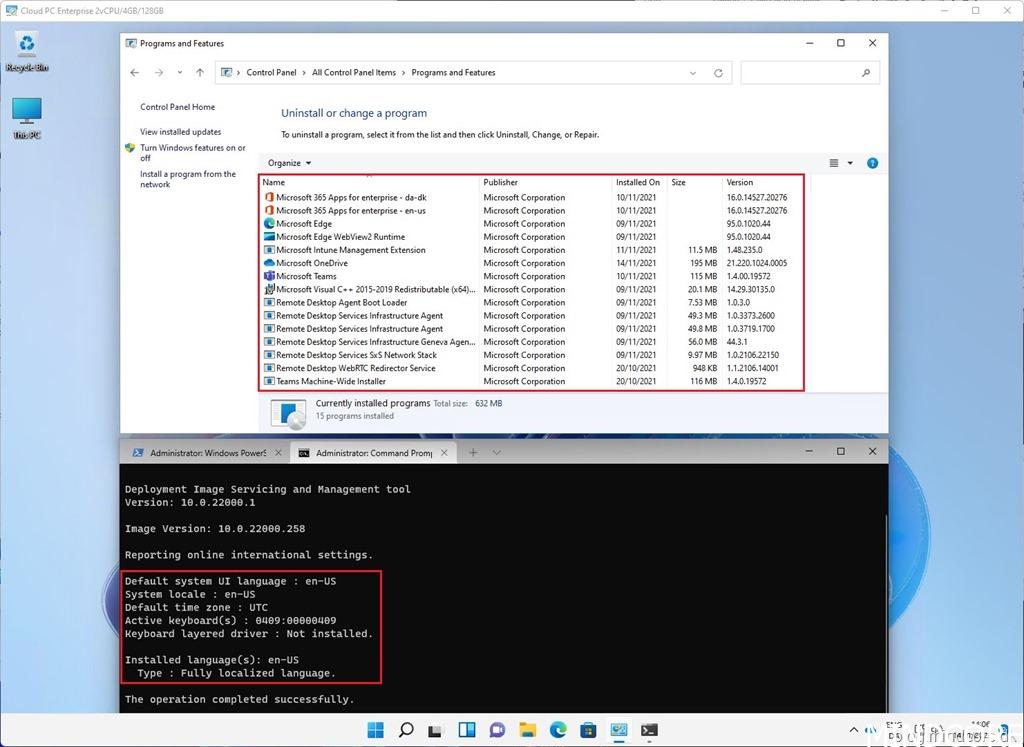
If I connect to my current Windows 365 Cloud PC we can see that it is running Windows 11 and the system locale is “en-US” at the moment and no extra application has been installed since this Cloud PC is provisioned with a standard gallery image.
Let’s create a custom Windows 11 image for Windows 365 Cloud PCs.
Go to https://portal.azure.com
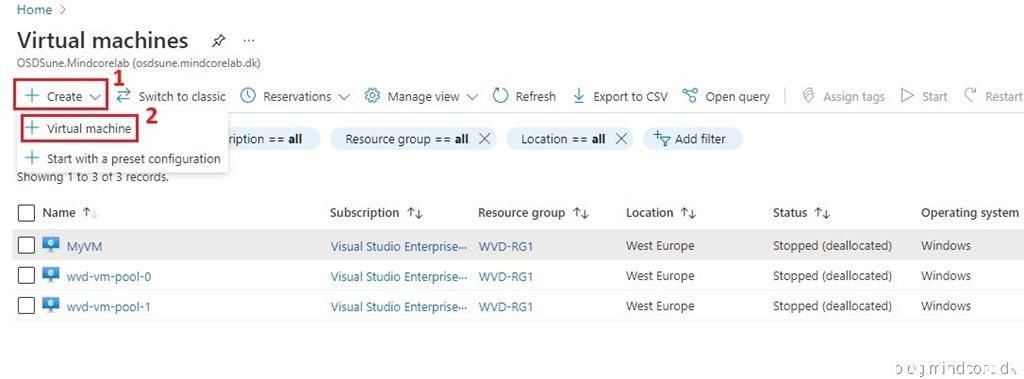
Search for “Virtual Machines” and select the service from the list.

Click Create and select Virtual machine.
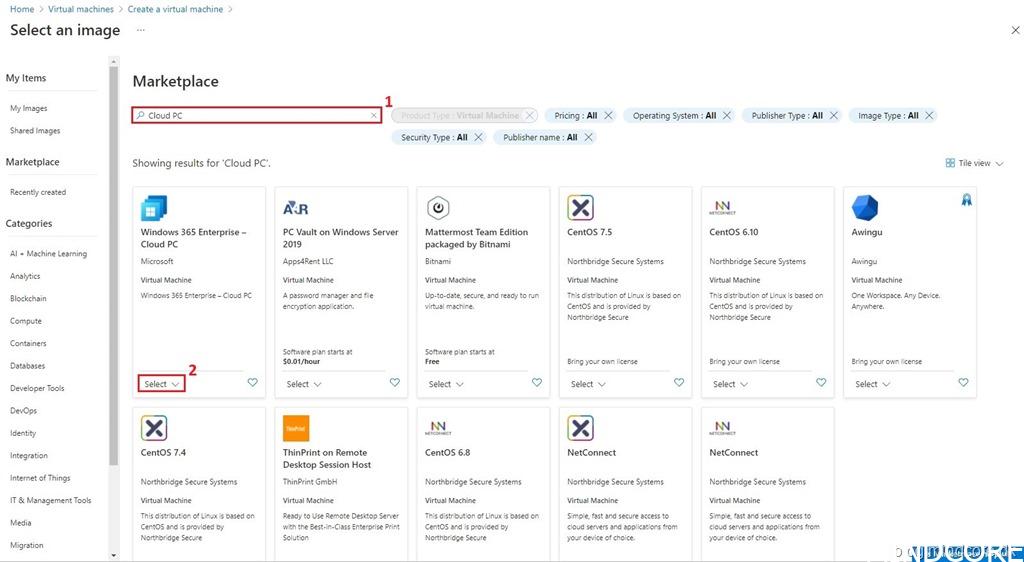
Fill in all the required fields and click on “See all images”
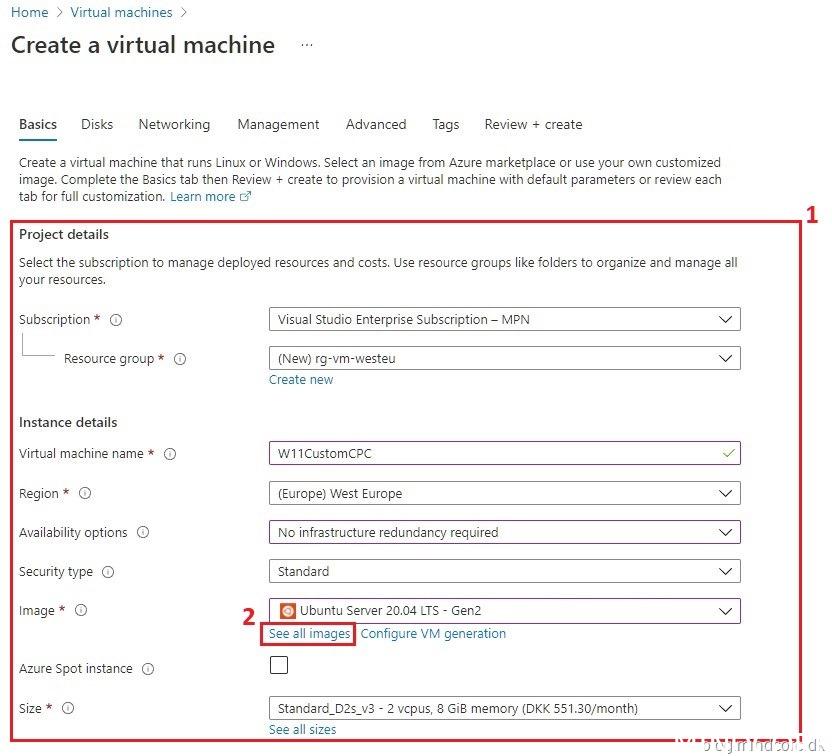
Search for “Cloud PC” and click Select.
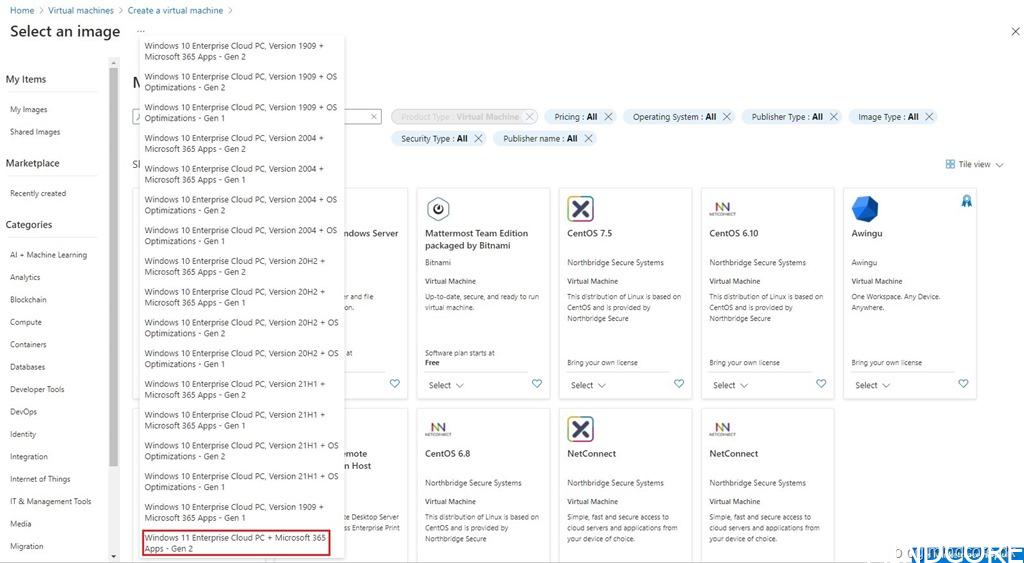
Select “Windows 11 Enterprise Cloud PC + Microsoft 365 Apps – Gen 2” from the list.
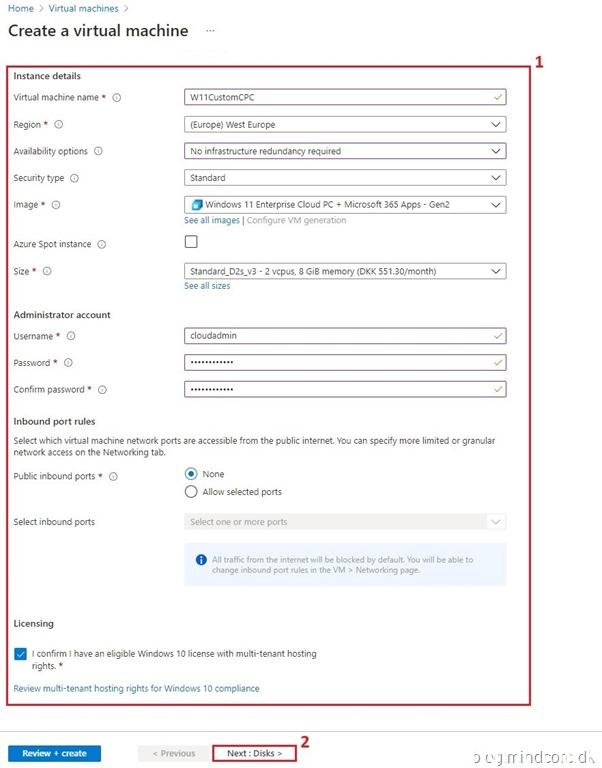
Fill in the rest of the required fields.
Note. It’s important that security type is set to “Standard” and that VM generation is “Gen 2”. – Microsoft does not support Gen 1 images as part of Windows 365 Enterprise.
Click on Next.
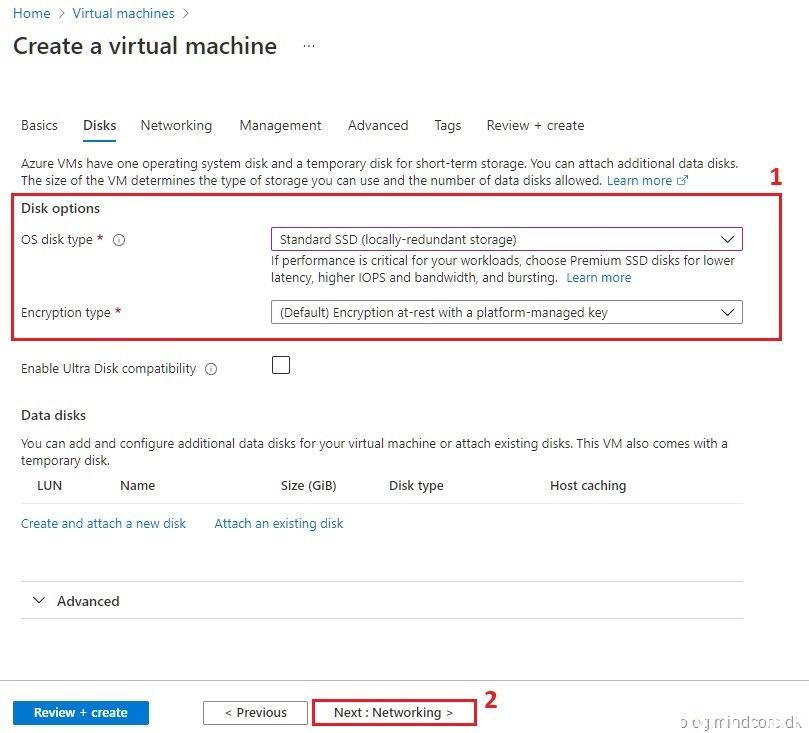
Select “Standard SSD” as the OS disk type and click Next.
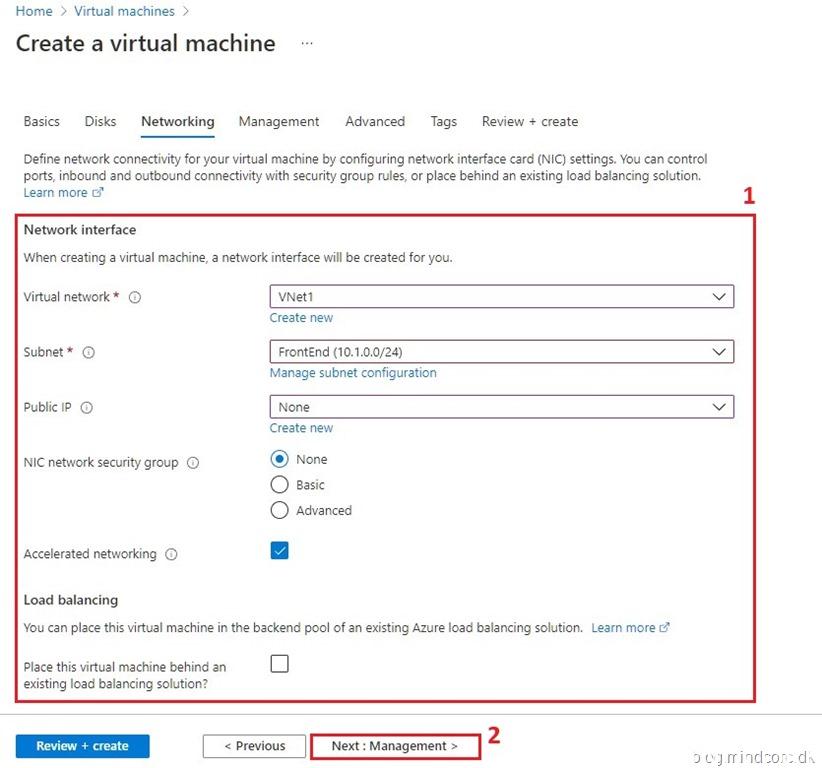
Configure the network interface and click Next.
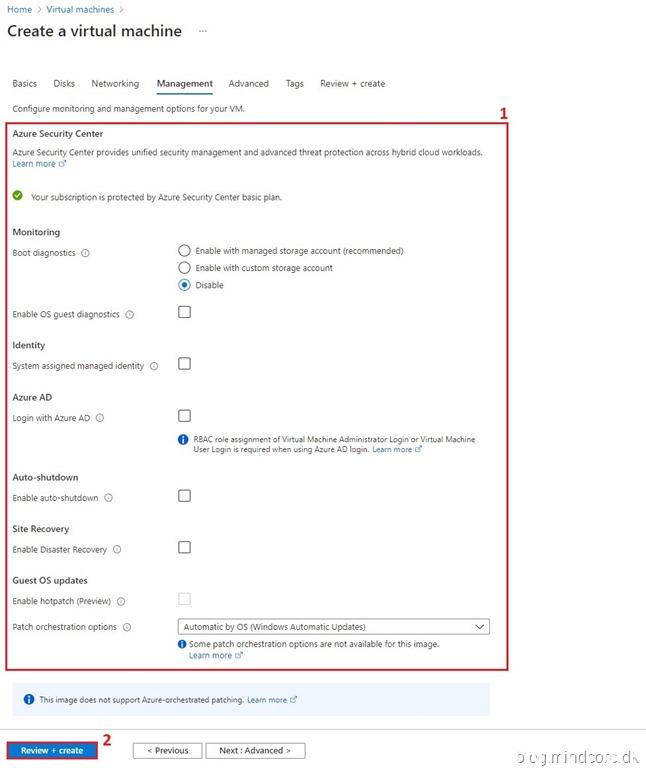
Configure the monitoring and management options and click Review + Create.
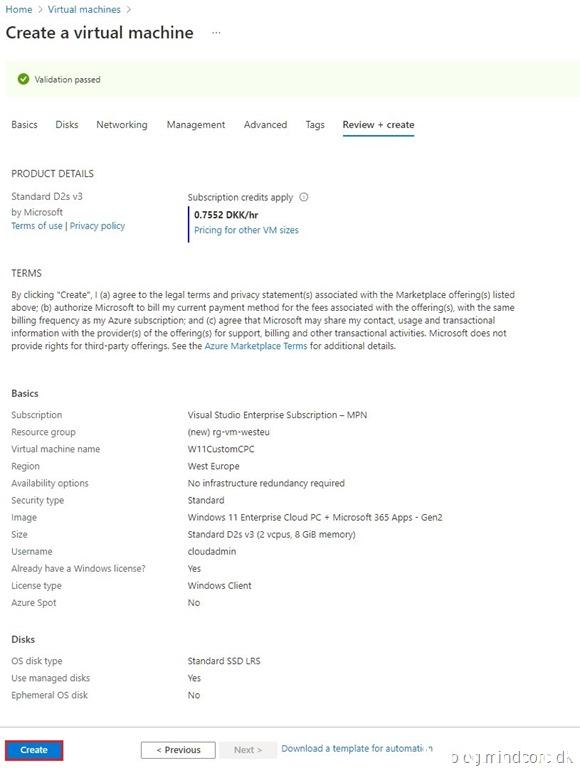
Review your configuration and click Create.
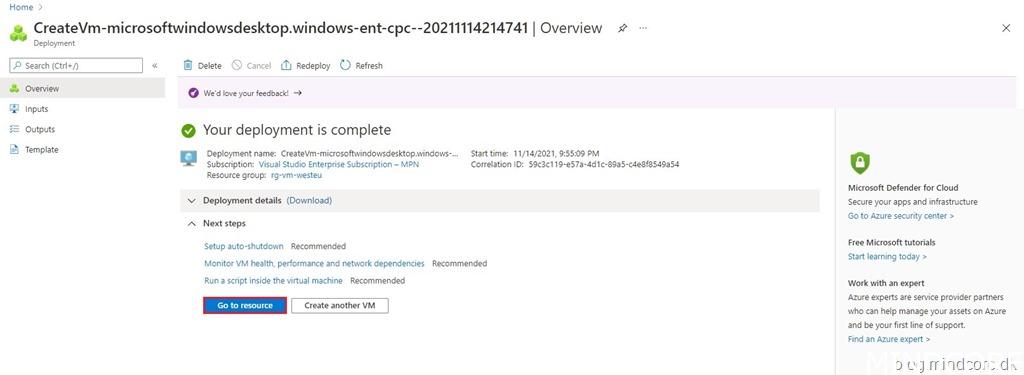
After a few minutes you should see that the deployment has completed.
Click on “Go to resource”
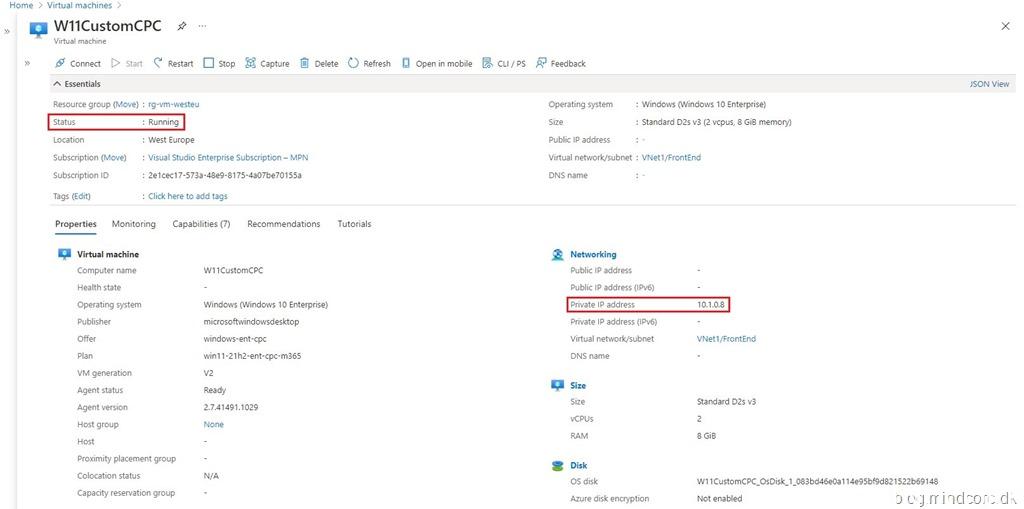
Once the VM has been created, you should see that the VM is running and that it is assigned a private IP address. Make note of the assigned private IP address, you will need it to connect to the VM via RDP.
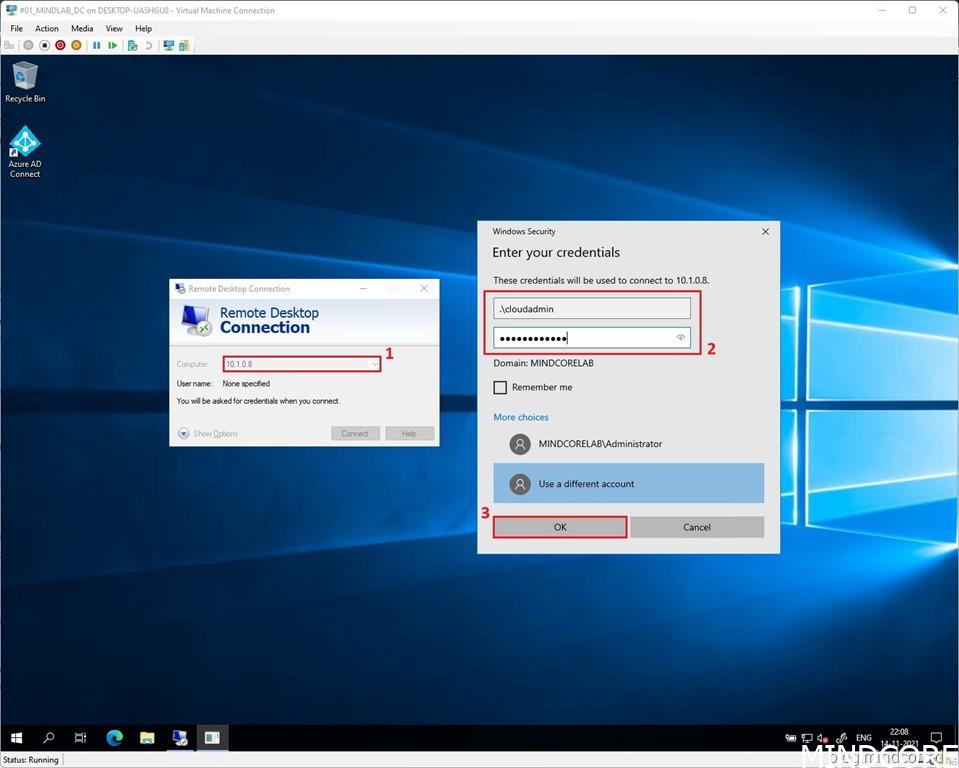
Connect to the VM with either Azure Bastion or RDP.
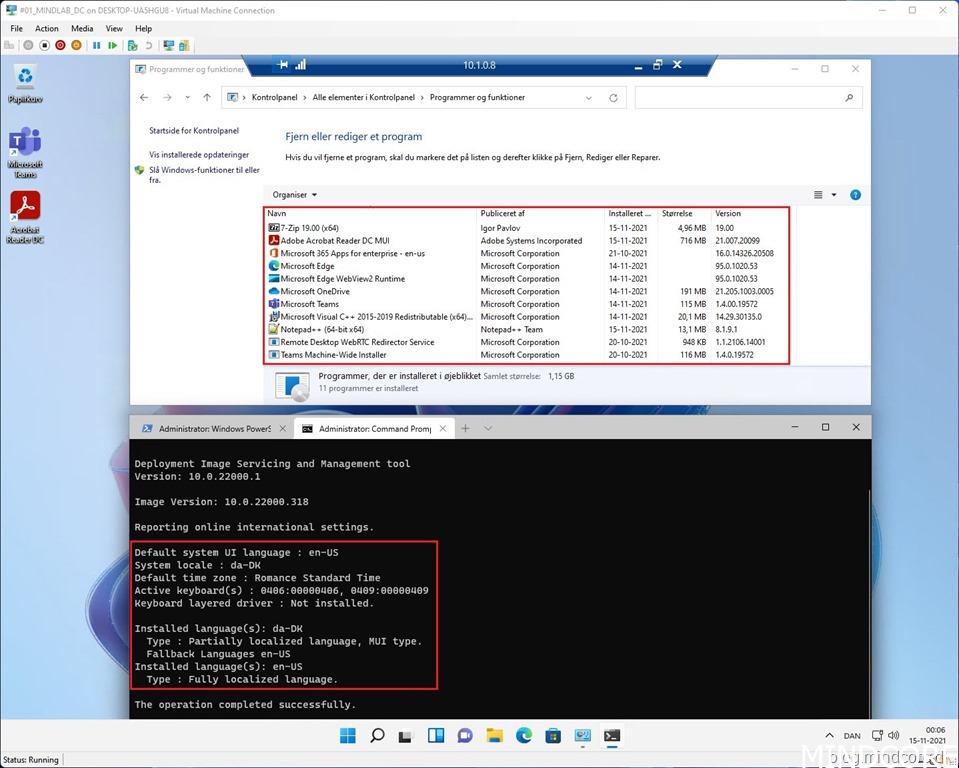
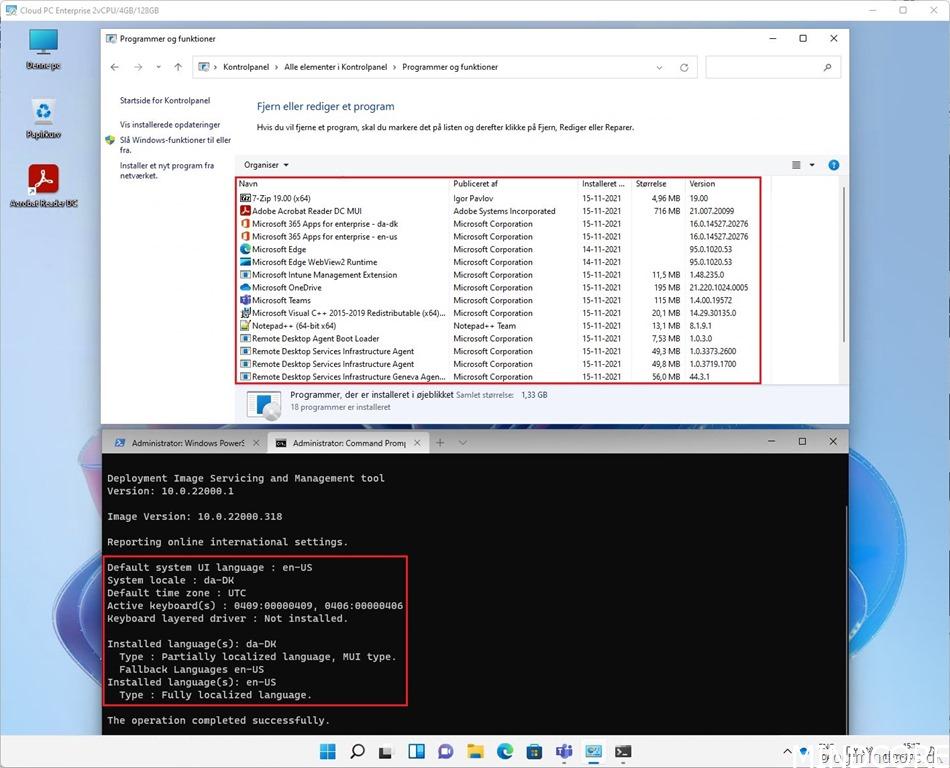
I’ve added a Danish language pack and installed the latest OS updates to the image.
For the purpose of this blog post I’ve added a few applications: 7-Zip | Adobe Acrobat Reader DC | Notepad++
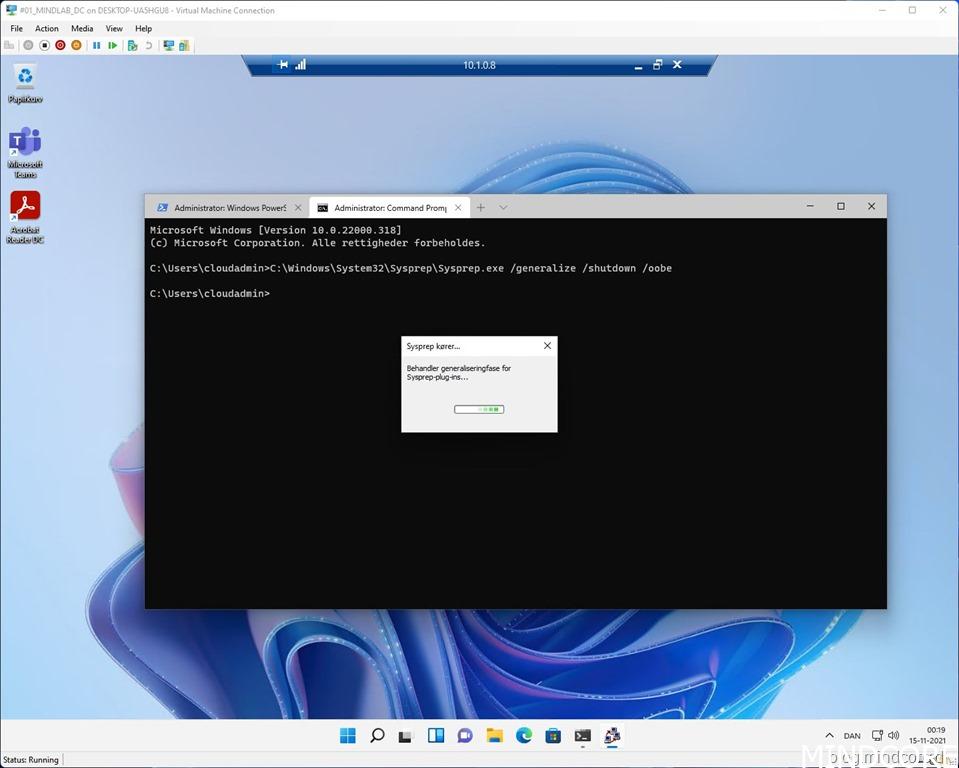
Once you are done with the customizations, run this sysprep command:
sysprep.exe /generalize /shutdown /oobe
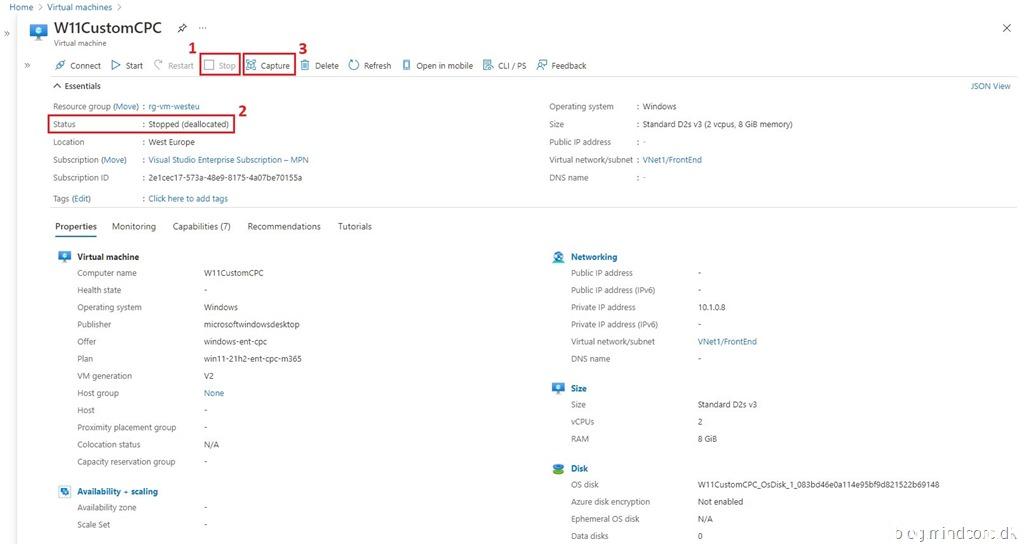
Go to “Virtual Machines” in the Azure Portal and put the VM into a stopped (deallocated) state.
Click on Capture.
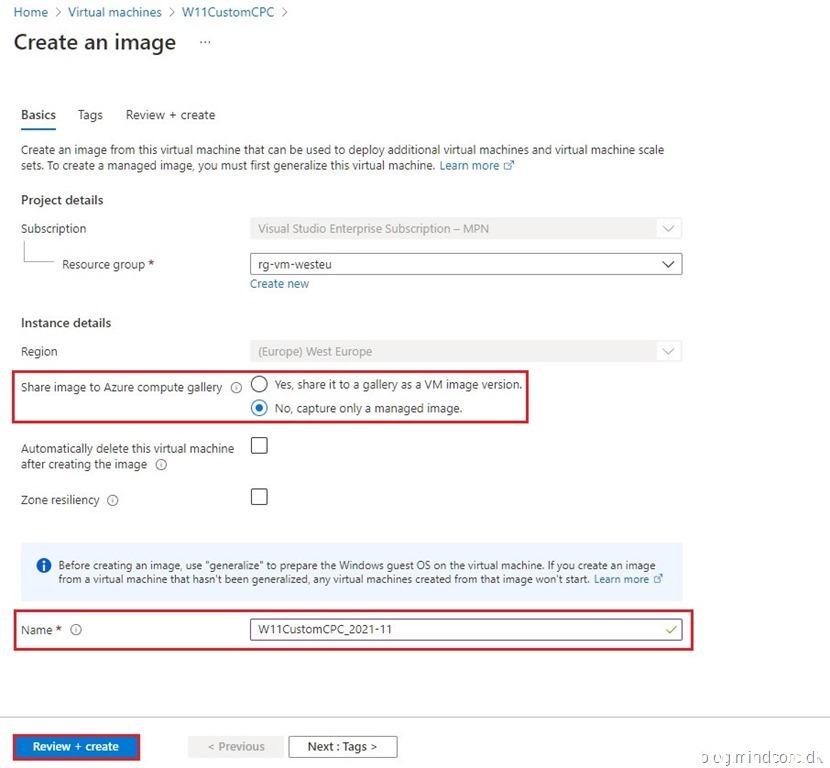
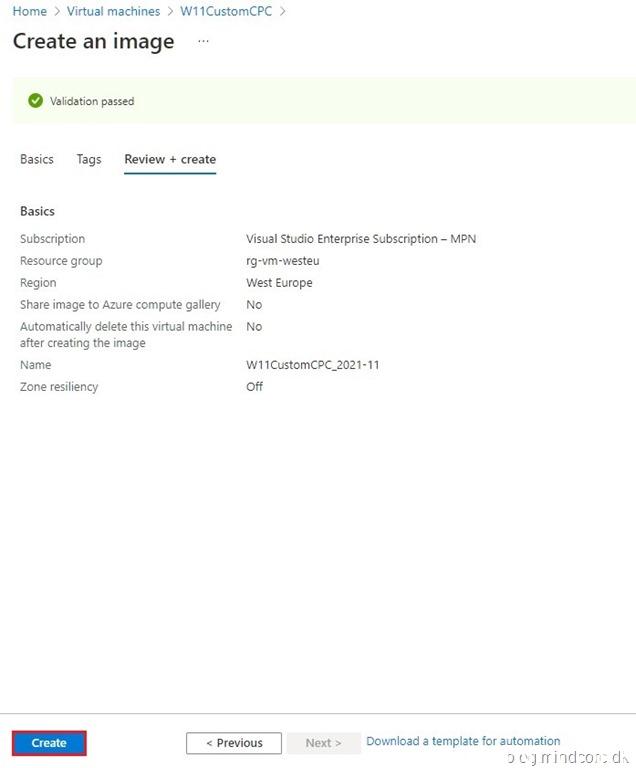
Create or choose an existing resource group, select “No, capture only a managed image.” give the image a name and click Review + create.
Click on Create.
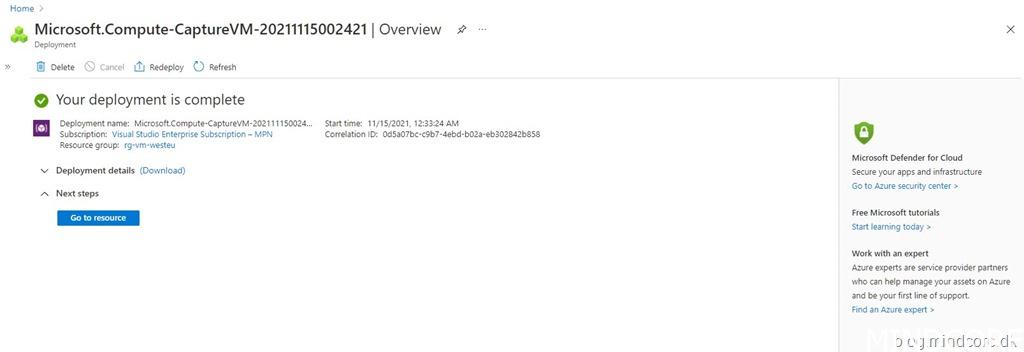
After a few minutes you should see that the deployment has completed.
Provision the custom image to your Windows 365 Enterprise Cloud PC(s)
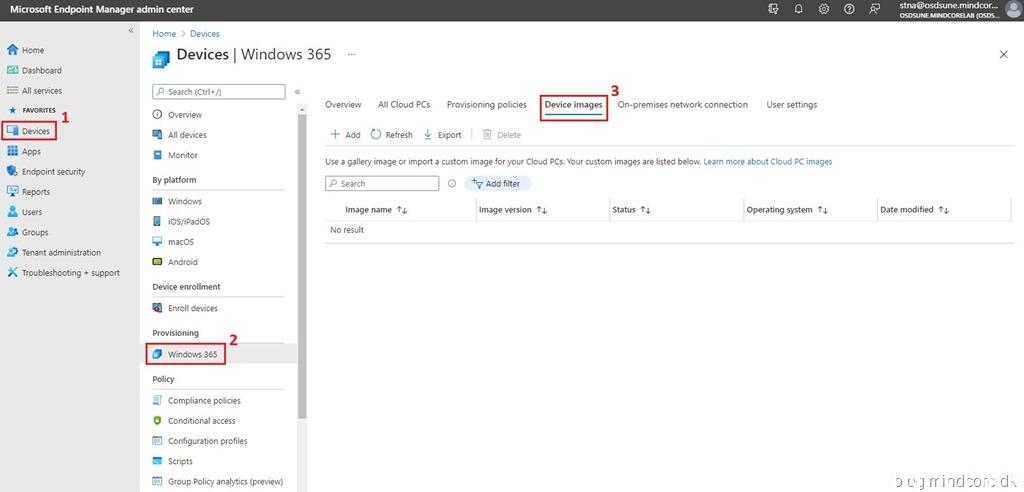
Let’s add the new custom Windows 11 image to our provisioning policy.
Go to https://endpoint.microsoft.com
Click on Devices | Windows 365 | Device images.
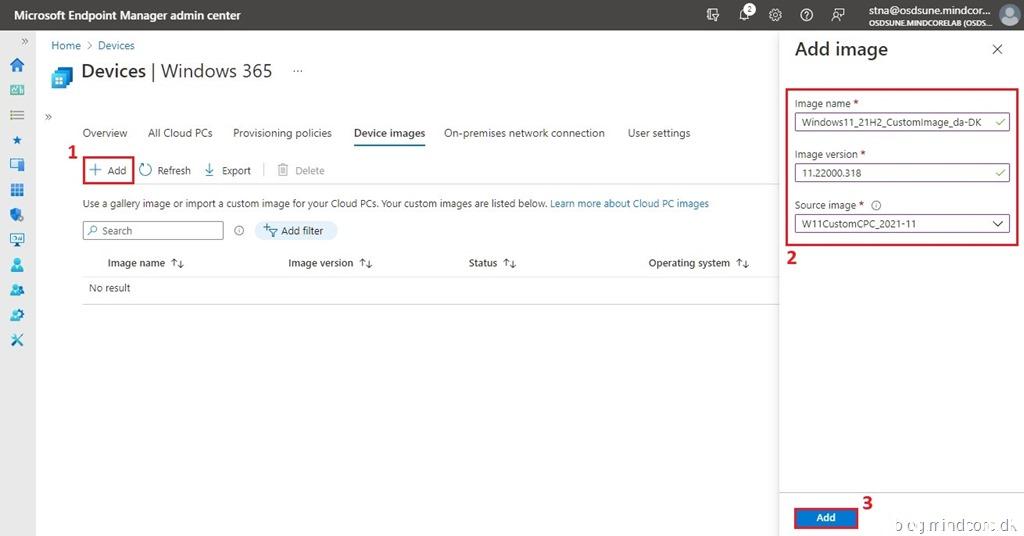
Click on add, fill in the required fields and click Add again.
Note. The upload process will take approx. 30 minutes to complete.
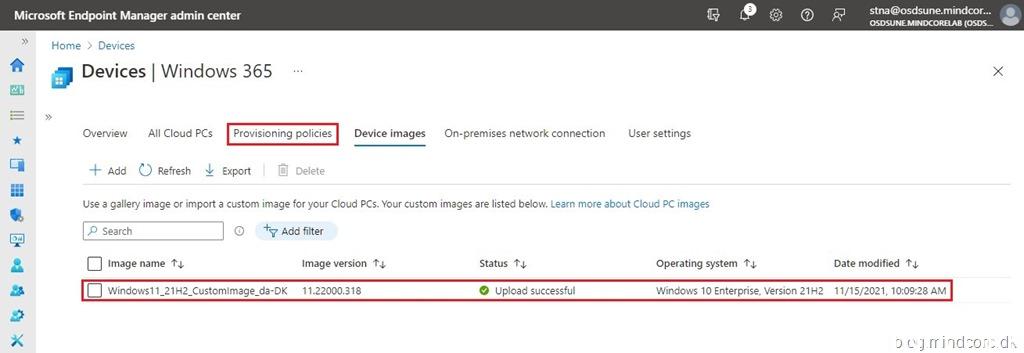
Once the upload process is completed, click on the “Provisioning policies” tab.
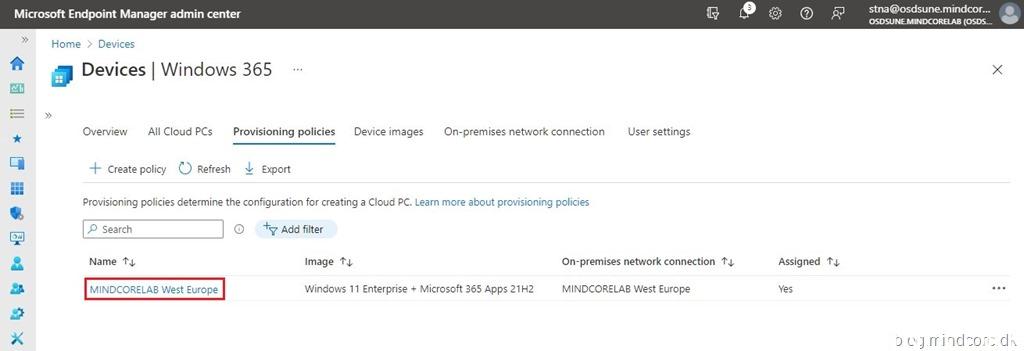
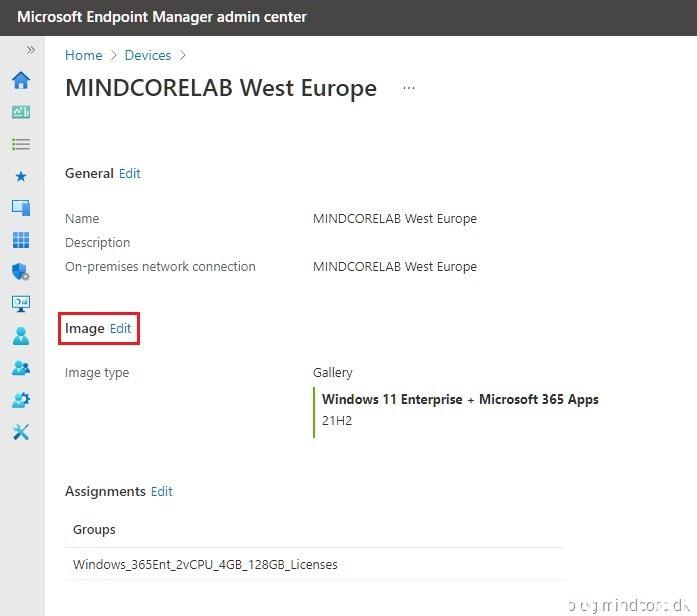
Create a new provisioning policy or modify an existing policy.
I chose to modify an existing policy and then I reprovisioned my Windows 365 Cloud PC.
Note. Creating a new provisioning policy is described in our original Windows 365 blog post.
How to configure Windows 365 Enterprise in Microsoft Endpoint Manager
Select your provisioning policy.
Click on Edit.
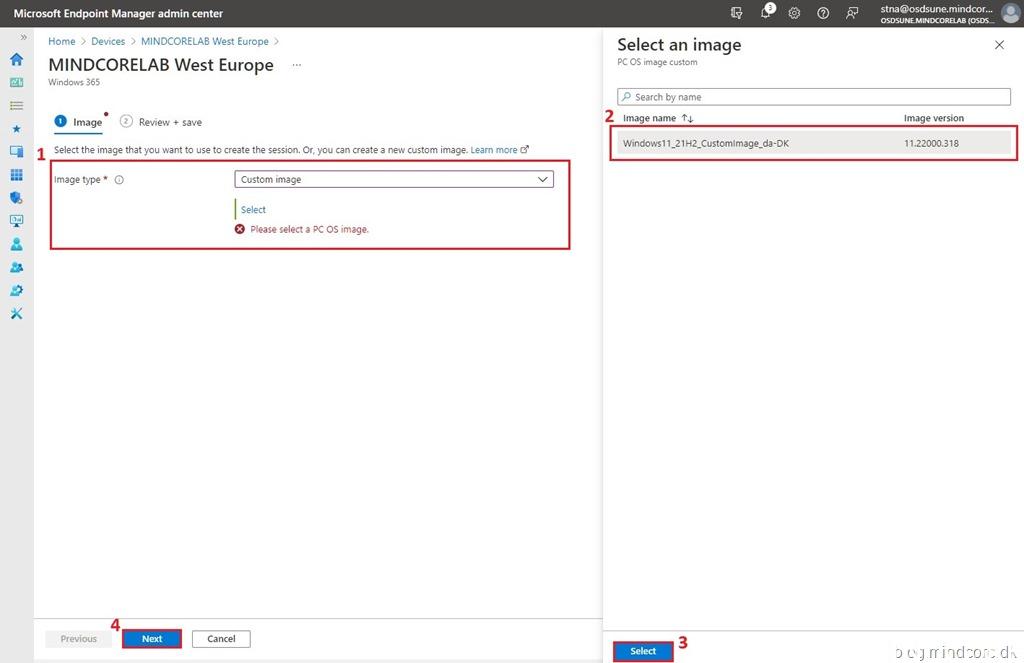
Change the image type to “Custom image” and click on Select.
Select your custom Windows 11 image, click Select and then click Next.
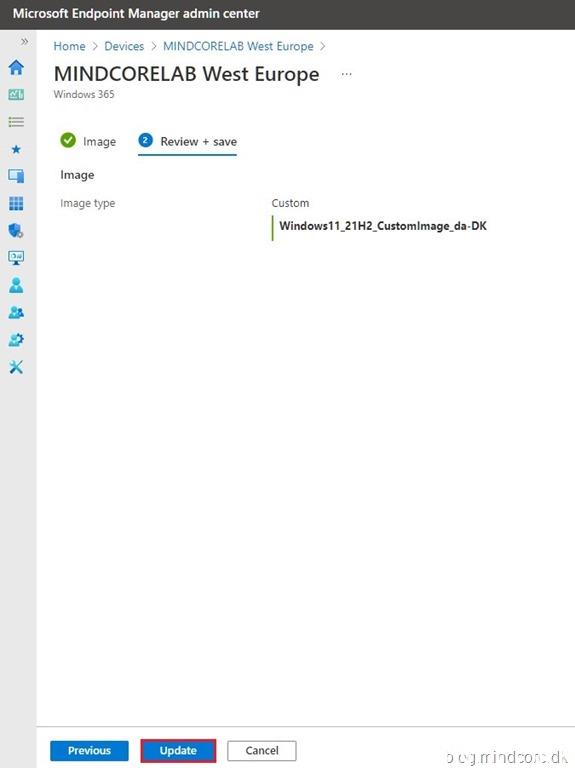
Click on Update.
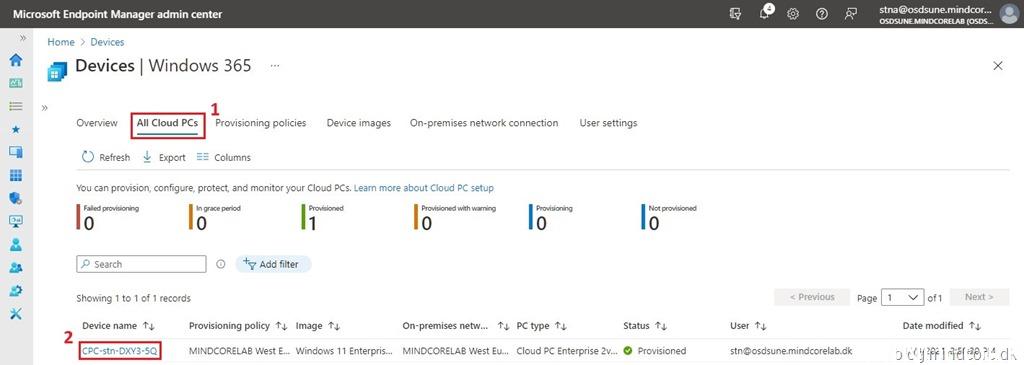
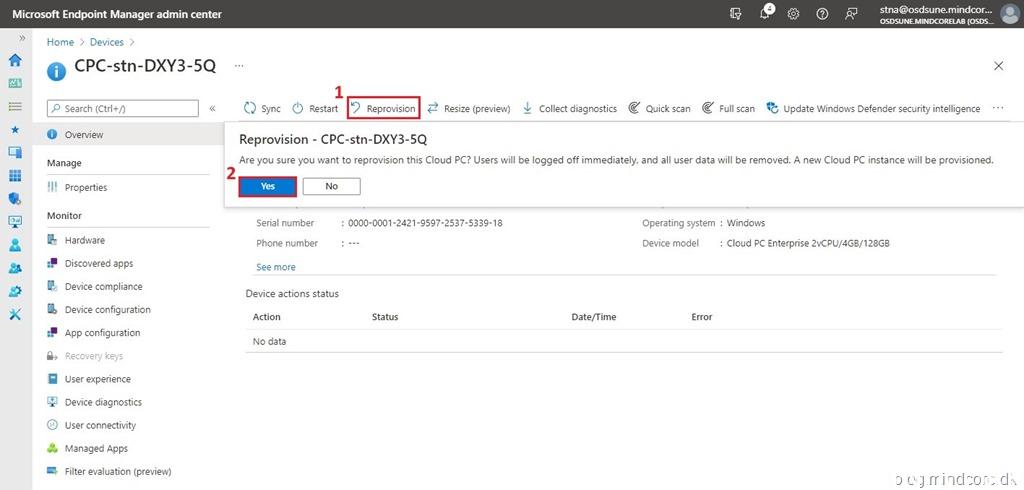
Click on Devices | Windows 365 | All Cloud PCs or Devices | Windows.
Select your Cloud PC from the list of devices and click on Reprovision.
Click Yes.
Approximately 1 hour later and your new Cloud PC with a custom Windows 11 image will be ready for use.
Success! My Windows 365 Cloud PC is now in Danish and the added applications are still present for the user logged on…
Summary
Now you know how to create a custom Windows 11 image for your Windows 365 Cloud PC(s). I do understand the need and why Microsoft support custom images in Windows 365, and I think it makes great sense in scenarios where you want to apply a few baseline applications and/or language packs to your custom image. But it is also my recommendation that you keep the image as clean as possible to leave a very small footprint and then let Microsoft Endpoint Manager and Intune add other applications, and configuration settings. Happy testing!
As always, if you have any questions regarding this topic, feel free to reach out to us.