In this first Azure Arc Remote Management focused blogpost, let’s cover the OpenSSH extension and how it can be used to get a remote PowerShell connection over SSH and even a Remote Desktop Session, all without any direct network connectivity. The best part: It costs absolutely nothing! Join me in this adventure to more securely manage all your infrastructure from a single-pane-of-glass.
Freshly back from the PowerShell Conference EU 2025, I’m also ready to share some of the new things that were covered by the PowerShell SSH team.
Azure Arc blog overview:
1. Modern Server Management with Azure Arc – Remote Management Pt.1 (SSH/RDP) (This blog post)
2. Modern Server Management with Azure Arc – Remote Management Pt.2 (Security/Linux) (coming soon)
3. Modern Server Management – Entra ID based SSH Login on Linux with Azure Arc (coming soon)
4. Modern Server Management – Azure Arc RDP with Entra ID Authentication (coming soon)
5. Azure Arc VM Onboarding Pt.1 (coming soon)
So why SSH? WinRM has been around the block for a long while now and been the de-facto remoting protocol for the Windows world. However, WinRM is no longer being maintained by Microsoft, meaning that no further enhancements or security patches will be made to it. Rest assured, it’s not going anywhere anytime soon but now is a good time to begin looking at other options.
SSH in comparison has been around a long time in the POSIX world and there is now a conscious move by Microsoft to unify remote management and make it more cross-platform. According to Microsoft, they’re aiming to make SSH the default remoting protocol for Windows. They’ve forked the OpenBSD Portable OpenSSH application and keeping it open-sourced by adding a compatibility layer for Windows.
If you’re still using WinRM, it’s a good time to consider the advantages of SSH for remote management. It’s secure by default, offers additional performance, and comes with the ability to tunnel other protocols (such as RDP). However, it currently does not yet support Just Enough Administration (JEA), but the Microsoft team is working on implementing a general hosting model that will support it. If JEA is a requirement for your environment, you will need to stick with classic WinRM (for now).
Installing the extension
This blogpost will assume there is an Arc machine already onboarded. If not, feel free to have a look at our other blogpost about how to onboard or use Microsoft’s documentation found here.
On a freshly onboarded machine, no extensions would be installed unless there’s a configured Azure Policy that deploys it (which might be another blogpost by itself).
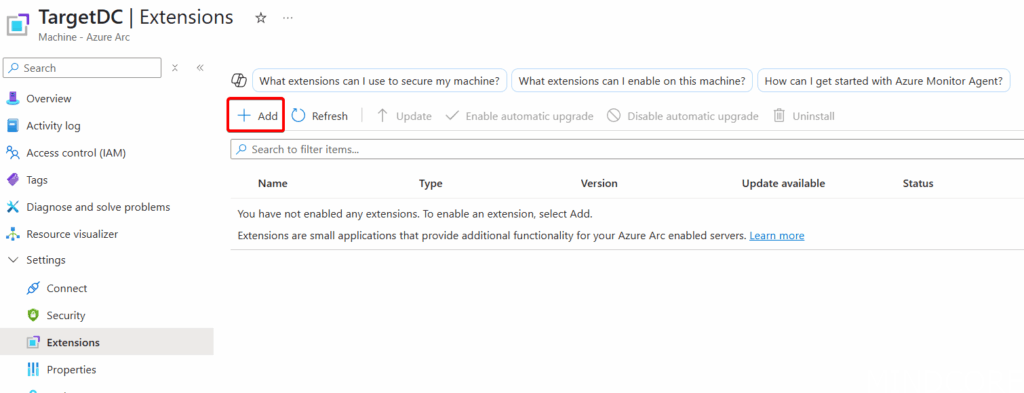
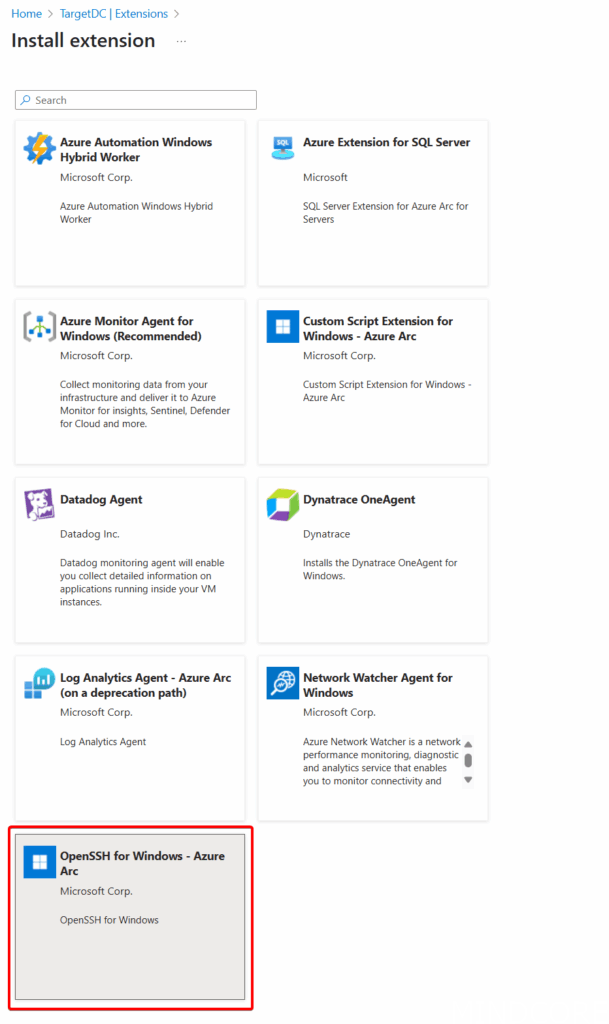
Under Extensions, click Add and select the ‘OpenSSH for Windows‘ extension to install.
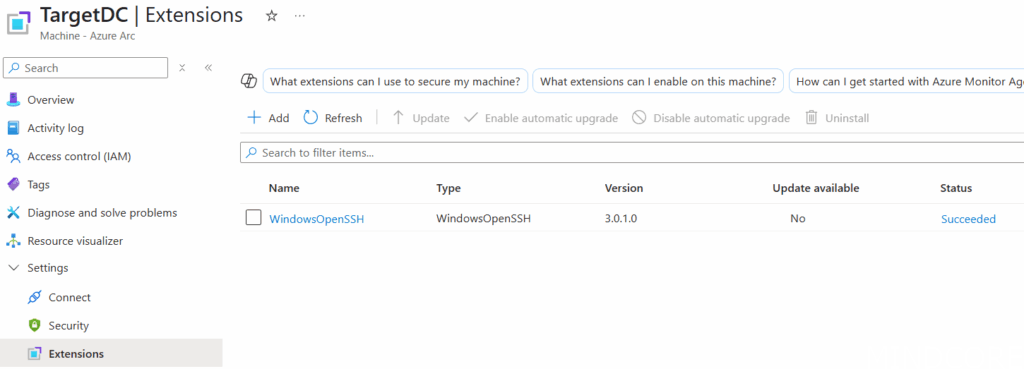
Wait a few minutes for the installation to complete. Under the Extensions list the WindowsOpenSSH extension should now be listed with a ‘Succeeded’ status:
There are other ways of deploying extensions too, as previously mentioned, Azure Policy can be used to do it at scale, and the Azure CLI or the Az PowerShell module can also be used to do it programmatically.
Start an SSH session
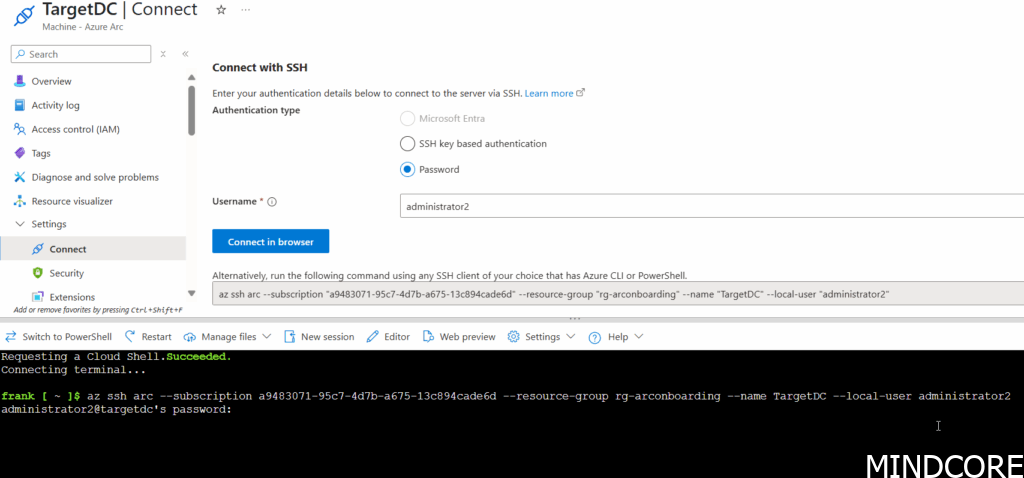
With the extension installed, head over to the ‘Connect’ settings menu:
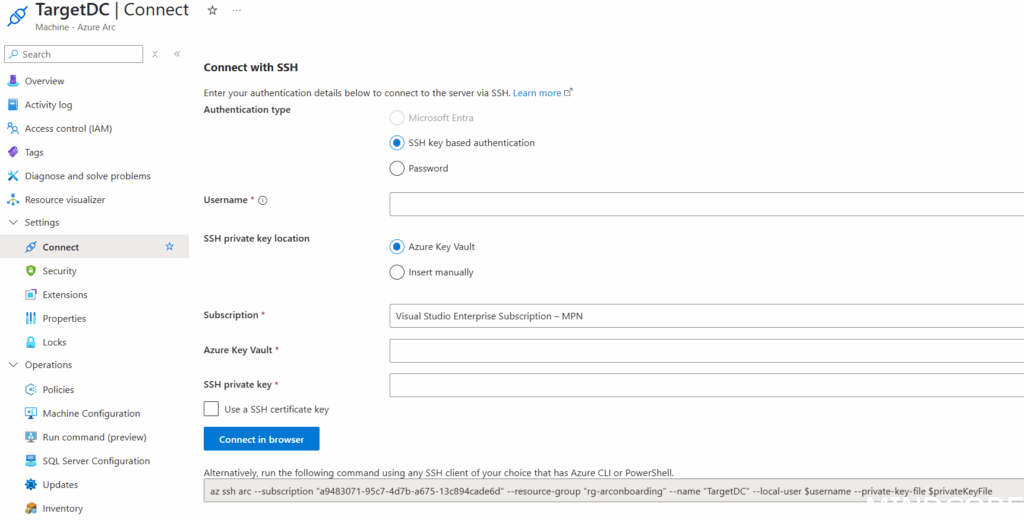
By default, Azure will want to connect using SSH key based authentication which will be covered later in this post. For now, select ‘Password’ and type in a Username of an available user account on the Arc machine. This can be a local user, or Domain user (but without the domain since no special characters are allowed besides ‘.’, ‘-‘, and ‘_’).
Simply select ‘Connect in browser’ and an Azure Cloud Shell should start and automatically creates the SSH session and prompt for the password for the user:
When connected, you’ll see the prompt adjust and you’re now logged in! By default, it will enter a standard CMD session, which you can make into a PowerShell session by simple typing in ‘powershell‘:
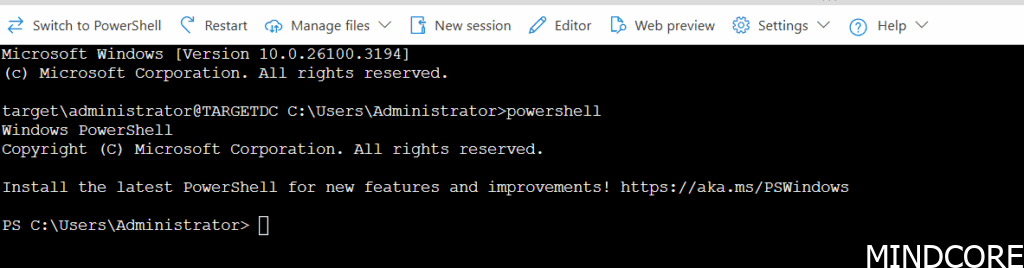
Note: the default shell that opens can be adjusted with a registry key (see below on how to do that) and read more information here.
What about RDP?
Prerequisites
RDP will require that we use the Azure CLI or Az PowerShell module from a local terminal on Window since the Cloud Shell can’t access our local RDP client. Instructions on installing the Azure CLI can be found here.
For this to work the machine needs to be configured to allow for RDP connections:
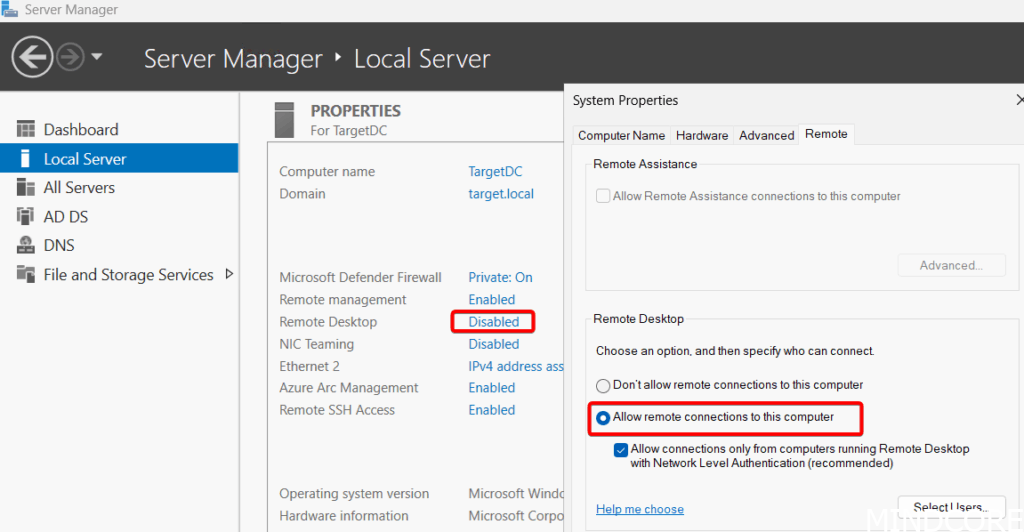
This setting can be changed manually as above or applied by GPO. Alternatively, let’s use the new SSH connection to configure this quickly instead!
First, sign into the correct tenant using the Azure CLI:

Next. copy and paste the ‘az ssg arc’ command from the ‘Connect’ settings page on Azure:

This command should work the exact same way as before using Cloud Shell where it will prompt for the user’s password and open the SSH session.
NOTE: if this is the very first time an SSH connection is opened using Az CLI on the local machine, it will prompt to both install a local SSH extension for Az CLI and to allow port 22 for SSH connections on the resource. This updates the Service Configuration in on the Azure Arc endpoint to allow it. You may also be prompted to trust the fingerprint when connecting the first time.
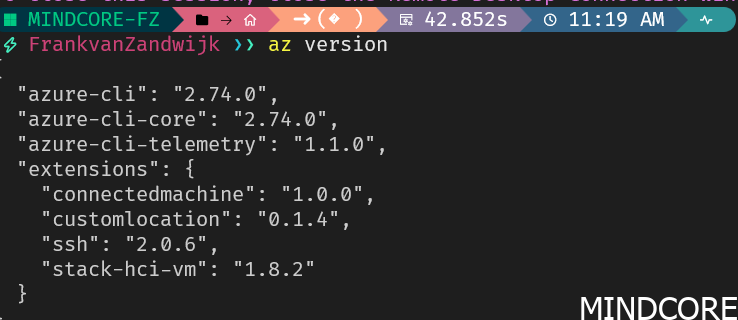
You can see the Az CLI extensions installed on your machine by running ‘az version’. Note the ‘ssh’ extension installed here on my machine.
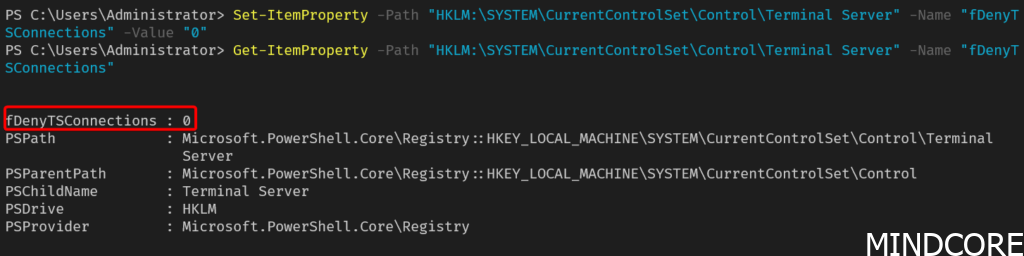
With an open SSH session, we can now check if RDP is enabled on the machine using PowerShell:
Get-ItemProperty -Path "HKLM:\SYSTEM\CurrentControlSet\Control\Terminal Server" -Name "fDenyTSConnections"

A value of 1 indicates it is disabled, and we can simply set this registry key to 0 to enable RDP:
Set-ItemProperty -Path "HKLM:\SYSTEM\CurrentControlSet\Control\Terminal Server" -Name "fDenyTSConnections" -Value "0"
Now we should be able to connect through RDP. In a future blogpost, I’ll cover how we can programmatically ensure all our Windows Arc machines have RDP enabled using Ansible and the SSH connection through Azure but for now it’s good to see how this can be done manually.
Connecting using RDP
After confirming RDP is enabled and Az CLI is working in a local shell, let’s add something to the above ‘az ssh arc’ command that will create an RDP session instead. Copy the same command and add ‘–rdp’ as a parameter:

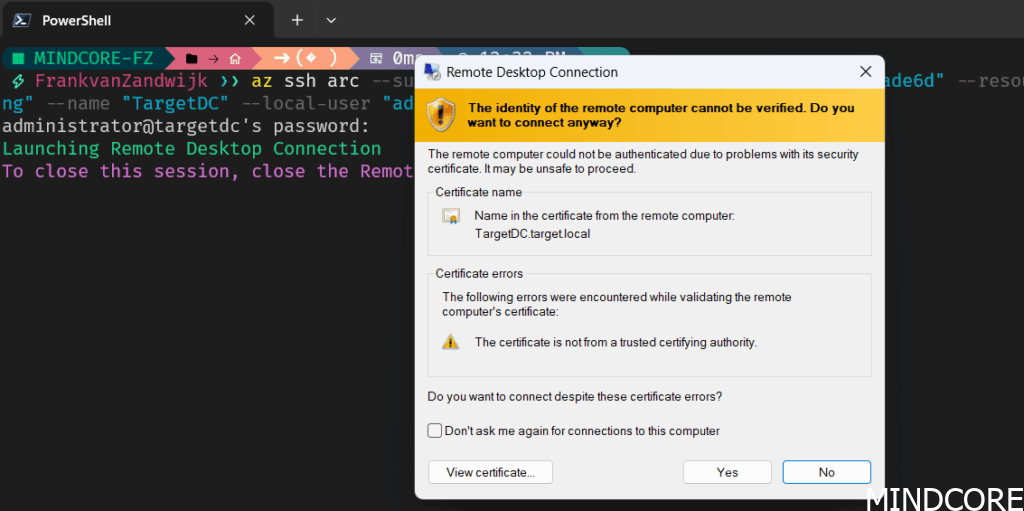
Again, you’ll be prompted for credentials prior to connecting:
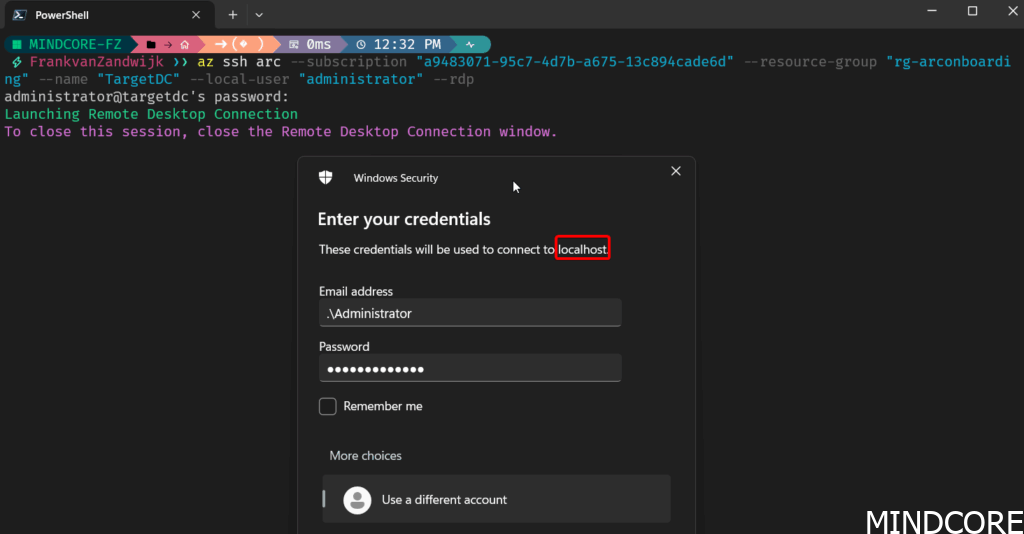
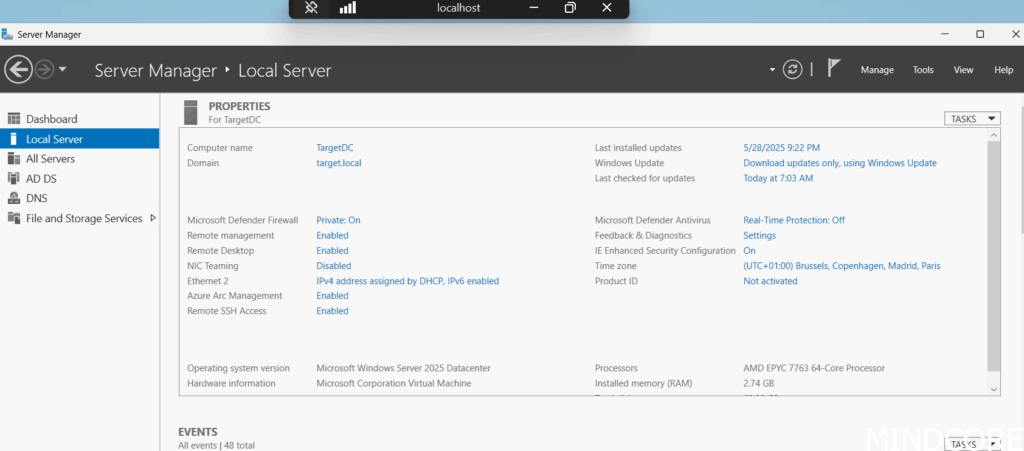
You’ll notice that the connection appears to be made to localhost instead of the actual server name. That’s because the SSH tunnel creates a secure local endpoint on your machine, forwarding your RDP traffic through the tunnel to the remote server.
Using PowerShell
Using the Azure CLI isn’t the only way you can connect. The Az Powershell modules Az.SSH includes a cmdlet called Enter-AzVM which will let you do the same thing. This lets you do some cool things such as connecting to a bunch of VMs all at the same time:
$Machines = Get-AzConnectedMachine -ResourceGroupName $resourceGroup | Where-Object Status -eq "Connected"
$sessions = @()

foreach ($Machine in $Machines) {

    $serverName = $Machine.Name
    $resourceGroup = $Machine.ResourceGroupName
    if ($Machine.OsType -eq "Windows") {
        $localUser = "Administrator"
    } else {
        $localUser = "jumpstart"
    }
    Write-Output "Creating session for $serverName with user $localUser"
    $configFile = "$env:TEMP\$serverName"

    Remove-Item $configFile -ErrorAction SilentlyContinue
    $null = Export-AzSshConfig -ResourceGroupName $resourceGroup -Name $serverName -LocalUser $localUser -ResourceType Microsoft.HybridCompute/machines -ConfigFilePath $configFile

    # Note: One option to avoid password prompt is to use the Run Command feature to populate the public key on the remote servers beforehand.

    # Use a regex pattern to find the ProxyCommand line and extract its value
    $proxyCommandPattern = 'ProxyCommand\s+"([^"]+)"\s+-r\s+"([^"]+)"'
    $match = Select-String -Path $configFile -Pattern $proxyCommandPattern

    $proxyCommandValue1 = [regex]::Match($match.Line, $proxyCommandPattern).Groups[1].Value
    $proxyCommandValue2 = [regex]::Match($match.Line, $proxyCommandPattern).Groups[2].Value
    $fullProxyCommandValue = "`"$proxyCommandValue1 -r $proxyCommandValue2`""

    $options = @{ ProxyCommand = $fullProxyCommandValue }

    $sessions += New-PSSession -HostName $serverName -UserName $localUser -Options $options -OutVariable session

}

$sessions
Note: When connecting to Arc machines, the Az.Ssh.ArcProxy is also required to be installed on the client machine. The cmdlet will attempt to install the module from the PowerShell Gallery if it’s not present.
How does this work?
The magic that makes these remote connections work without network Line-of-Sight to your server is the use of the Azure Arc proxy service. This service acts as a reverse proxy for the Arc-enabled machines as shown in the document below:
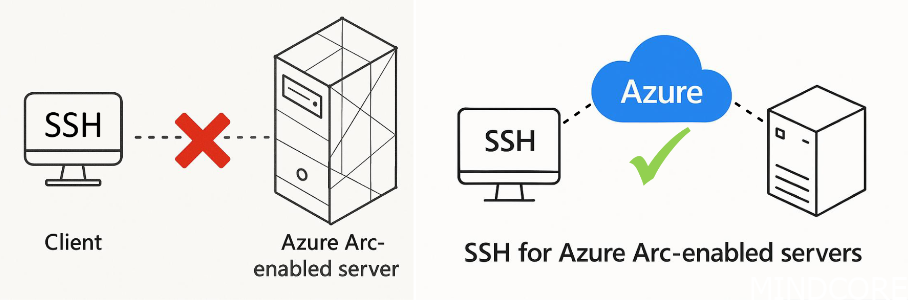
Source: 2025/Steven Bucher and Tess Gauthier/psconfeu_ssh.pdf at main · psconfeu/2025
When creating an SSH sessions, you’re first connecting to Azure which acts as a connection broker and tunnels the traffic to the Arc machine. Since the Arc machine has outbound access to Azure, it can open a reverse proxy and allows the SSH traffic through without needing to be directly exposed to the internet or have firewall openings. This allows anyone (with the appropriate access rights on your Azure subscription) to connect to the machine without requiring a VPN or jump host.
This enhances security by ensuring that only people requiring access have the capability of connecting to the machine since we can now use Azure RBAC and Entra ID’s capabilities to assign groups, require PIM, and add Conditional Access Policies.
This also lets you lock-down the servers within the on-premises environment to only allow access to the services hosted there, instead of needing to also open up access for remote management to a specified jump host. Essentially this eliminates the need for the jump host to exist which often has way too high network access anyways. More on this in part 2!
Configuring OpenSSH
A new local group “OpenSSH Users” is automatically created with a well-known SID of S-1-5-32-585 when the extension is installed:
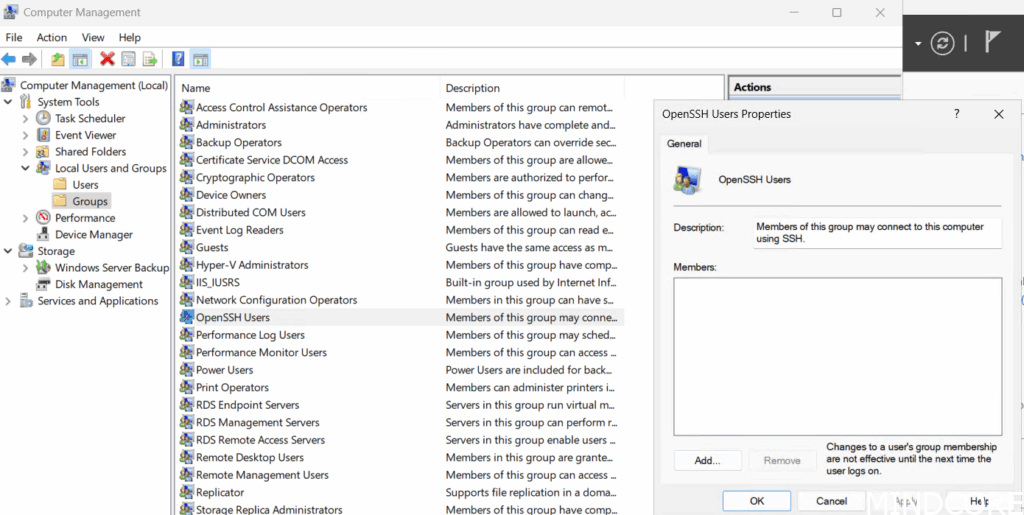
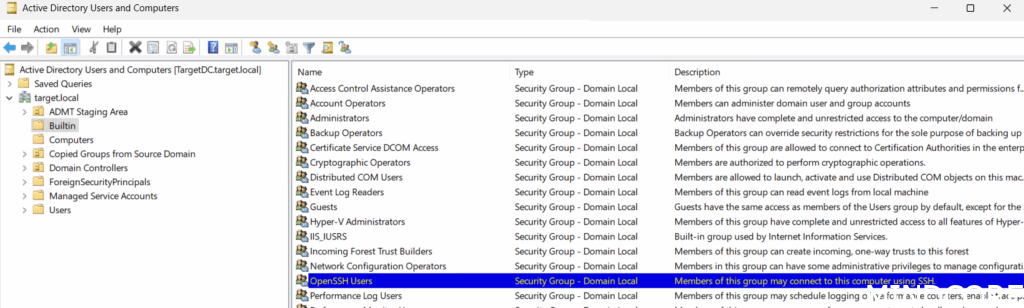
Note: This automatic creation of a local group is not great on domain controllers as that makes it domain local so please be careful if deploying OpenSSH to your DCs (or promoting a server to a DC that has OpenSSH installed on it). Due to this, we don’t recommend installing this extension on Domain Controllers.
Considering the administrative use-case of this group, it should be considered as Tier 0 and its memberships should be secured accordingly.
Note: Also something to keep in mind is the localization of the OS since there is a known-bug. For example, this group may be called “OpenSSH-Brugers” on a Danish server, but it won’t be referenced correctly in the default SSH configuration (since that always assumes it will be “openssh users”). This appears to be caused by OpenSSH not having an understanding of SIDs, so it can’t look up the well-known SID (which would solve the issue). Instead, it only does a lookup on the SAMAccountName of the group. There is a fix in the pipeline for this.
Courtesy of Evgenij Smirnov for finding this bug.
The default SSH configuration is fairly barebones and can be found in %programdata%\ssh\. We can see that login is restricted to the above mentioned “openssh users” group as well as the local “administrators” group:
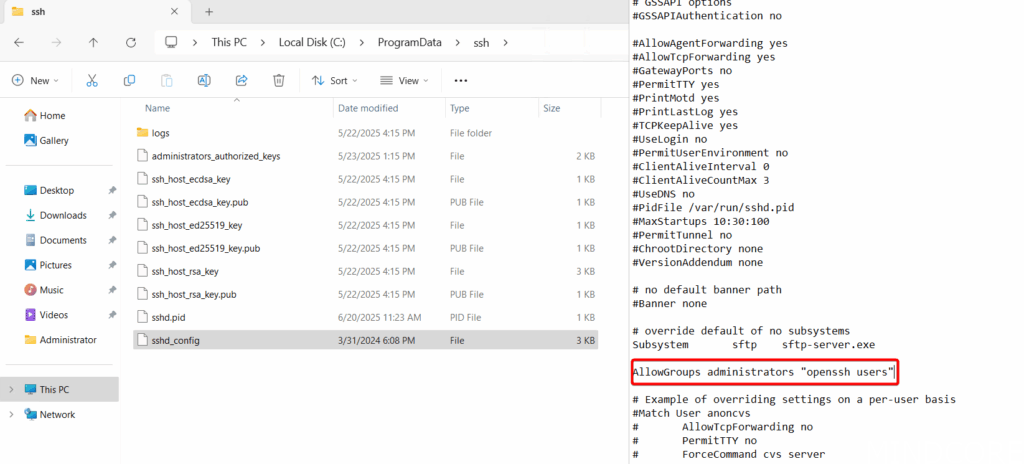
A great resource on all of the settings for OpenSSH can be found here. Mentioned in that article is also how to change the default shell to PowerShell which is a personal preference but one I prefer to configure. We’ll also get back to these settings to disable Password-Based authentication in the next section about making this more secure.
Naturally, keeping these settings configured at-scale becomes a challenge, which is why Microsoft is introducing SSH Posture Control. This lets you manage all the settings within SSHD_config (and more like the default shell registry key) through Azure Policy. It utilizes OSConfig in the background and provides recommended settings to apply defense in depth and allows for deployment of changes in rings. Currently it’s in preview, so feel free to give it a go but I’ll cover how to configure these settings as part of Ansible as well in a future blogpost.
All the above also applies for connecting to Azure Local VMs, as outlined in this Microsoft Learn resource.
What I’d like to see in the future
- Currently, if you login through SSH using an administrator account, you’re immediately elevated. That’s not great for security and there’s currently no way around that. Maybe Sudo for Windows could be used for this?
- While privileged identity management (PIM) gets us some additional security, Just-Enough-Administration (JEA) support would be really nice to be able to lock down and secure PowerShell access further.
- I wish that the same Azure Arc reverse proxy could be used for Azure VMs to avoid having to use Bastion and have the same management experience across both Azure native and Azure Arc machines. While the above all works great for Azure Arc onboarded machines, it does not work the same way for Azure VMs. Azure VMs cannot be Arc onboarded but instead can have the SSH extension directly installed but requires direct network Line-of-Sight to be able to connect.
- It has been confirmed that SSH should be considered the replacement for WinRM since that is no longer actively maintained. However, there are no official plans currently to deprecate WinRM just yet.
- There is a bug where if the Azure Arc machine has more than 1 Network Interface Card (NIC) enabled, the Azure Arc Proxy connection has a difficult time connecting reliably. The workaround is to work with the route metrics to ensure the agent always uses the correct NIC. Hopefully the agent can be updated to overcome this by itself.
More to come!
Expect a follow-up Part 2 of this topic where I’ll cover making things secure using SSH keys and an Azure Key Vault as well as Privileged Identity Management (PIM) and possibly even a quick look at Linux.
Stay tuned on this blog for much more Azure Arc content and possibly some handy tooling around making these SSH and RDP connections a bit easier.