Intro
If you’re diving into Microsoft Security Copilot, one of the first things you’ll want to get right is who can do what. That’s where Role-Based Access Control (RBAC) comes in.
Whether you’re working in Defender, Intune, Entra, Sentinel, or Purview, understanding and configuring RBAC is essential to ensure secure, scalable, and auditable access to Security Copilot.
Let’s get started.
Security Copilot blog overview:
1. Getting Started with Microsoft Security Copilot: A Practical Guide for Defender, Intune….
2. Role-Based Access Control (RBAC) in Microsoft Security Copilot: A Practical Guide (This blog post)
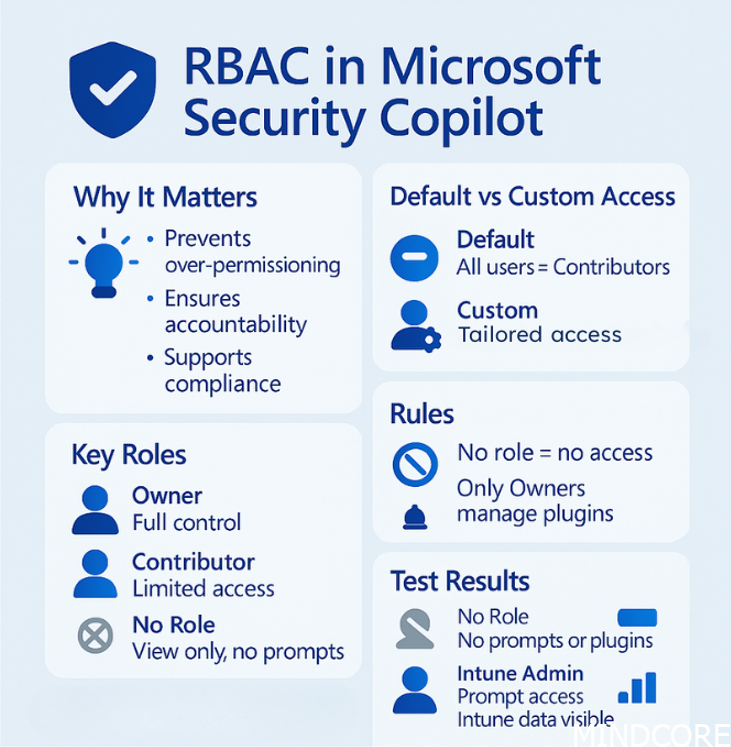
Why RBAC Matters in Security Copilot
Security Copilot can access sensitive data and perform powerful actions across your Microsoft security stack. Without proper access control:
You risk over-permissioning users
You lose visibility into who’s doing what
You may violate compliance or internal governance policies
No one can live with that, therefore – take control and do your Role-Based Access Control (RBAC)!
Understand how RBAC works with Security Copilot
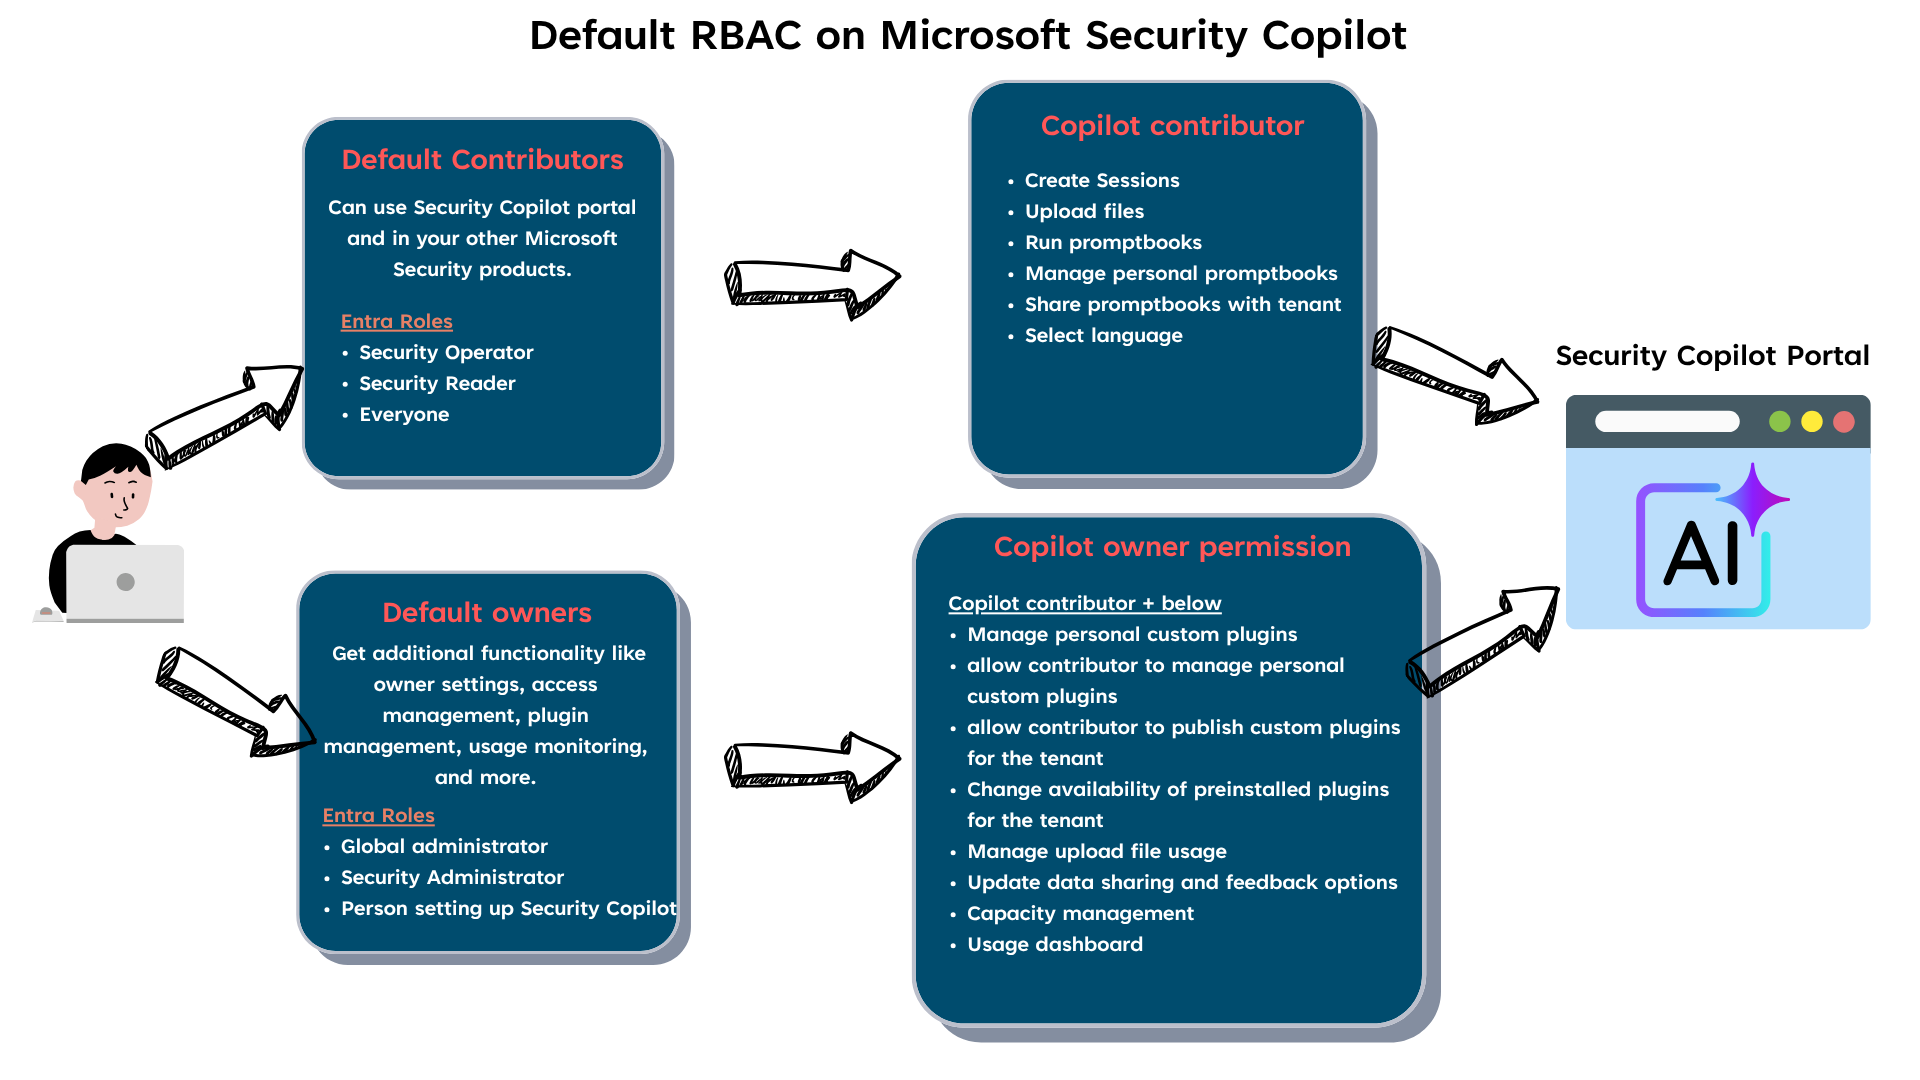
After setting up Microsoft Security Copilot, you’ll notice that Role-Based Access Control (RBAC) is configured by default. While this out-of-the-box setup might be sufficient for smaller teams or initial testing, it’s often not ideal for larger or more security-conscious organizations. In many of the environments I work with, we need tighter control – especially to prevent unrestricted access to the Security Copilot portal. Customizing RBAC ensures that only the right users have the appropriate level of access, aligned with their roles and responsibilities. Below I created a drawing that will help you understand the default Role-Based Access Control (RBAC).
By default, all users are granted access to the Microsoft Security Copilot portal as Contributors. While this might seem convenient, it can lead to confusion. Just because a user can access the portal doesn’t mean they’ll get meaningful results. Security Copilot relies on connectors to pull data from tools like Intune, Defender, or Sentinel – and those connectors require the user to have the appropriate permissions in those systems. For example, if someone tries to prompt for Intune-related data but doesn’t have access to Intune, they’ll receive empty or incomplete results. In that case, what’s the value of giving them access to the portal at all?
How it looks like as an end user
Before diving into how to configure Role-Based Access Control (RBAC) I will give you a tour inside the Microsoft Security Copilot portal from the two different views.
Owner role
| User Account | Mattias@memtipsandtricks.tech |
| License | Microsoft 365 E5 |
| Assigned roles | Global Administrator |
Home screen takes you to the prompt page, where you can start prompt away.


If you click the small button “Sources” on the right side of the textbox, you will find which plugins you enabled and from there you would know which sources you can get data from.
Note
Security Copilot only works within the boundaries of the access you already have – it won’t bypass any permissions. This follows Microsoft’s responsible AI and privacy principles. Each Microsoft plugin (like Intune, Defender, or Sentinel) has its own role and access requirements, which still apply when using Copilot. So, make sure users have the right roles and licenses assigned for the specific services they need to interact with. Otherwise, they won’t be able to retrieve any useful data through Copilot.
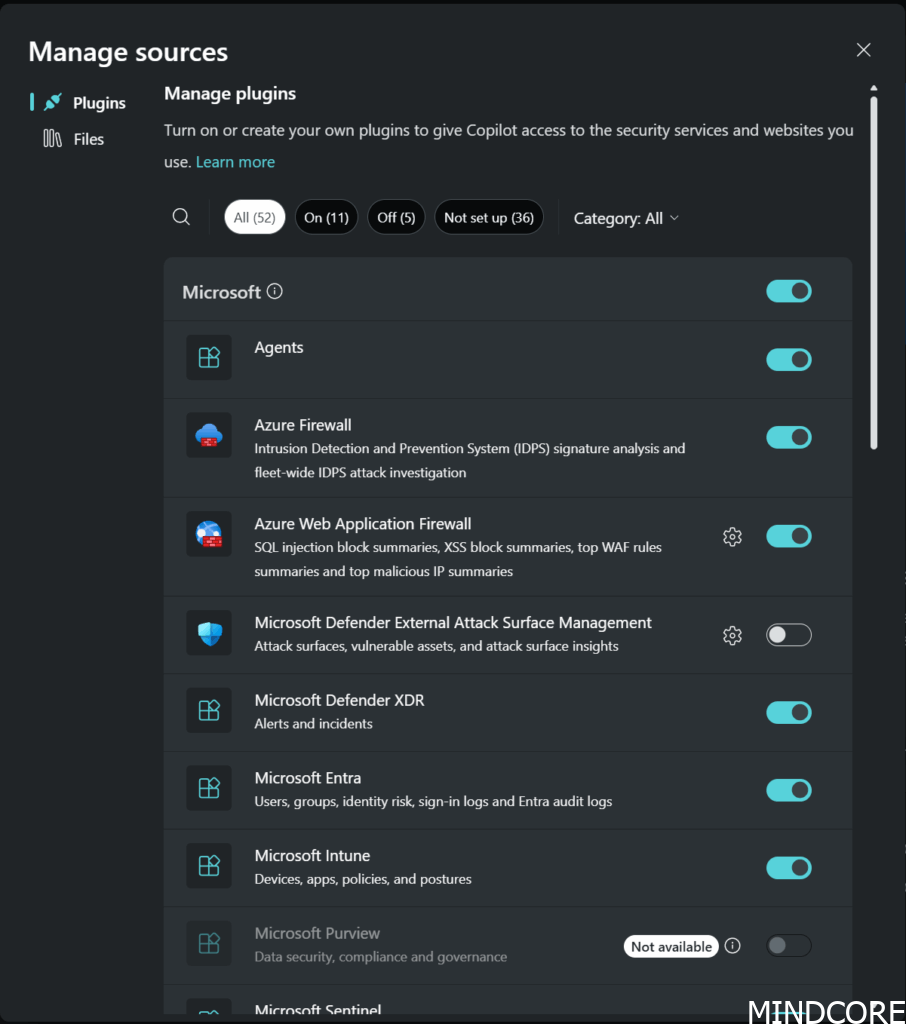
Since we are owner we get access to all the modules
Contributor role
| User Account | Demo@memtipsandtricks.tech |
| License | Microsoft 365 E5 |
| Assigned roles | None |
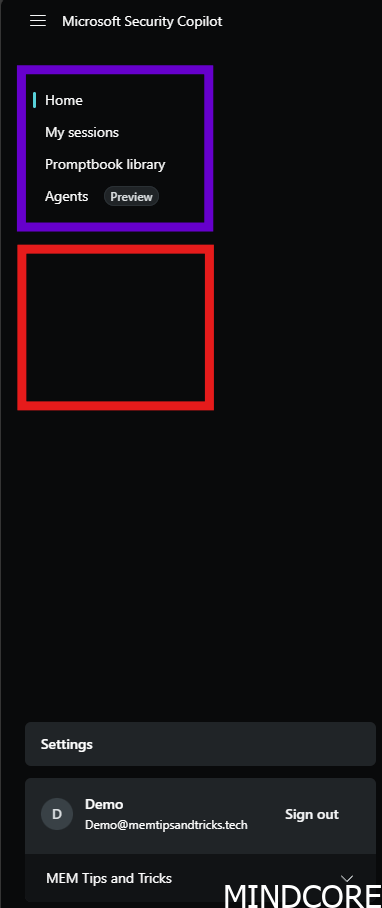
Home screen takes you to the prompt page, where you can start prompt away. No difference to see from the owner point of view from this screen. You can even manage the plugins if you like to.

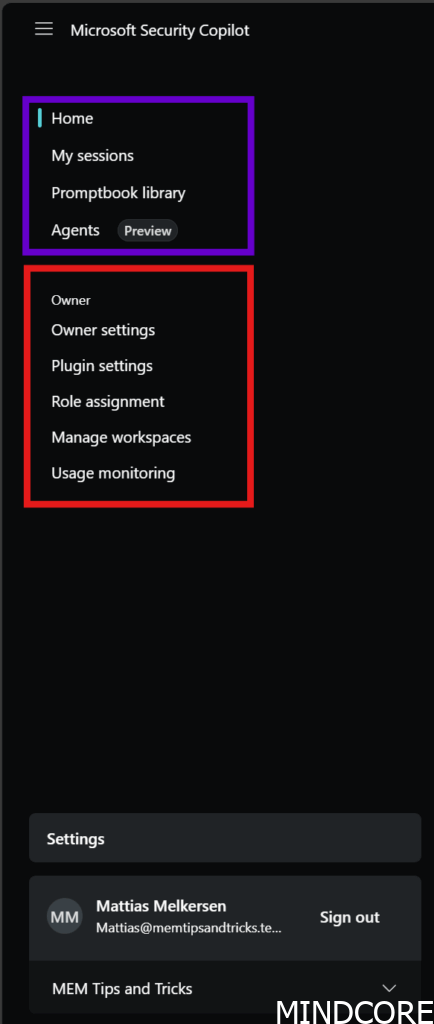
Where it differs is when we click the menu button to see what possibilities we have to manage in the portal itself. The owner section is missing which is just how it should be.
Step-by-Step: Setting Up RBAC for Security Copilot
Before we dive in, it’s important to define a clear scope. Now that we understand how Role-Based Access Control (RBAC) works in Microsoft Security Copilot, what exactly do we want to achieve? For some, the default setup might be perfectly fine – and if that’s the case, you can stick with it and build from there. But if the out-of-the-box configuration doesn’t meet your organization’s needs, keep reading. I’ll walk you through how I would approach this task and implement a more tailored RBAC setup.
Rules
- Rule 1: A user without an Entra Role should not have access to Microsoft Security Copilot.
- Reason: If a user doesn’t have the necessary roles, they won’t be able to run any meaningful prompts. So why allow them to consume valuable SCU resources when they can’t actually use the service effectively? It’s better to restrict access to those who can make full use of it.
- Rule 2: Contributor Role should not be able to choose which custom plugins are added or not.
- Reason: If you’re planning to make custom plugins available in your organization, make sure they’re properly reviewed first. A good approach is to test them with a few selected users before rolling them out company-wide. This helps catch any issues early and ensures the plugin works as expected.
Allright, let’s get to it. Let’s configure the settings so it matches the rules we’ve defined.
Navigate to the portal as owner and find Role assigment
Remove users from this owner list. No owners should be listed as single persons, but be member of a group or role.
Note
If you need to assign access to someone who isn’t a Security Administrator or Global Administrator, the best approach is to create a standard Entra group. Give it a meaningful name that reflects its purpose, and then assign that group the appropriate role here.

And if you followed me this long, this is how it would look like:
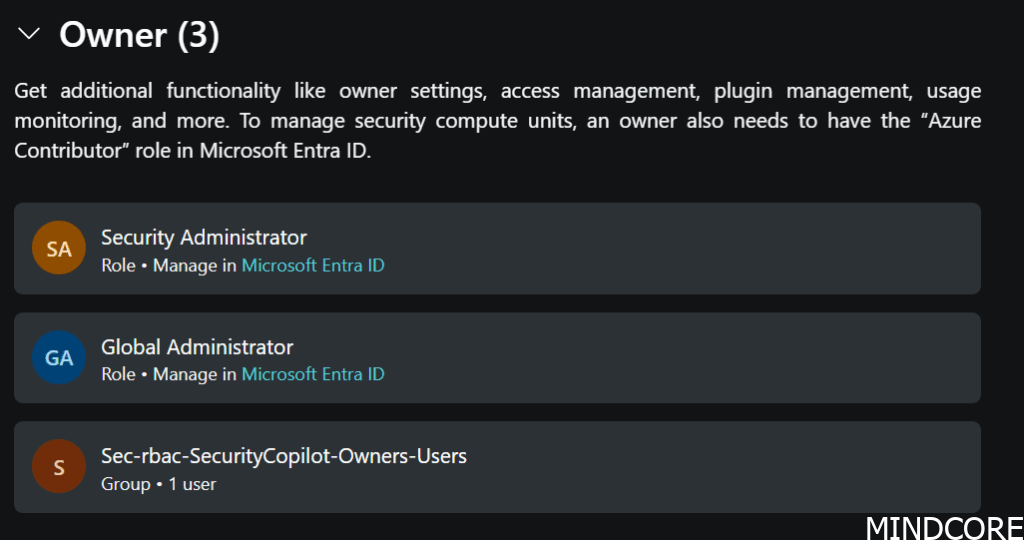
Moving on to the contributor role, as shown in the first default RBAC drawing, we have 2 roles configured and then Everyone. It kind of makes no sense as everyone would also cover Security Operators and Security Reader. Let’s clean up. Remove all 3.

Click on Add recommende roles

Click Add
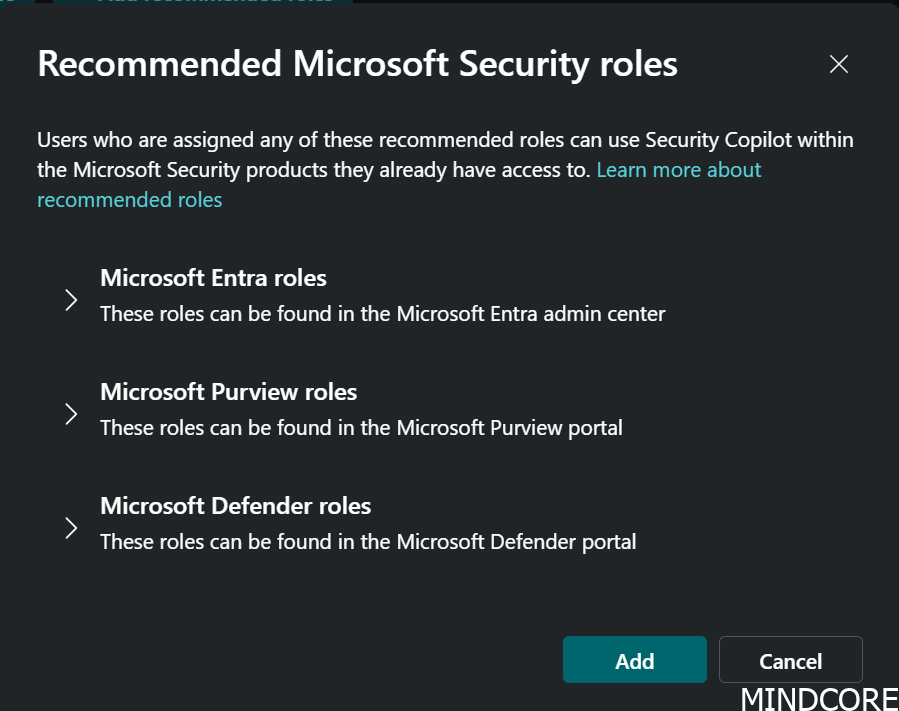
This will add in all the Microsoft recommended roles into contributor role.

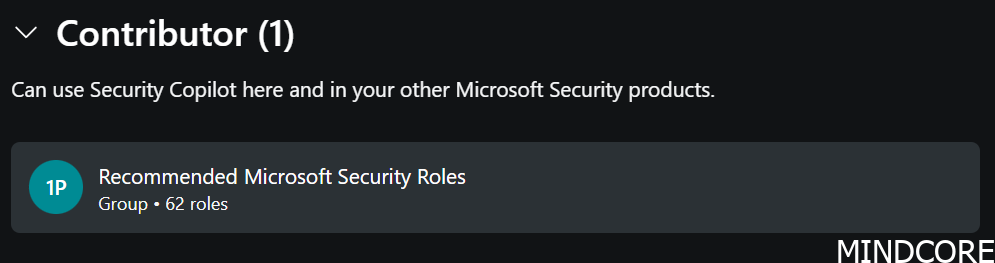
We ended up with no fewer than 62 roles assigned as Contributors. The downside to this approach is that you can’t customize or modify the recommended roles individually – it’s an all-or-nothing setup. On the positive side, assigning someone as a Contributor now requires them to have a specific role that also grants access to the relevant data source, such as Defender, Purview, or Entra. This ensures that users can only interact with Microsoft Security Copilot if they’re actually authorized to access relevant data.
To comply with the second rule we set in the beginning where custom plugin can only be configured by owners we need to find the menu and click Plugin settings
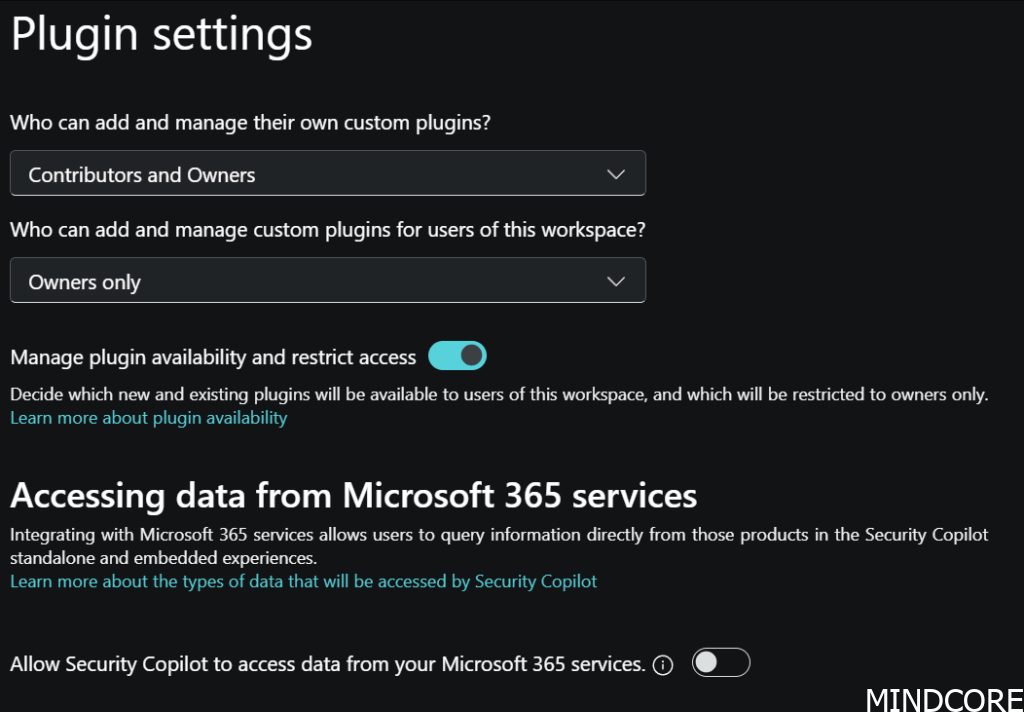
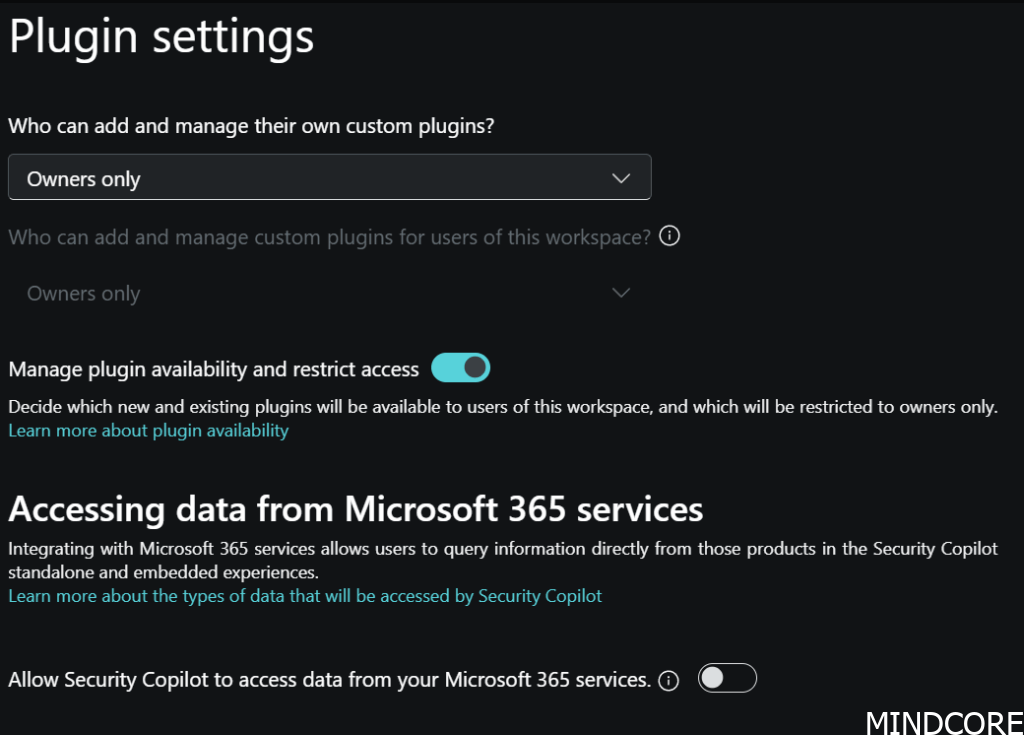
Change Who can add and manage thier own custom plugins and set it to Owners only
How it looks like after Role-Based Access Control (RBAC) has been configured
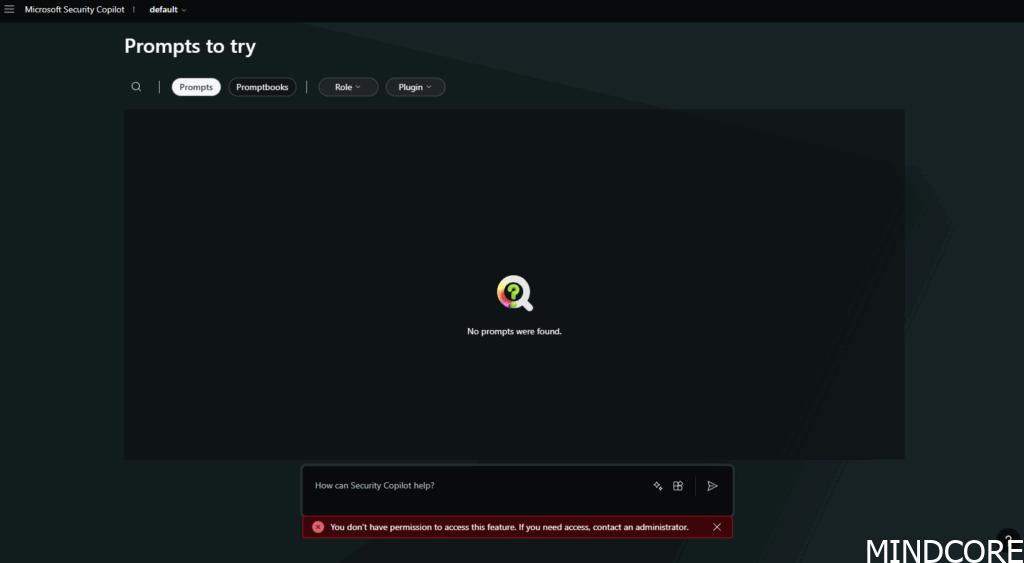
Test 1
| User Account | Demo@memtipsandtricks.tech |
| License | Microsoft 365 E5 |
| Assigned roles | None |
You’ll still be able to access the Security Copilot portal, but if you try to run a prompt, you’ll see a message saying it’s no longer possible. Prompt suggestions won’t appear, and under the “Sources” tab, no plugins will be listed. In other words, this enforces Rule #1: users without the necessary roles shouldn’t be able to use Microsoft Security Copilot in any meaningful way.
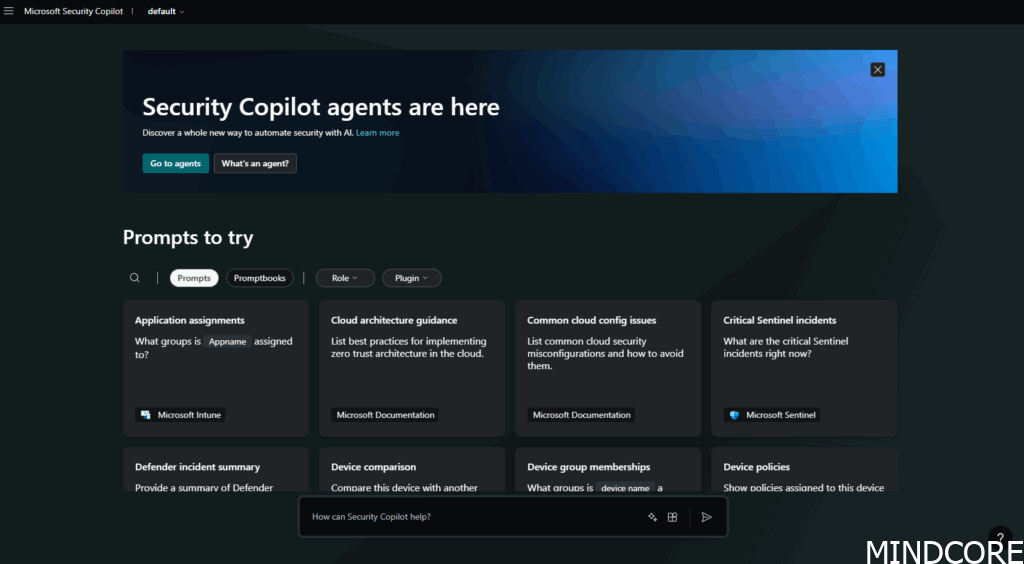
Test 2
| User Account | Demo@memtipsandtricks.tech |
| License | Microsoft 365 E5 |
| Assigned roles | Intune Administrator |
We are back in and can see what a contributor needs to be able to see. We can start prompt and this user would be able to either use this portal to get Intune related data or go directly into the embedded version.
This is the embedded version

Desired Role-Based Access Control (RBAC)
We’ve been through all the way around, how RBAC works in Microsoft Security Copilot and found out how to configure it and how/who we want to let in and start work with our data.

Summary
This blog post breaks down how to properly configure Role-Based Access Control (RBAC) in Microsoft Security Copilot to ensure secure and efficient access across tools like Defender, Intune, Entra, Sentinel, and Purview.
Why RBAC Matters
- Prevents over-permissioning
- Ensures visibility and accountability
- Aligns with compliance and governance standards
Default vs. Custom RBAC
- Out-of-the-box setup gives all users Contributor access
- Contributors can access the portal but may get no results if they lack permissions in connected services
- Custom RBAC allows tighter control over who can access what
User Experience
- Owners have full access, including plugin management
- Contributors see a similar interface but lack admin controls
- Users without roles can access the portal but cannot prompt or view plugins
RBAC Configuration Steps
- Define your scope and goals
- Remove individual owners; use Entra groups instead
- Clean up default Contributor roles
- Add Microsoft’s recommended roles (62 total)
- Restrict plugin management to Owners only
RBAC Rules Defined
- Rule 1: Users without Entra roles should not access Security Copilot
- Rule 2: Only Owners should manage custom plugins
Testing Access
- Users with no roles: Can’t prompt or view plugins
- Users with specific roles (e.g., Intune Admin): Can prompt and access relevant data
🧭 Final Thoughts
RBAC is essential for controlling access and ensuring Security Copilot is used effectively. By aligning roles with data access and limiting unnecessary permissions, you create a secure and scalable environment.