Something that flew under my radar this summer was the release of Microsoft Connected Cache for Enterprise and Education.
Originally, Configuration Manager (SCCM) had a Connected Cache functionality through its Distribution Points. This is something I’ve successfully deployed before and actually works great by caching content on-premises so clients can benefit from Delivery Optimization features and reduce loads on WAN links.
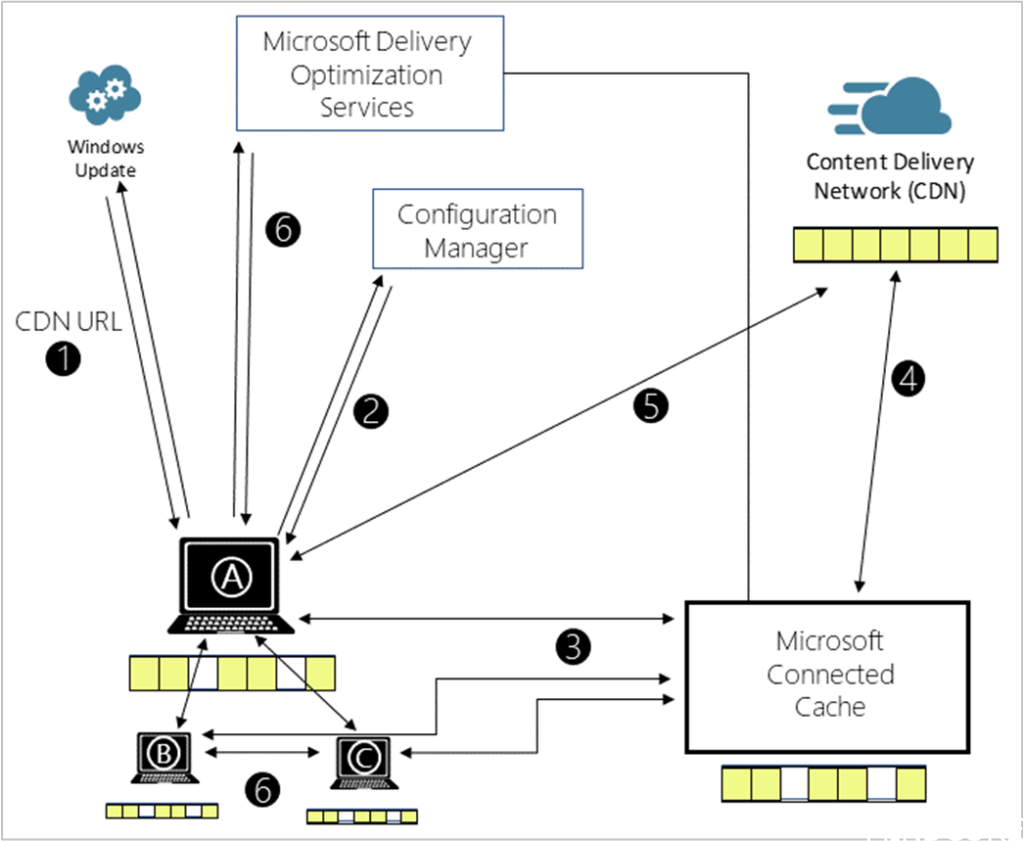
This worked fine but always felt a bit underwhelming to me when it came to actually seeing what it was doing or how much data it was actually serving to clients. There were some PowerShell commands to run in order to pull that information but nothing like a dashboard.
What’s New?
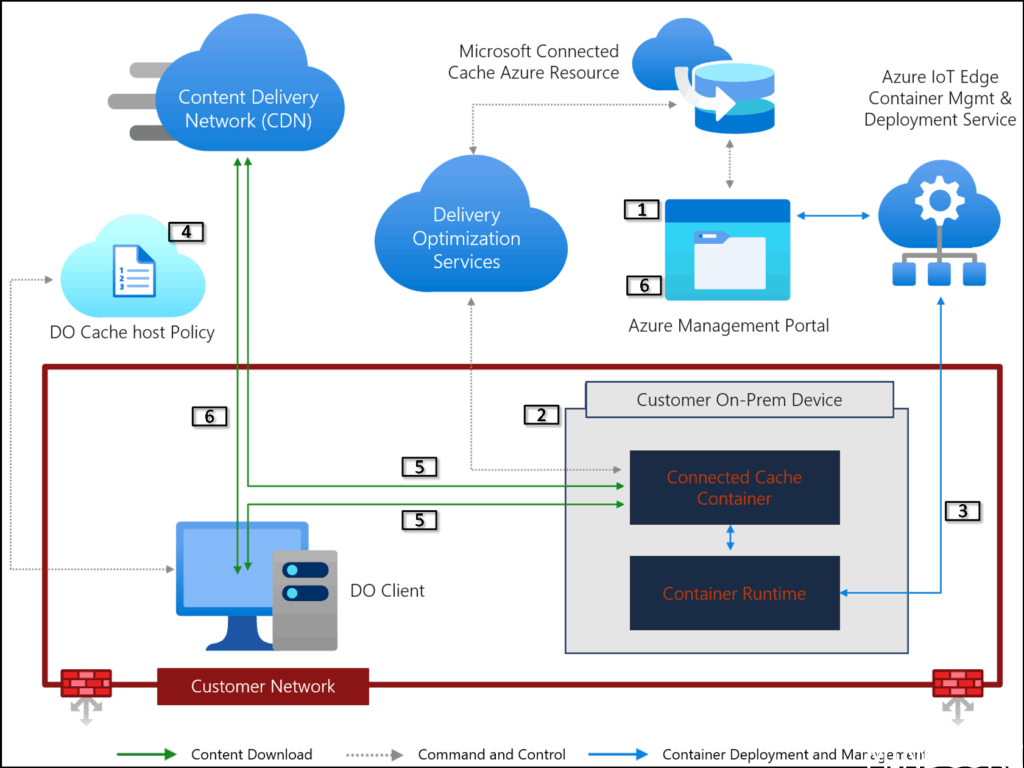
Instead of deploying this caching system through Configuration Manager, it can now be managed from the Azure portal instead. It’s designed as a standalone cache for those moving towards modern management and away from Configuration Manager distribution points.
Supported Content Types
Connected Cache can cache content from the Microsoft CDN and supports the following content types:
- Windows Updates: feature and quality
- Microsoft 365 Apps and updates (Office)
- Intune store apps and updates
- Windows Defender definition updates
Moving away from Configuration Manager never fails to peak my interests so I decided to spin it up!
Requirements
Licenses
- Valid Azure subscription – while there are no costs associated to the Azure resource for the Connected Cache, you’ll still need a valid subscription to deploy the resource to.
- E3/E5 or A3/A5 licenses – required for each device that downloads content from a Connected Cache node. There’s no limit to the number of licensed machines that can concurrently download from any given node (aside from hardware constraints).
Host machines
The caching software is now cross-platform, supporting Windows (both Server 2022+ and 11 for small branch offices) and Linux. Under the hood it appears that it’s all actually Linux based, regardless of whether it’s deployed on a Windows machine since on Windows, you’ll need to ensure nested virtualization is supported and install the Windows Subsystem for Linux (WSL).
If choosing to use Windows as the host machine, it will need a designated Connected Cache runtime account which can be one of the following options:
- Group Managed Service Account (gMSA) – Recommended option, but requires domain-join.
- Local user account – if the host machine will not be domain joined
- Domain user – not recommended
- service account – not recommended
Depending on site size, you’ll want to ensure the node has enough network capacity too, there’s some guidance on Microsoft’s website here.
There are also various network requirements to consider since any type of TLS-inspecting proxy can break the certificate chain which will fail deployment and operation. For more information, see the deployment documentation.
Setup
Depending on whether you’re deploying to a Windows or Linux machine, the deployment process will be a bit different. However, the common starting point is the Azure portal:
- Deploy a Connected Cache for Enterprise resource
- Create Cache Node(s):
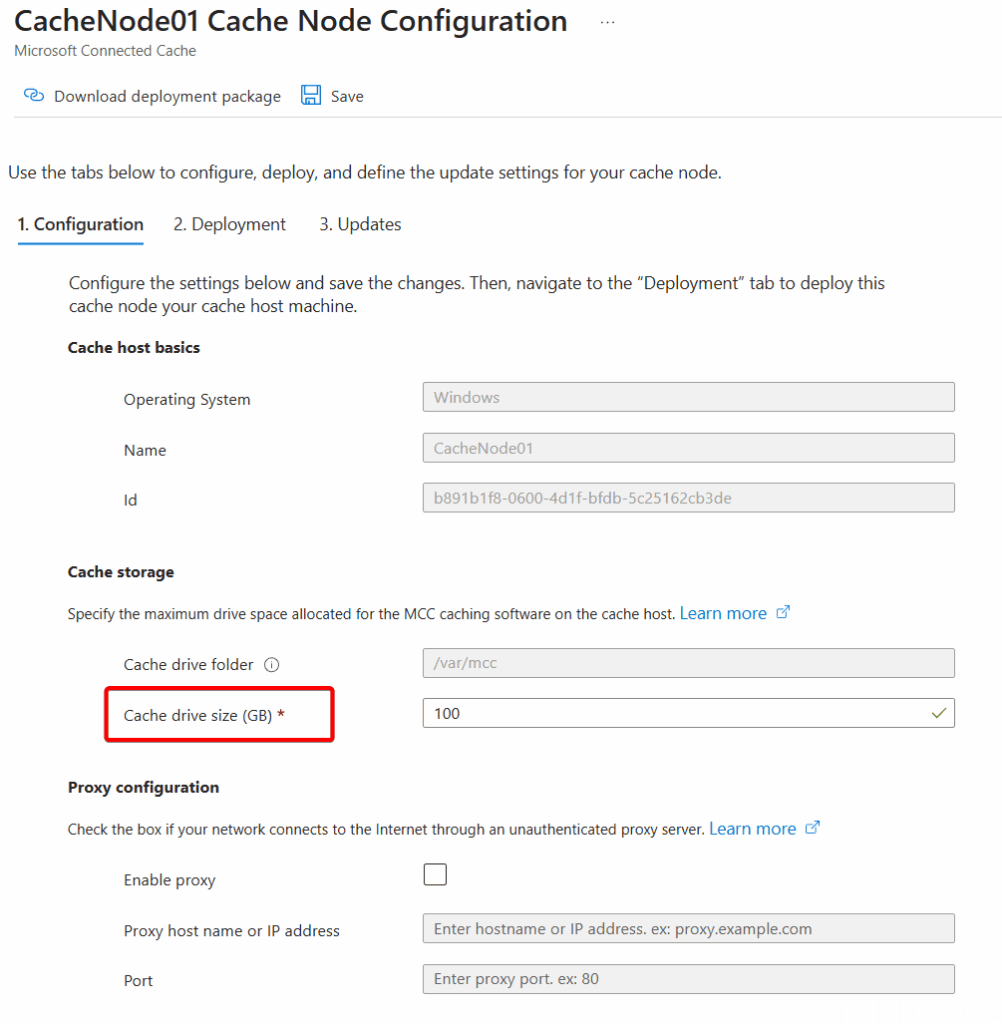
Make sure the node has enough disk space available for the cache to install. This seems to be at minimum 100GB and the installation will fail if this is not present.
Also ensure the network adapter is set to a static IP (or better yet, use DNS and have a FQDN name for the server) so the Intune policy we’ll create later doesn’t need to be updated anytime the Cache Node IP address changes.
Windows
Deploy Microsoft Connected Cache software to a Windows host machine | Microsoft Learn
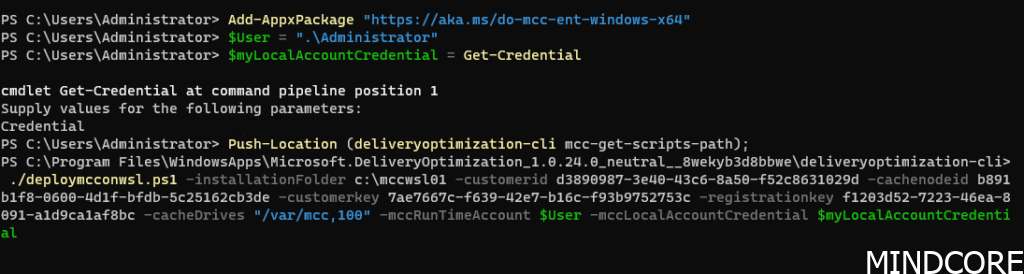
On Windows, we need to prepare the server with some prerequisites first:
Setup Connect Cache runtime account
This one is super important, since we can simply use a local administrator (for example, if the machine is not domain joined like in my demo environment). However, the administrator account used to proceed through this cache node deployment process cannot be the same as the Connected Cache runtime account.
If you do use the same account, the deployment will end up removing the WSL distro from the local admin user context and therefore deleting what it just deployed.
Install Hyper-V
(If this is a VM, be sure to enable nested virtualization)

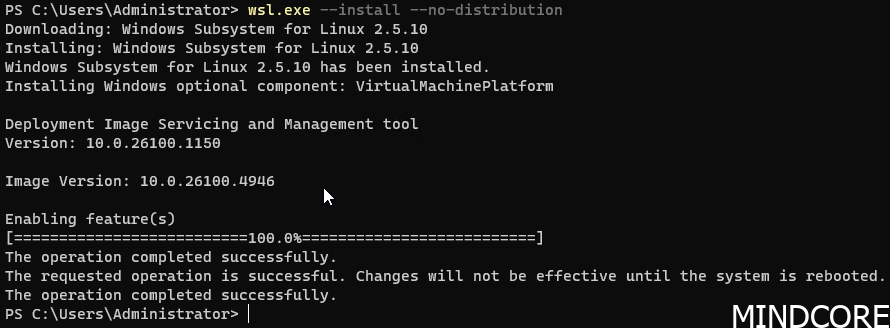
Install WSL 2
Reboot it and then we can begin following the instructions from the Azure Portal once the configuration is initialized by providing a Cache drive size.
Note that on Windows-based cache nodes, we can’t select a specific drive folder. That’s hardcoded, unlike on Linux where we can specify a specific folder (and therefore, a different drive is desired).
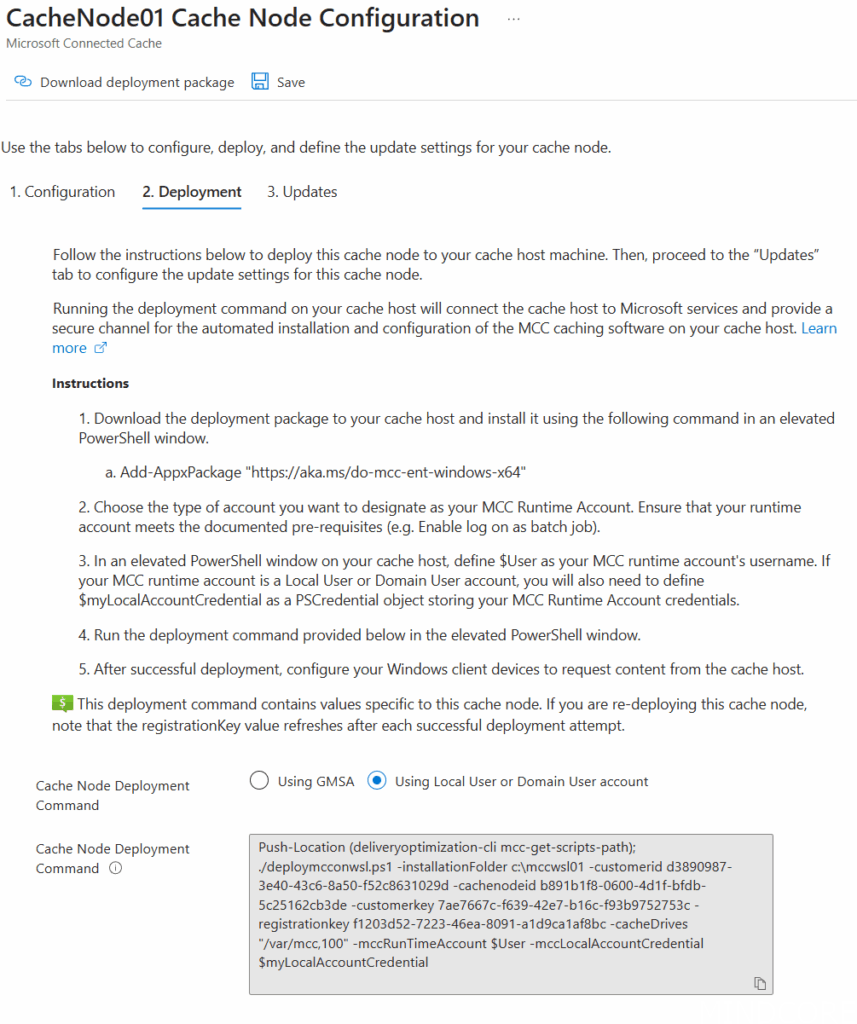
Once the configuration command has been generated we can follow the remaining deployment steps:
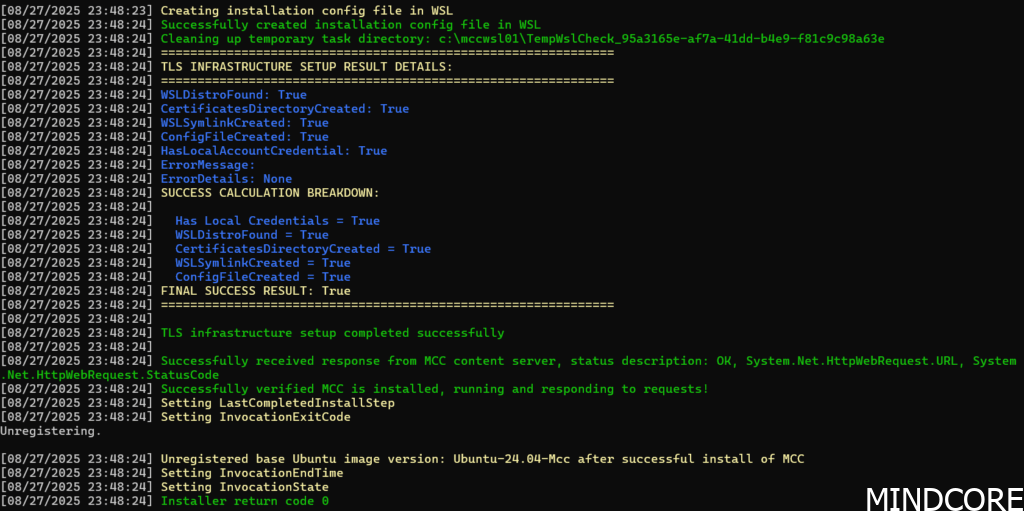
After a few minutes the process should complete:
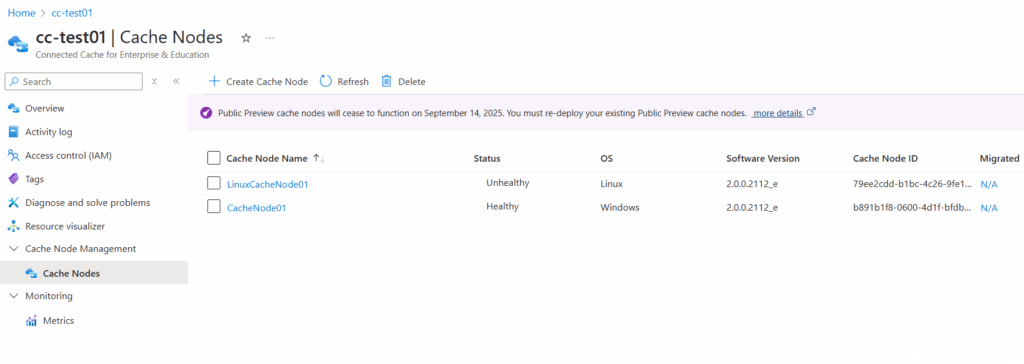
And the node should report healthy in the Azure Portal:

What’s actually been deployed is a WSL 2 Ubuntu image with the Azure IoT Edge and containers running inside it, hence the requirements for nested virtualization. Personally, I’m uncertain I would trust this level of complexity in a production environment, especially for something like a cache node where I/O performance is paramount. It will also make troubleshoot somewhat cumbersome.
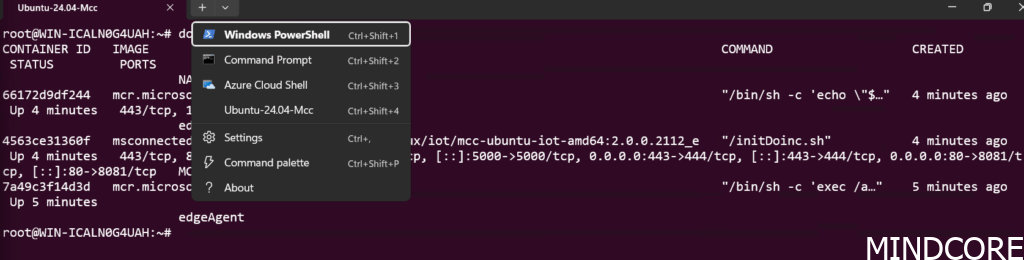
You’ll find an Ubuntu-24.04-Mcc-Converted VHD file in C:\mccswsl01 within which the WSL 2 instance is running. However, you won’t be able to access it from the deployment user. For that you’ll want to log in with the service account you’ve provided during deployment after which you’ll see the WSL instance within the terminal and you can access the docker containers:
Linux
Deploy Microsoft Connected Cache software to a Linux host machine | Microsoft Learn
Once the configuration is initialized, configure it by providing the cache storage location:
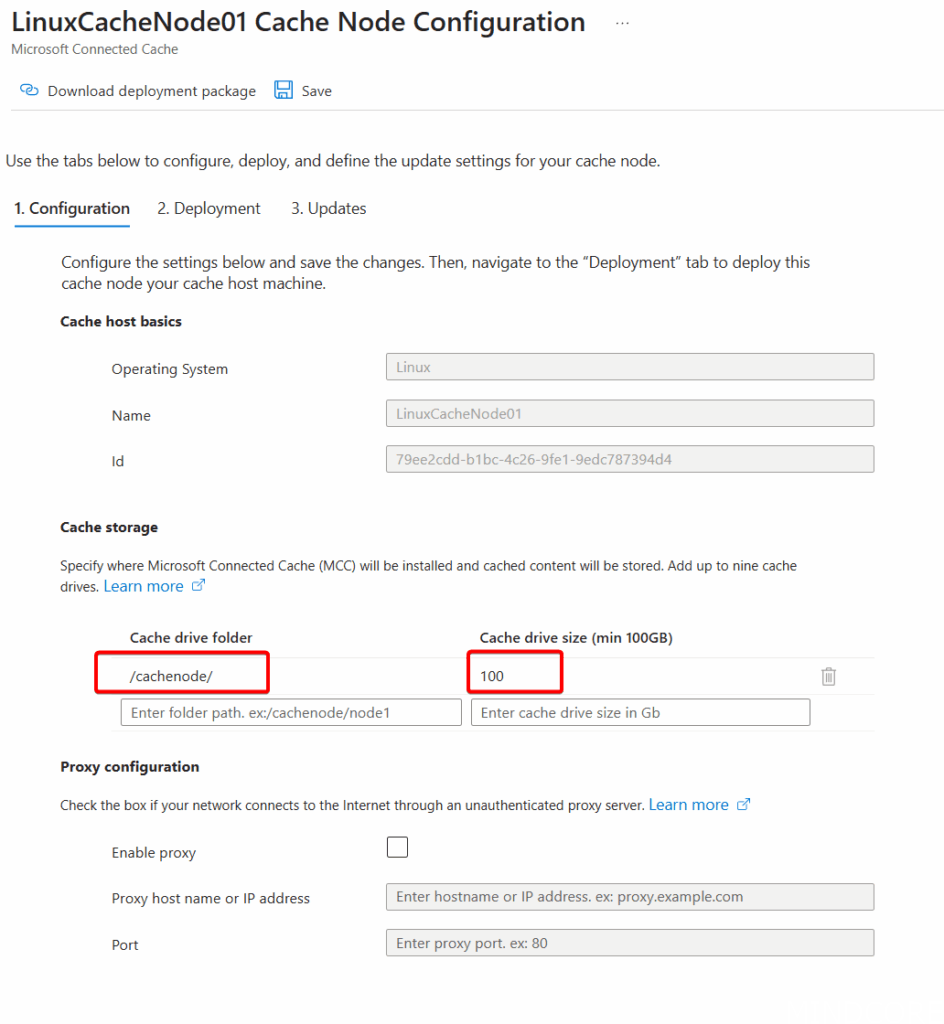
Make sure the above drive folder actually exists on the node.
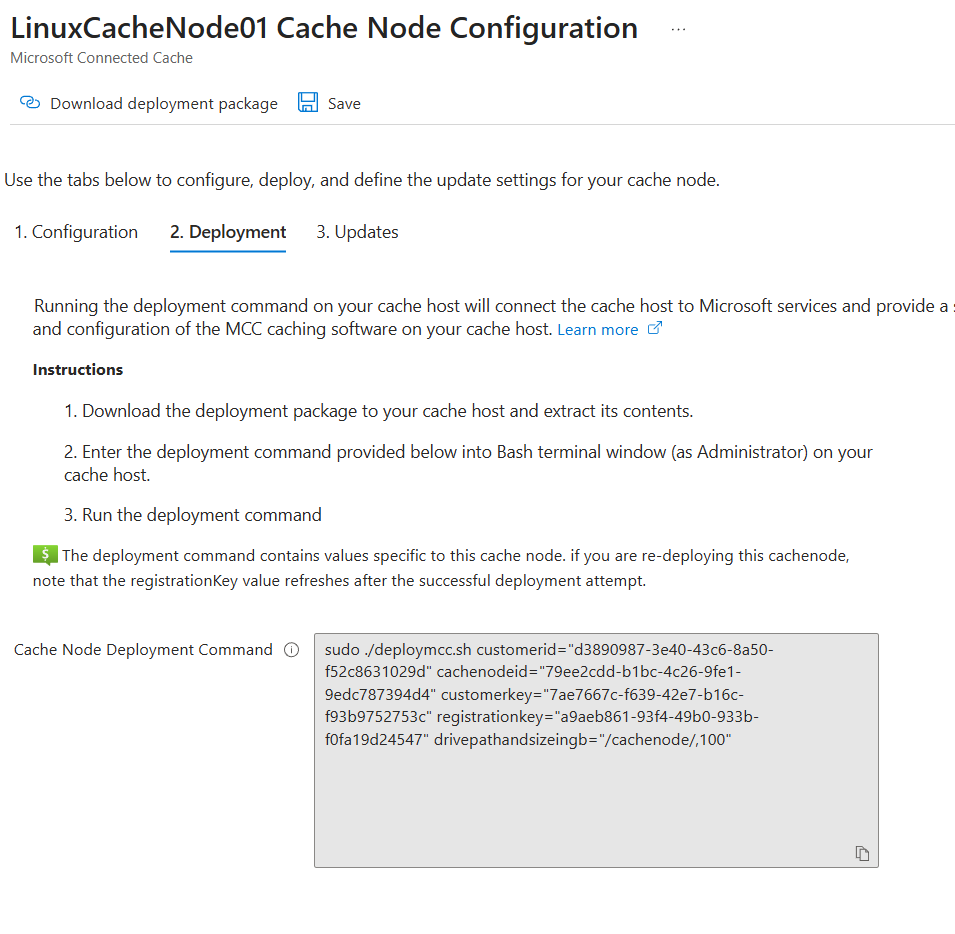
Once the deployment script has been generated, it should show up in the next tab:
Download the deployment package at the top of the page and copy it to the Linux node (I simply used SCP over HVC since this node is running as a Hyper-V VM):
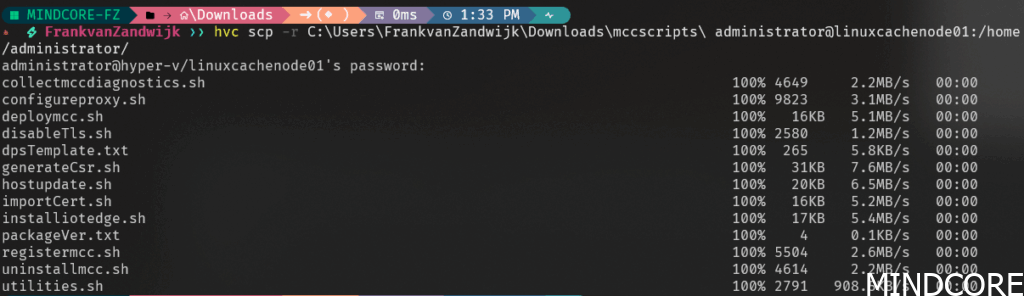
Don’t forget to make the shell scripts executable by using chmod:
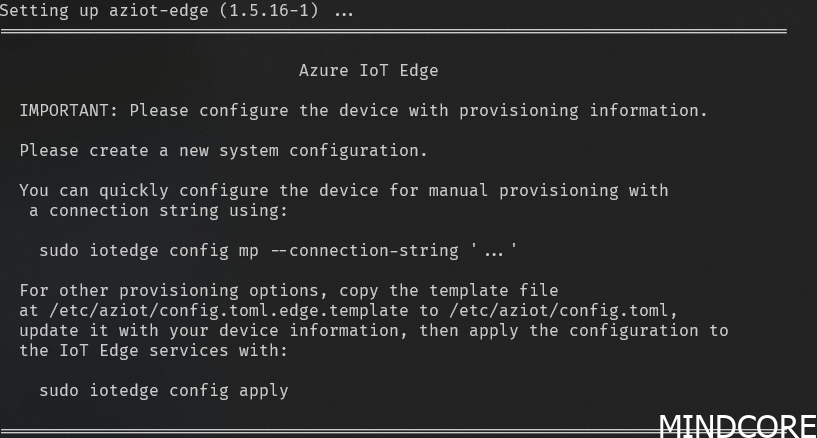
chmod u+x *.shCopy and execute the Cache Node Deployment Command on the Linux node:

Under the hood we can see that it deploys Azure IoT Edge alongside Moby to run containers:
If we list out the currently running docker containers we can see three active:

After some time, the node should show a ‘Healthy’ status in the Azure portal:

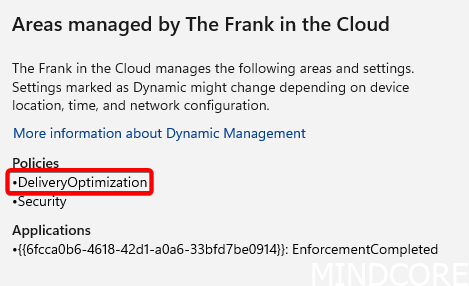
Intune Policy
In order for the cache node to be used, Windows client devices need to be told where the node is located to request content. This is done by setting Delivery Optimization options and the easiest way to do this is through Intune.
In the above policy I’ve set the configuration to directly hit the IP address of the cache node. This can also be the FQDN.
With the policy pushed to the machine:
Nothing much else will be different to the end user (apart from faster download speeds, hopefully!).
Testing
On the first client, not much will be noticed, but any consecutive machines needing the same content will start to benefit from the cached content and things will be noticeably faster.
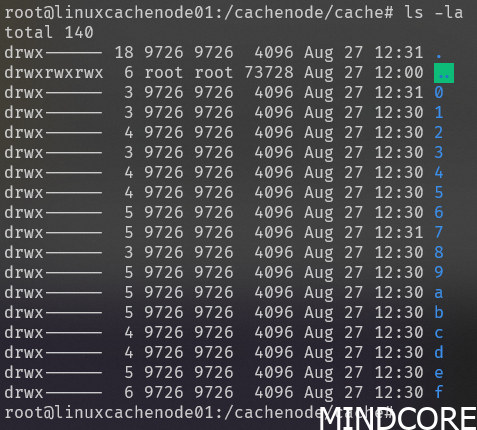
On the cache node within the folder we specified earlier in the configuration we can start seeing folders being created with binary blobs in them:
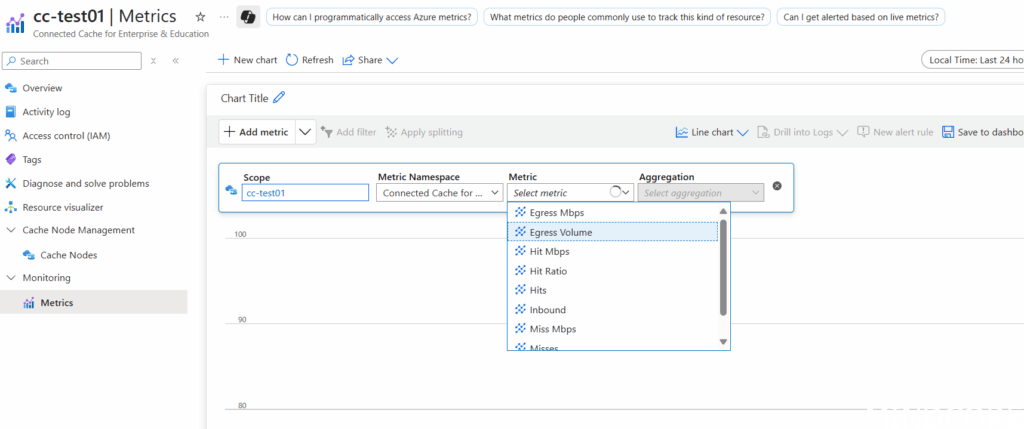
Back in the Azure portal we can now see some statistics that blows the previous PowerShell results out of the water!
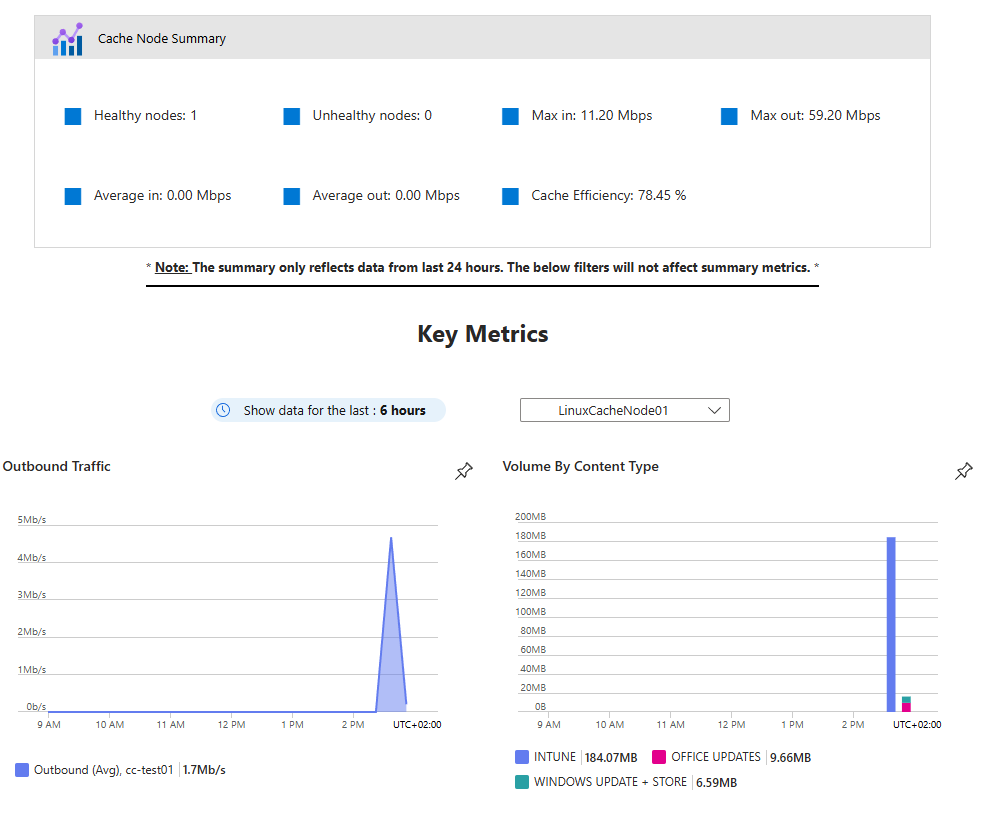
We can even dig into the Metrics in more detail ourselves!
In comparing to the original solution offered through Configuration Manager, this now also caches Intune packages, so this can greatly speed up deployments of new software.
From my testing, I believe the Linux installs will be the more popular choice to go given the additional nested virtualization requirements and complexity for the Windows hosts as well as the extra license costs that can be saved.
HTTPS support!
Another benefit of this new solution is that it optionally supports HTTPS! This enables it to support secure delivery of Intune-managed Win32 apps (although currently it doesn’t enforce the HTTPS-only requirement yet) and even Microsoft Teams content. This does require either a public or enterprise Certificate Authority to sign a CSR so this might be a blogpost on its own in the future.
HTTPS isn’t supported using the Configuration Manager backed solution so if security is a concern and Intune/Teams content caching is of interest, definitely consider generating a certificate and enabling it!
Troubleshooting
While the Linux deployment went through without a problem on the first try, the Windows deployment was riddled with problems.
Initially, the deployment was failing when attempting to reach a Microsoft service to download the required Linux packages. I retried it the following day and it worked fine but if you see the following message in the log file (located in C:\mccwsl01\InstallLogs\):
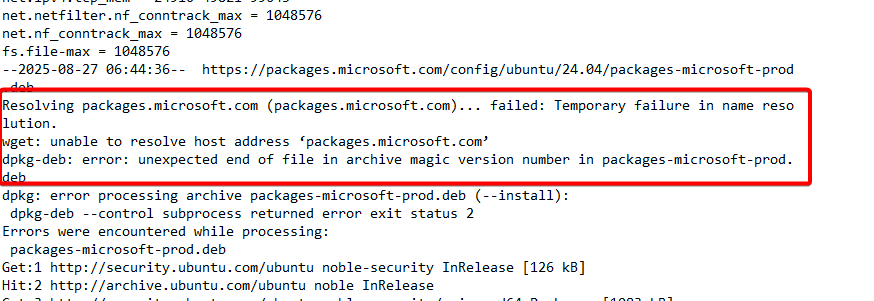
Rebooting seemed to fix this consistently but it seemed to come back if something else in the deployment failed and it needed to be restarted. Seems like some weird caching issue to me.
If you see the below error message that a VHDX file couldn’t be found:

Simply restarting the deployment seemed to work. If you then receive an error that the registration key has timed out, return to the Azure portal, click ‘Save’ to regenerate a new key (wait a few minutes), refresh the page and copy/paste the new deployment command.
Conclusion
This is a rare ‘freebie’ from Microsoft that’s a win-win for everyone involved. Microsoft will have less clients hitting their CDN, and in turn, we get to have speedier updates and deployments.
If you’re looking to retire some Distribution Points but are relying on Connected Cache, have a look at this new solution. Even if you’re not retiring Configuration Manager anytime soon, it’s good to get ahead and this is a simple deployment that will provide just a little bit more modern cloud management. An added bonus is that you get a nice little dashboard to verify things are actually working as expected!
Even if you’re not using Configuration Manager, it’s still worthwhile to deploy this since it doesn’t take much to get it going and the benefits can be substantial depending on the WAN link quality of your office(s).
I’d also highly recommend Arc-onboarding the cache nodes for easier management from the cloud. Have a look at my other blogposts for more information.