From my last blogpost, I showcased how to setup Microsoft Connected Cache (MCC) for Enterprise on both Windows and Linux. There I suggested folks go with the Linux solution and that’s the assumption I’ve made for this blogpost.
So why bother with the complexity of configuring HTTPS? There’re three strong arguments:
- HTTPS is safer and should be the default in the year 2025.
- Access to Microsoft Teams content – Microsoft Teams content is only available over HTTPS. Without HTTPS support, Connected Cache can’t cache or deliver this content.
- Continued delivery of Intune-managed Win32 apps: Microsoft Intune will soon enforce HTTPS-only delivery for all managed Win32 applications. Cache nodes without HTTPS support will be bypassed, and clients will fall back to CDN delivery. The enforcement date is TBD.
It’s also a new feature that wasn’t supported on the old, ConfigMgr (SCCM) version, so that’s likely why Teams and soon Intune apps won’t be supported for much longer on that.
So, let’s get ahead of Microsoft, and get some certificates installed on a cache node.
Generating a Certificate
Microsoft leaves the generation of a valid certificate an exercise to the readers. Either an internal Enterprise PKI or public CA’s can be used. The only real requirement being that the certificate is valid and trusted by the endpoint devices.
Instead of building an entire PKI in my lab environment, I decided to instead leverage the wonderful (and free) LetsEncrypt public CA. As long as you own a domain name, you can use it to generate valid certificates.
On top of that, I wanted to ensure the certificate could be centrally managed and that it could be stored in an Azure Key Vault. This way, the solution becomes scalable across many cache nodes if required. For this, Key Vault Acmebot is the perfect solution to automate certificate issuance for Azure Key Vault.
These certificates can then also be used for other Azure products such as App Service, Container Apps, App Gateway, Front Door, etc. or for multiple cache nodes.
I won’t cover the setup since that is a blogpost on its own, but usage is nice and simple since it has a web interface:
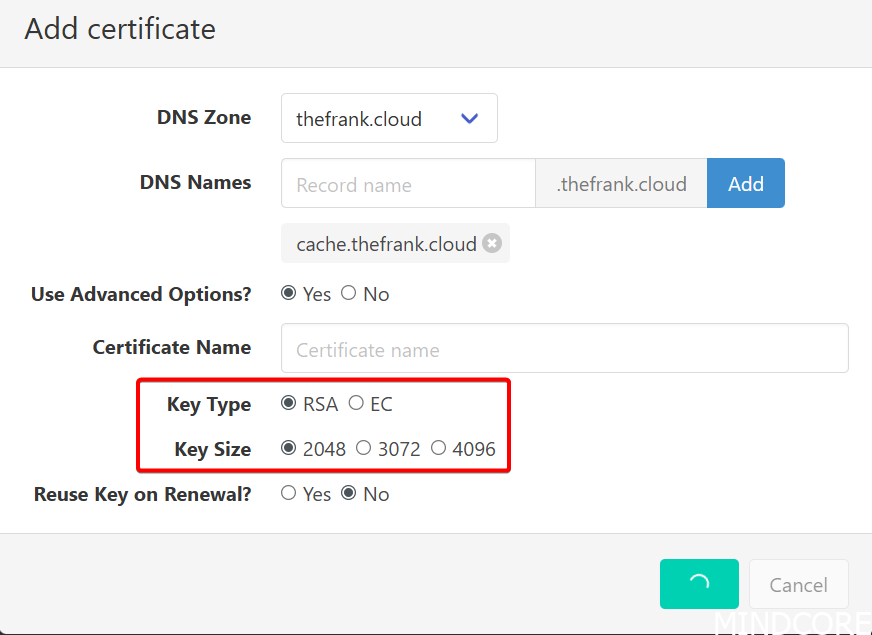
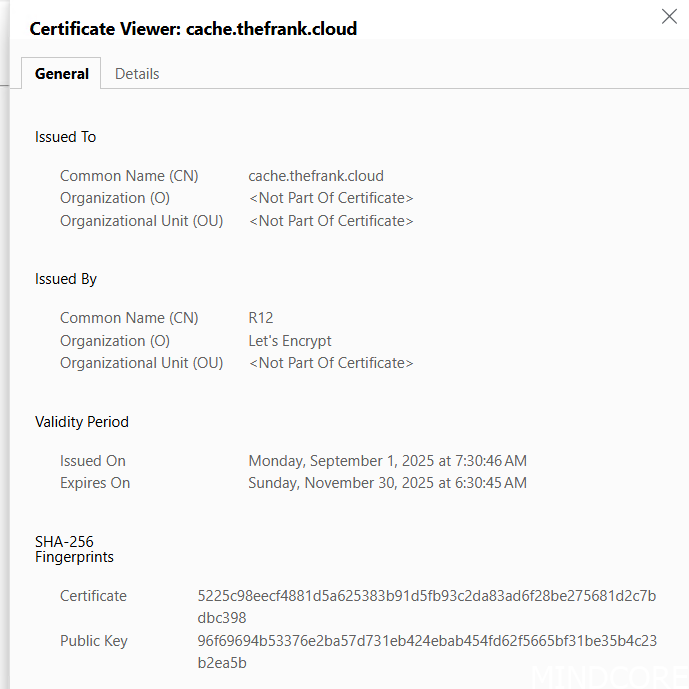
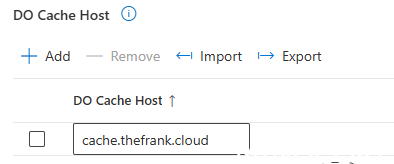
I simply define the public DNS Zone I own, give it a DNS name (in this case, it will be cache.thefrank.cloud) and leave everything else default. The most important thing here is to note the Key Type and Size (RSA 2048 by default) since we’ll need that later.
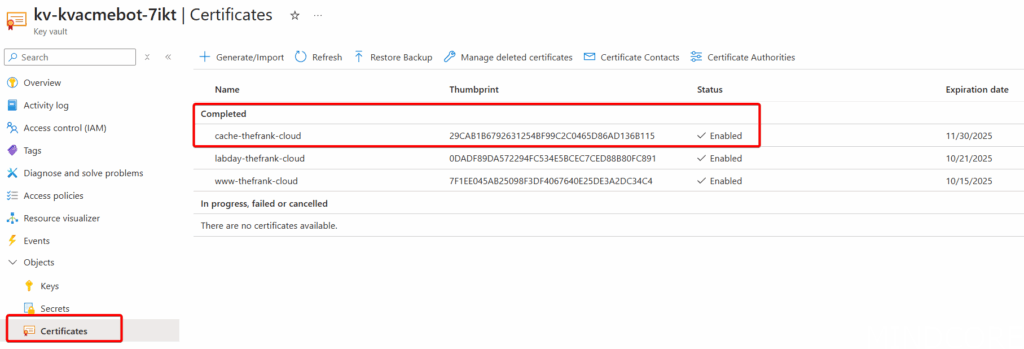
Once the certificate is created, it can be found in the Key Vault:
Preparing the components
If you’re attempting to follow the steps provided by Microsoft, they’re showcasing the Certificate Signing Request (CSR) method in order to obtain a valid, signed certificate. However, if you’ve generated a certificate using the Key Vault Acmebot as outlined above, you’ll have skipped this part of the process, and we’ll need to forge our own path a little bit.
On the Linux machine there are various scripts already installed for us when MCC was deployed:

Of particular interest today are the generateCsr.sh and importCert.sh scripts.
When following Microsoft documentation, it will tell you to start with generating a CSR first. While we already have a CSR, I still recommend to run the script since it also scaffolds the required folder structure we need. We’ll just end up replacing the generated CSR with the valid one from the key vault later.
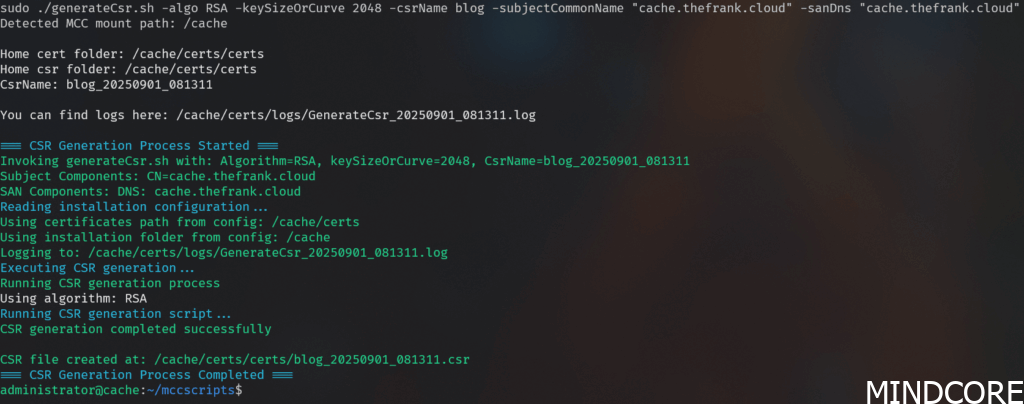
Take note of the path to the CSR file that was created as we’ll need it later.
Parsing the certificate
When running the script to install the certificate, the node will check for the following three things that should be in place:
- The CSR file is present and matches the certificate
- The certificate is valid, in Base64 encoded format and matches the CSR
- The Private Key is valid and matches the certificate
As long as everything is in the correct places and matches, it will go ahead and install it and reconfigure the cache to use HTTPS instead.
To obtain the required three required files from the signed certificate in the Azure Key Vault we’ll need to do a bit of parsing.
CSR
The CSR is easy at least, head over the certificate in the Key Vault and open the Certificate Operation panel and download the CSR:

Now, rename it to the generated CSR from the script output above

Certificate
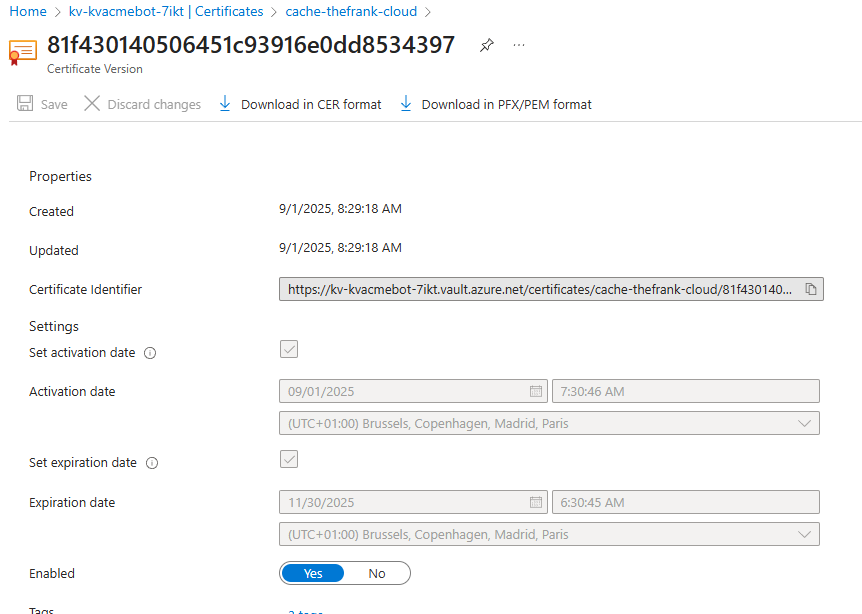
The public certificate is a little more tricky, since when its downloaded from the key vault, it comes DER encoded. Unfortunately, MCC requires it to be Base64 encoded so we need to a conversion. Open the current certificate version and download it in PFX/PEM format: (we’ll need to do this for the private key anyways)
Install OpenSSL from here or through Winget (winget install FireDaemon.OpenSSL) and run the following command:
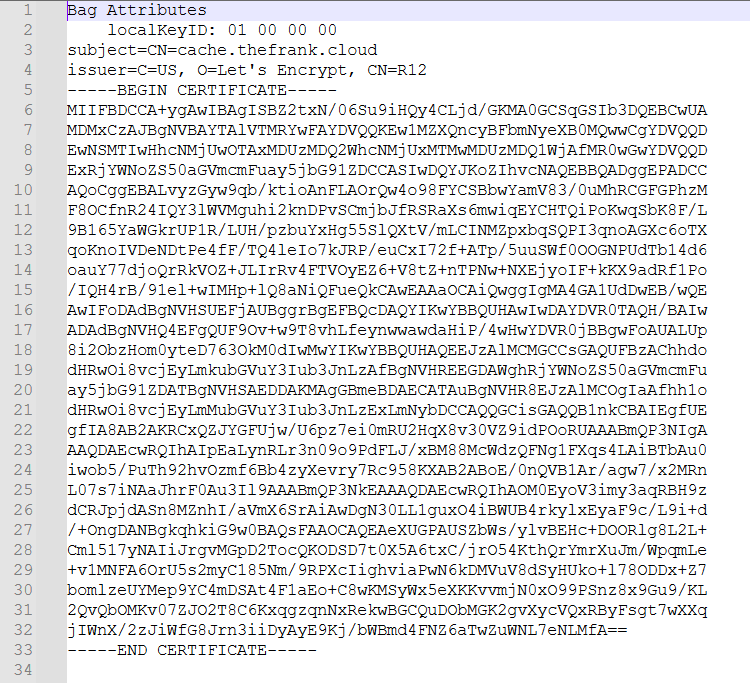
openssl pkcs12 -in "mypfxfile.pfx" -clcerts -nokeys -out "mycert.crt"If you open the generated .crt file with Notepad and see something similar to this, it’s good to go:
Private Key
Since OpenSSL is already installed and the PFX file is handy, we can simply extract the private key (without a passphrase and in plaintext) like so:
openssl pkcs12 -in "mypfxfile.pfx" -nocerts -out "mycert.key" -nodes -passout pass:You can now delete the .pfx file and copy the three parsed certificate files (key, crt, and csr) to the Linux cache node (SCP makes this easy). Alternatively, this could probably be automated with a little bit of scripting and could be done directly on the Linux node itself (if it’s Arc-onboarded it can use its managed identity to authenticate to the key vault), so the private key isn’t exposed. This would also help in renewing the certificate.
Installing the certificate
With the three required components copied to the Linux node, all that’s left is placing them in the required locations.
CSR
Recall the path of the generated CSR file and replace the existing one that’s present with the one downloaded from the Azure Key Vault:

But we’re not done yet! This isn’t actually the original CSR, and it won’t be used (it just needs to be present as a ‘check’ for the installation script). The original CSR (and associated Private Key, see next section) are actually located within the MCC container that is running on the Linux node:

To gain access to it run the following:
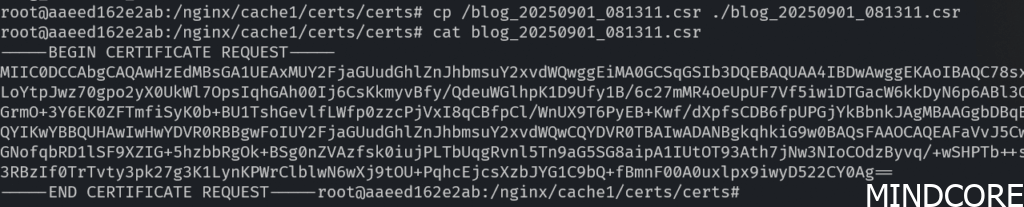
sudo docker exec -u root -it MCC bashYou’ll be dropped into a root shell where you can head to /nginx/cache1/certs/certs and find the originally generated CSR:

Back on the Linux host, copy the CSR from Azure Key Vault into the container using this command:
sudo docker cp blog.csr [containerID]:/blog.csr
Hop back into the container and overwrite the original CSR in /nginx/cache1/certs/certs using the CP command.
Private Key
The private key is also located within the container so rinse and repeat the same steps as above except for the different location path /nginx/cache1/keys/

This concludes the most complicated part of this journey. As mentioned before, this should be fairly simple to automate (Azure Arc and Ansible comes to mind).
Importing the Certificate
The final step is to import the public certificate and activate HTTPS which is what the importCert.sh script will do for us.
Back on the Linux Node, copy the public certificate (in Base64 encoding) to the same folder the CSR file is located in:

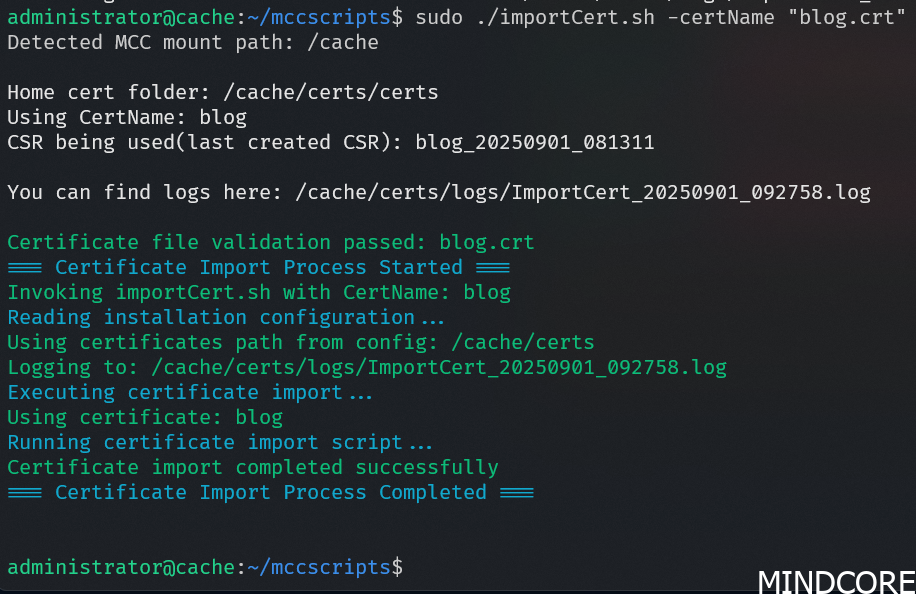
Head back to the mccscripts and find importCert.sh. Execute it by providing the certificate name.
Testing
Now it’s time to hop onto a client machine that has network access to the cache node. The first thing to test is DNS resolution since this will need to match the certificate. In my demo environment, I’ve just quickly edited the hosts file, but in production, use real DNS servers.
Using PowerShell we can also pull a file through the cache with curl and verify full HTTPS connectivity is working:
curl "https://cache.thefrank.cloud/ee344de8-d177-4720-86c1-a076581766f9/070a8fd4-79a7-42c8-b7c8-9883253bb01a/c7b1b825-88b2-4e66-9b15-ff5fe0374bc6.appxbundle.bin" --include -H "host:swda01-mscdn.manage.microsoft.com" --output ./file.bin
Now be sure to update the Intune policy to point to the new URL:
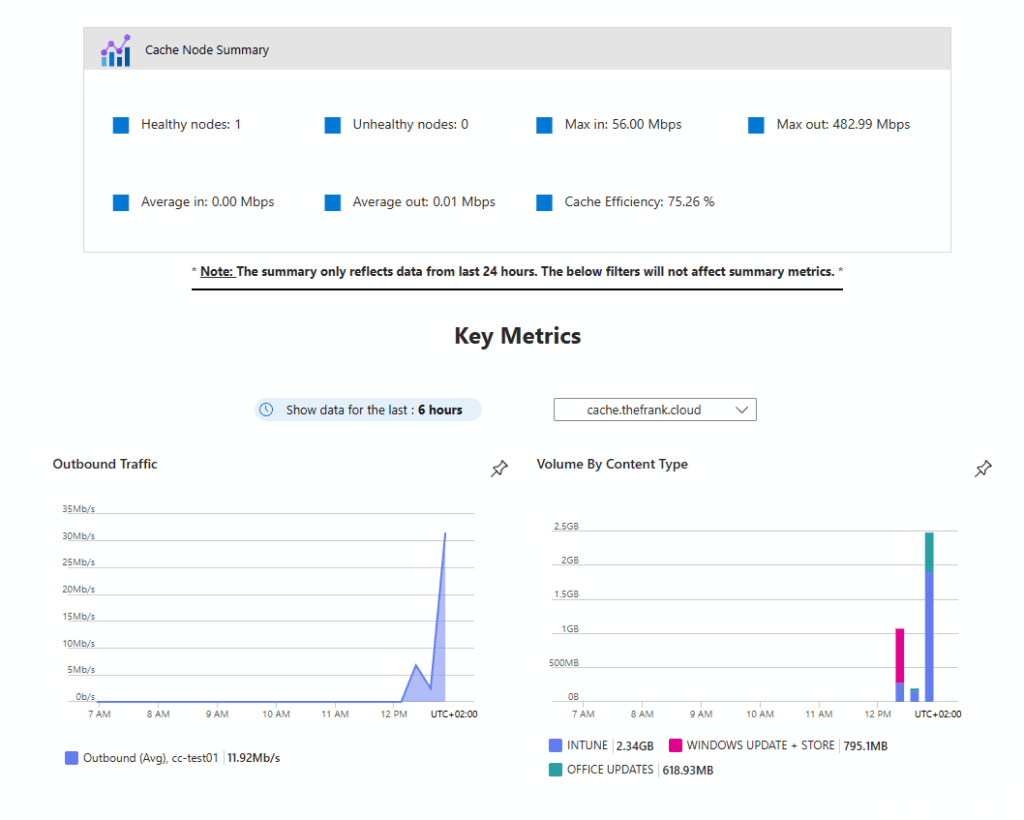
If everything is working correctly, you’ll see devices pulling data from the cache node:

Troubleshooting
If the import script fails, it should generate some logs to check out. However, sometimes it doesn’t appear to pull the logs from inside the container properly. If that happens, gain access to the container (shown above) and head to /nginx/cache1/certs/logs and have a look at ImportCert.log. For example, the below shows that the private key does not match with the certificate and therefore it failed:

Conclusion
This now ensures your cache nodes are ready for when Microsoft decides to enforce Intune apps over HTTPS as well as the new functionality of caching Teams content leading to even more savings!
While the setup isn’t the simplest, it can definitely be done. While this has shown manual steps, this is absolutely a perfect candidate for some automation magic, especially once you consider renewals of the certificates and multiple cache nodes.
I’m disappointed that Microsoft chose not to make this simpler by providing a method for easier automatic certificate management. For example, including Certbot would have been an easy integration and one that I’ve seen in other solutions and products (even wrapped up with a nice UI). If third-party vendors can do it, I’m sure Microsoft (currently the 2nd most valuable company by market cap in the world) can too.
I briefly investigated whether or not Microsoft’s own offering in Cloud PKI could be used as the CA for the certificate signing however, it appears to be strongly tied to Intune managed devices. We can’t issue certificates to any other services or devices (such as the MCC server).
Again, I feel like most of the puzzle pieces are here, but they’re scattered and incompatible. Obviously, Microsoft is able to provide a CA to each tenant in the form of Cloud PKI, but they then arbitrarily lock it behind Intune devices, failing to give customers the control they need to properly shift infrastructure to the cloud.
If you’re interested in an automated solution using Azure Arc, reach out!